Argonaut RM3
By Richard Crowley- — a dream bike
- — wheels, tires, and rotors
- — crankset, chainrings, and bottom bracket
- — frameset
- — stem
- — brake hoses
- — derailleurs, saddle
- — off to the races
As eccentric IPO purchases go, a dream bike is a pretty responsible one (he justifies, mostly to himself). I found myself in just that fortunate position making just that eccentric purchase in the summer of 2019. This is how it went.
The frame came first because on this bike it’s allowed to dictate whatever decisions it wants. I thought I knew what I wanted. Before I put down the deposit, though, I needed to know the extent of my options to convince myself my dream was worthy of turning into reality. So I asked the encyclopedic hive mind of the San Francisco Cycling Club.

They dutifully expanded my horizons but nothing sparked joy. This seems obvious in hindsight: It can’t be a dream bike if you haven’t known it exists long enough to dream about it. Argonaut remained my choice. Just to be sure, though, I made one final attempt to goad someone into selling me on an alternative.

But they’re enablers, to a person. And who doesn’t want an Argonaut?

OK, so we’re doing this. I made a detour to 3D Bike Fit to get dialed and get told to stretch, then I contacted Argonaut.
On the phone, Ben Farver offered me two paths. I could have the Argonaut road bike on the website or I could wait until April and be one of the first people riding their new model. It was October 3, 2019. He went on at some length about new carbon fiber fabrication techniques, internal brake hose routing starting at the stem, clearance for 35mm tires, and custom tooling that obviated the need for their clever and functional but eyebrow-raising rivet. He was excited. I became excited. It would be a fun April.
I wasted no time starting a spreadsheet, as one does. In the past, making these spreadsheets has been easy; the stakes have been lower. But this was a dream bike. Research was in order. It had to be right.
I paced my research with an eye towards purchasing all the parts in March and April. Then the novel coronavirus or covid or covid-19 or COVID-19 struck and before we even decided what to call it the supply chain for small manufacturers was laid to waste. Argonaut were the first to acknowledge the problem, with some of their Italian-made testing gear in limbo, but they were far from the only folks impacted. Anyone without warehoused inventory took a six-week hiatus. Europeans stopped even answering their email for a time. Eventually, though, everything arrived.
Argonaut got their testing gear, kept testing, kept tweaking, and kept delaying until they got it right. April became May became ??? became December. Those six-week delays sourcing some parts were distant memories. At times, I must admit, I completely forgot I had a build on the horizon. Then I remembered and excitement bubbled over. I love building bicycles from boxes of parts almost as much as I love riding them.
Today is December 4, 2020. My frame’s expected to ship in a week. I’m the dog who’s about to catch the car. And because I enjoyed reading Jess’s Indy Fab, Jim’s chronicle of building his wife’s Crown Jewel, I’m going to document my Argonaut RM3 build here as I assemble it. Read, ride, refresh.
— My frameset hasn’t shipped yet but I still want to wrench. Today’s topic: Wheels and the bits attached to them. Wheels were the single toughest choice. Limited by my inability to build my own wheels, certain hub and rim combinations were out of reach. I wanted a very wide rim to mate nicely with the wide tires the frame can clear and this felt like the right time to expand my tubeless repertoire into tires less than two inches wide. Unfortunately, a great many such rims are hookless and that, to use the technical term, freaks me the fuck out. Concerning hubs: I like ratchet designs for completely emotional and irrelevant reasons.
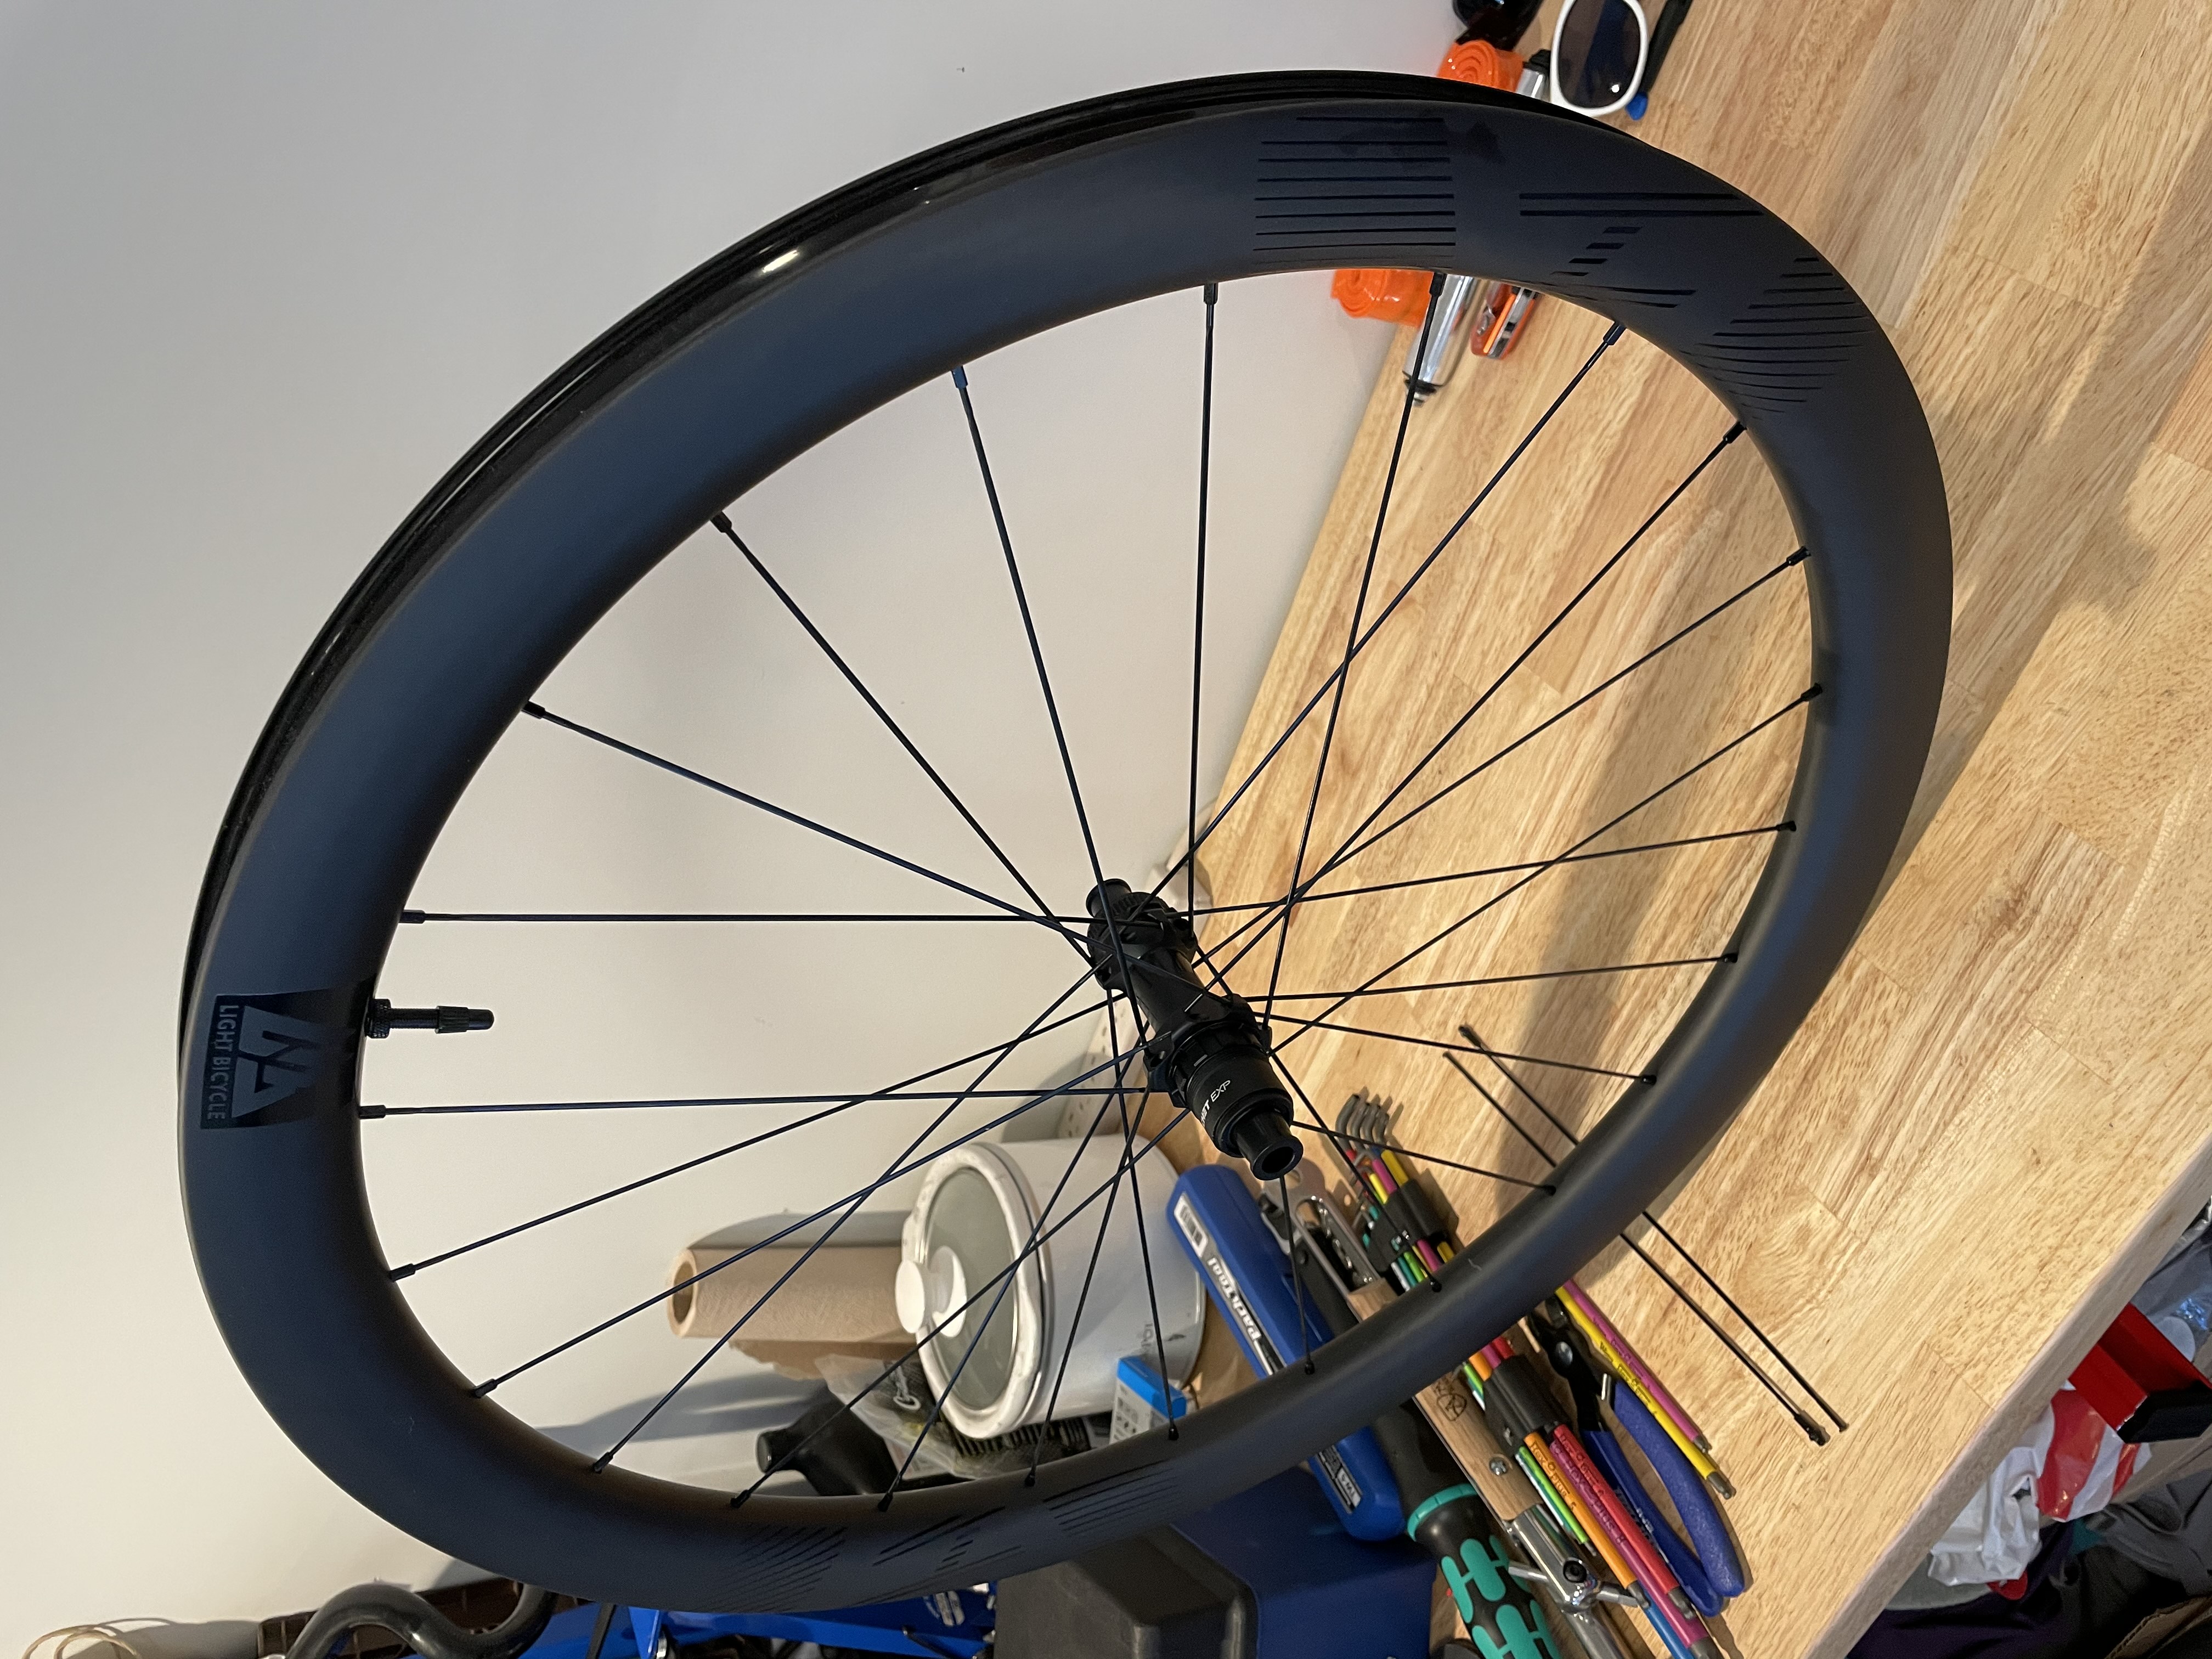
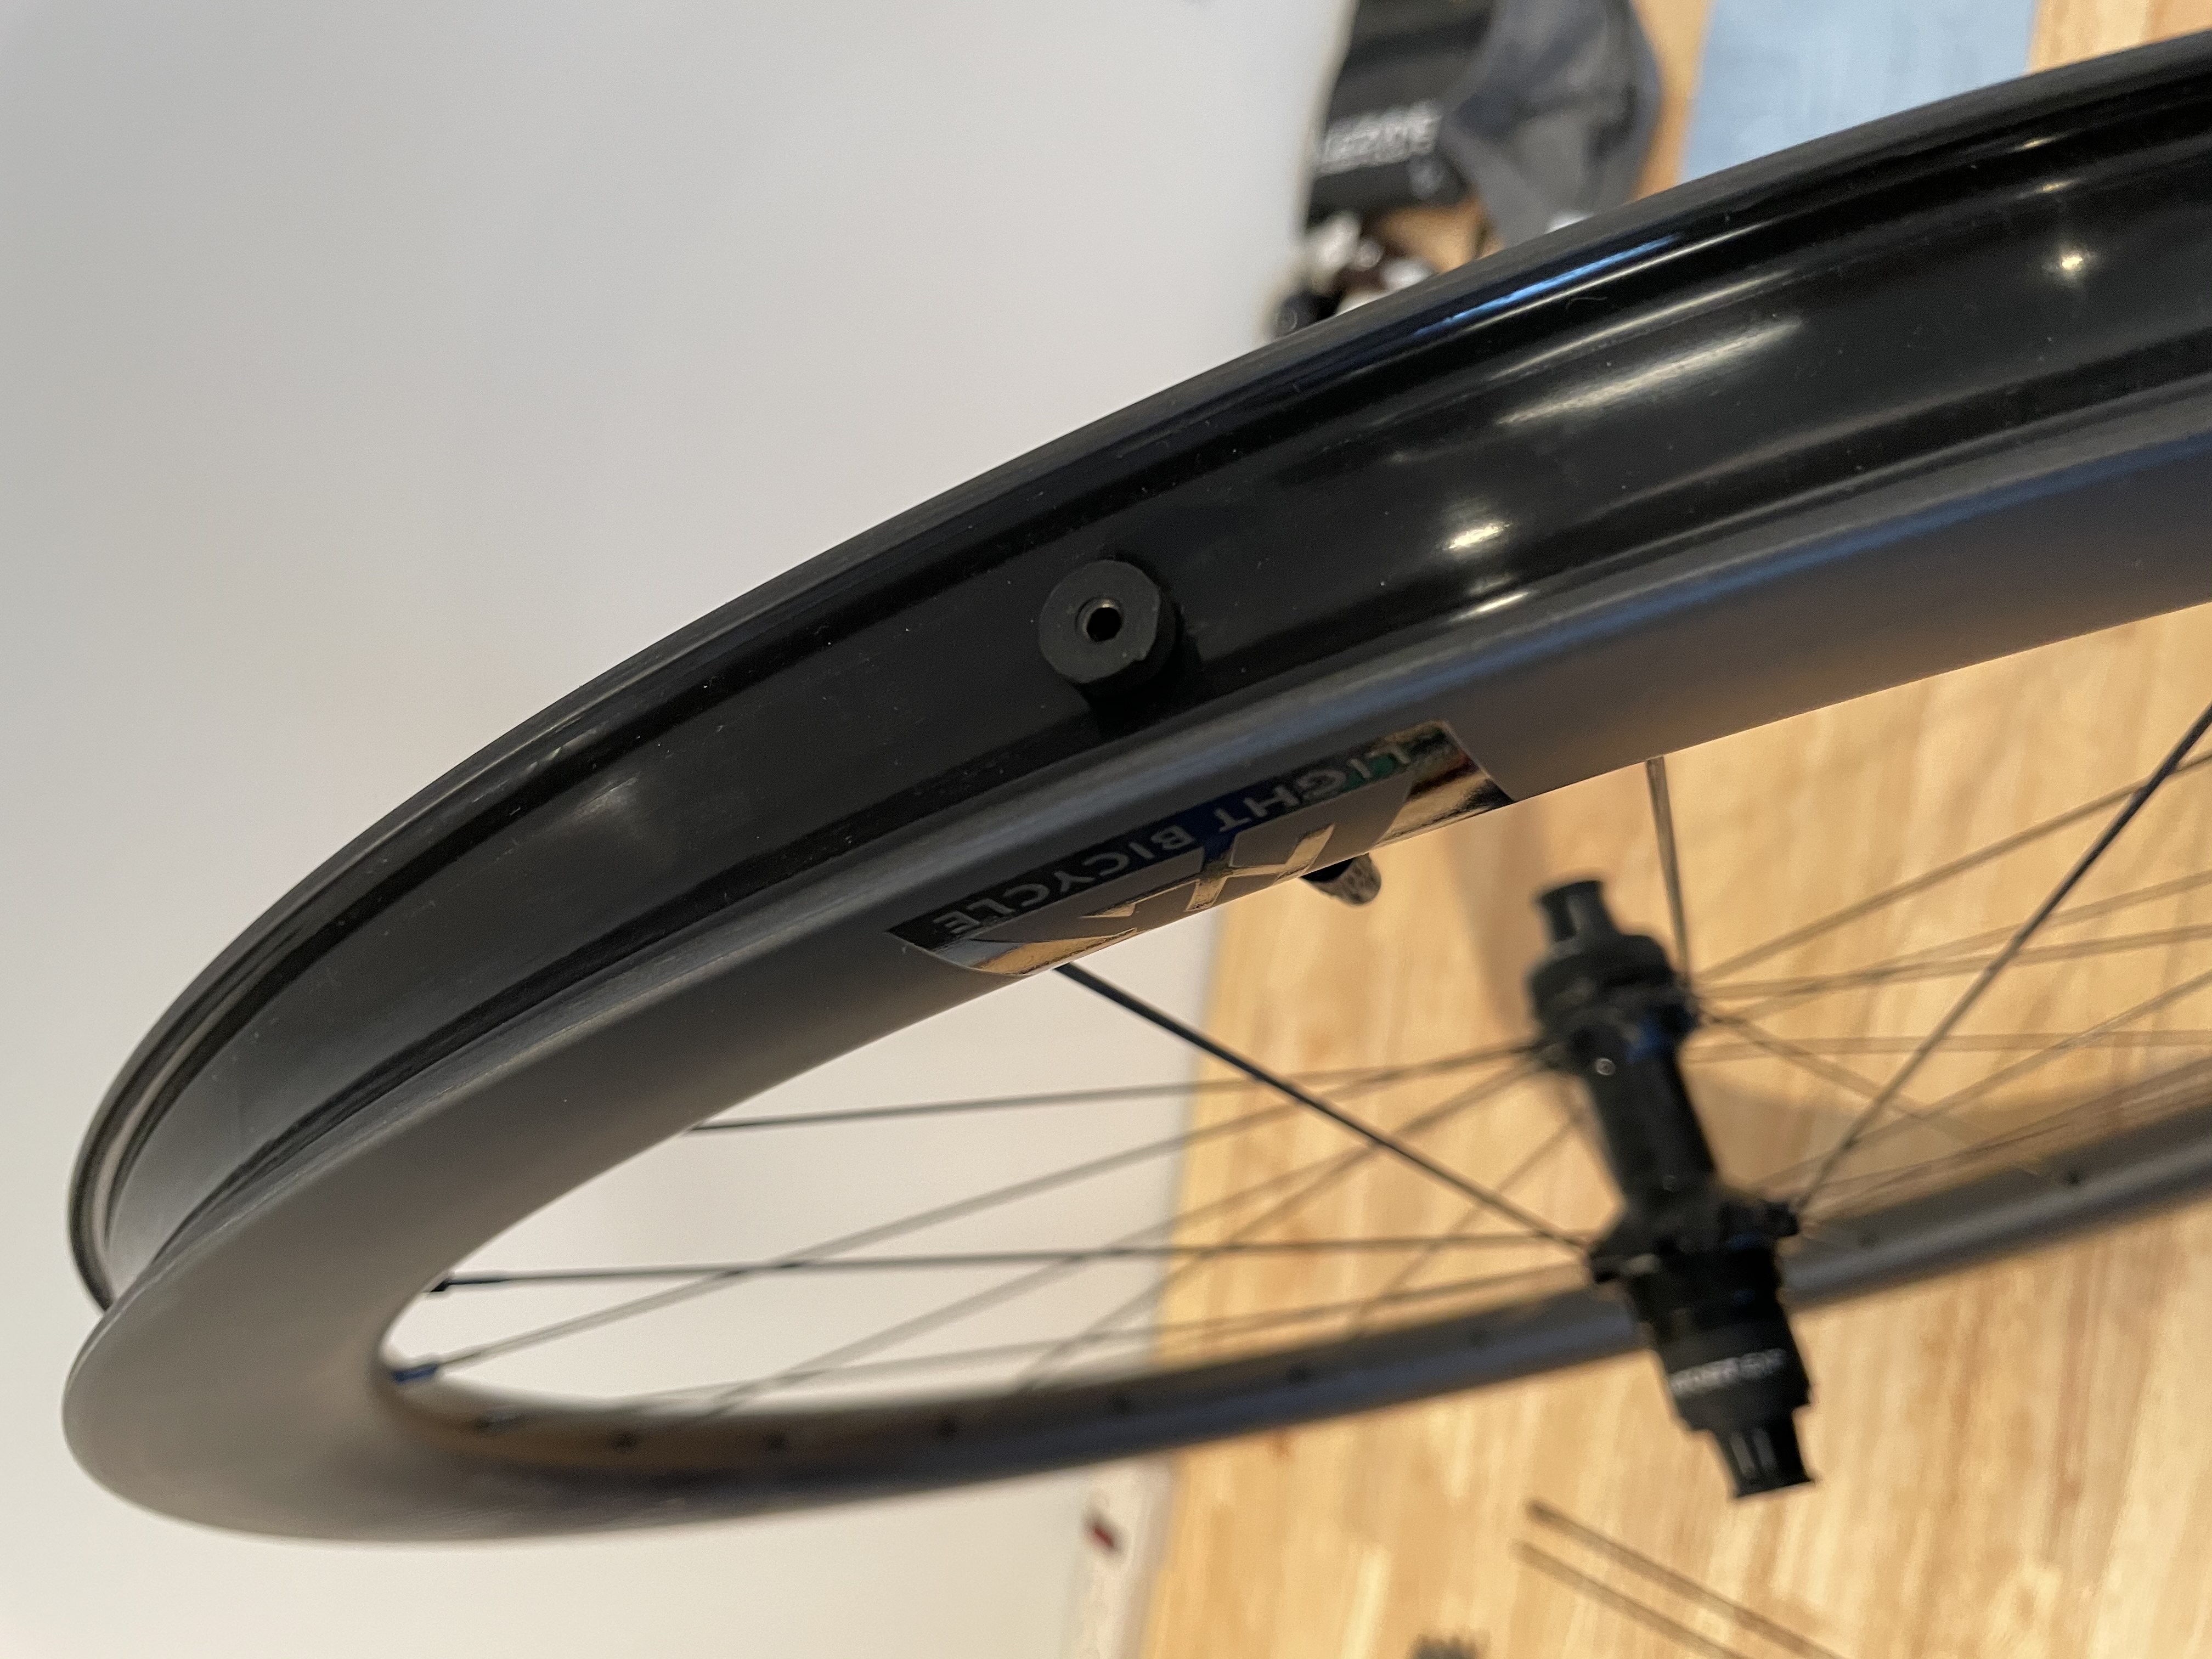
In the end, Light Bicycle won. Their rims have a strong reputation even among mountain bikers and they make a 25mm wide, hooked, tubeless-compatible rim for an absolute knockout price. Along the way I looked at DT Swiss, Enve, Hunt, Knight, Reynolds, Santa Cruz, Zipp, and probably others. Hunt were probably second place. Everyone but Light Bicycle failed to meet one or more of the width, hook, or ratchet goals.
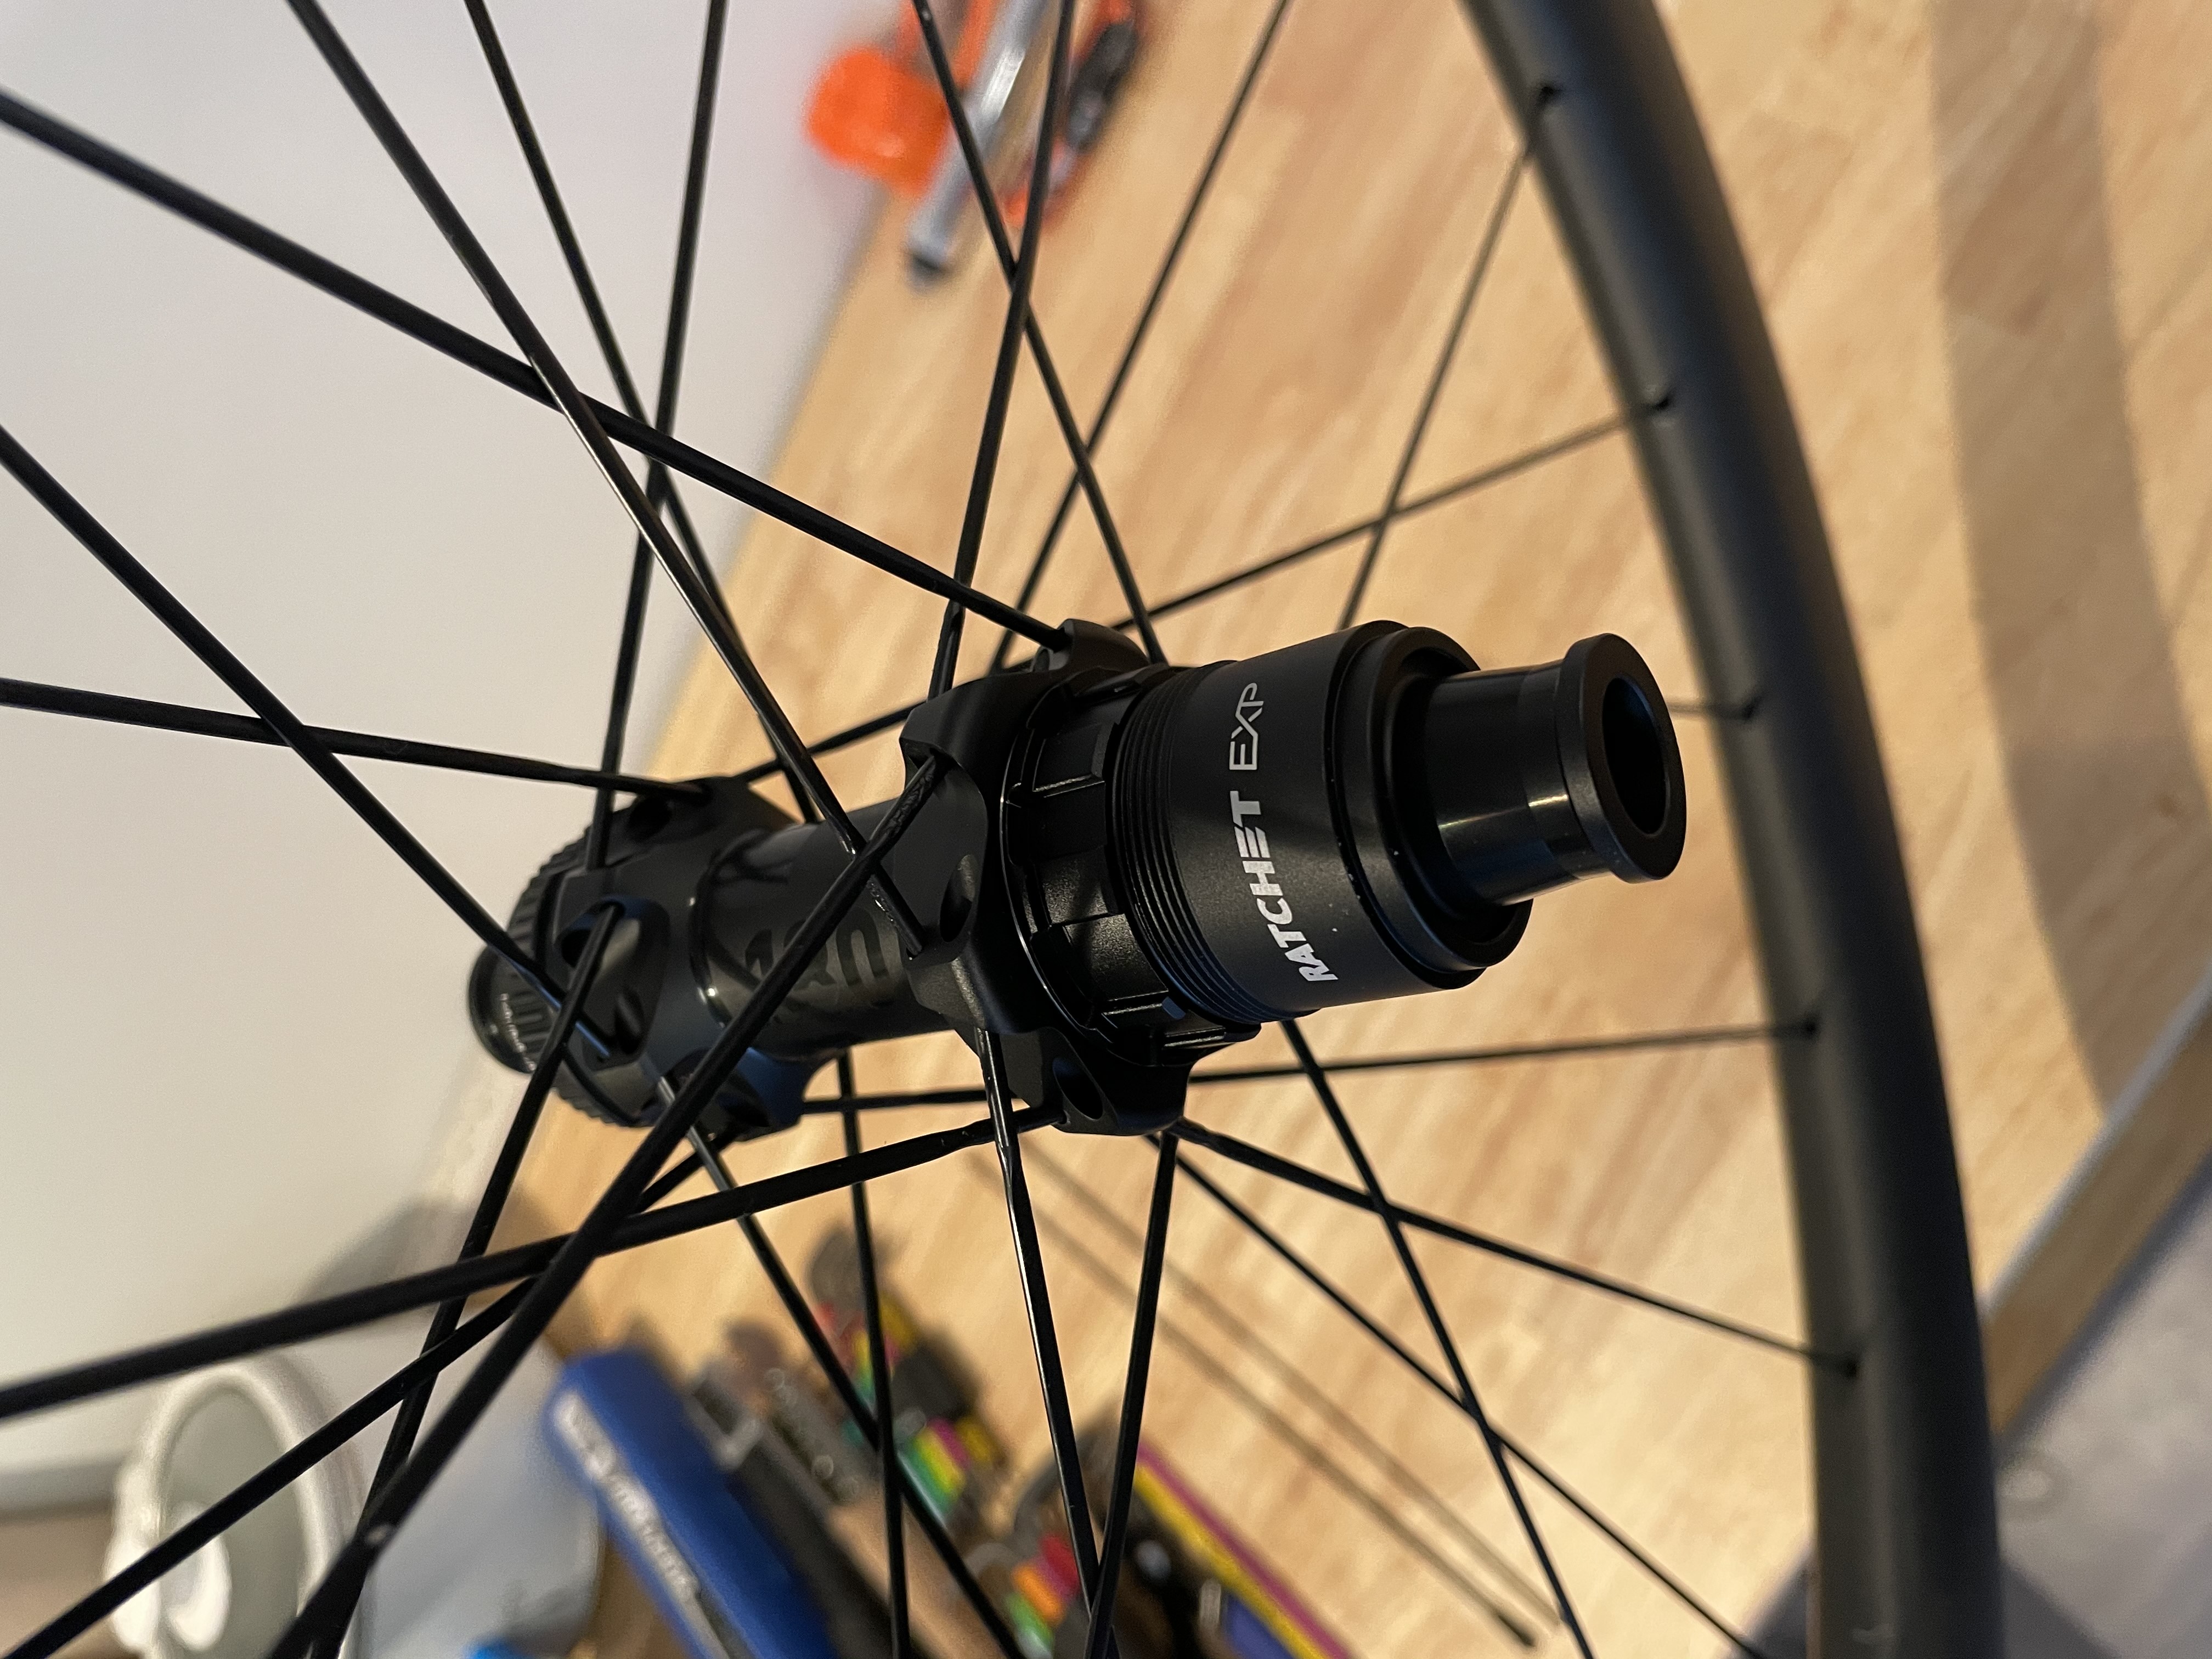
My usual hub choice would’ve been Chris King, if for no other reason than I’m getting fairly good at maintaining them, but the XDR driver I would need to run SRAM Red AXS wasn’t available. And, since the rims felt like a bargain, and the XDR freehub was there for the taking, I decided to try the not-oft-seen DT Swiss 180. Why not?
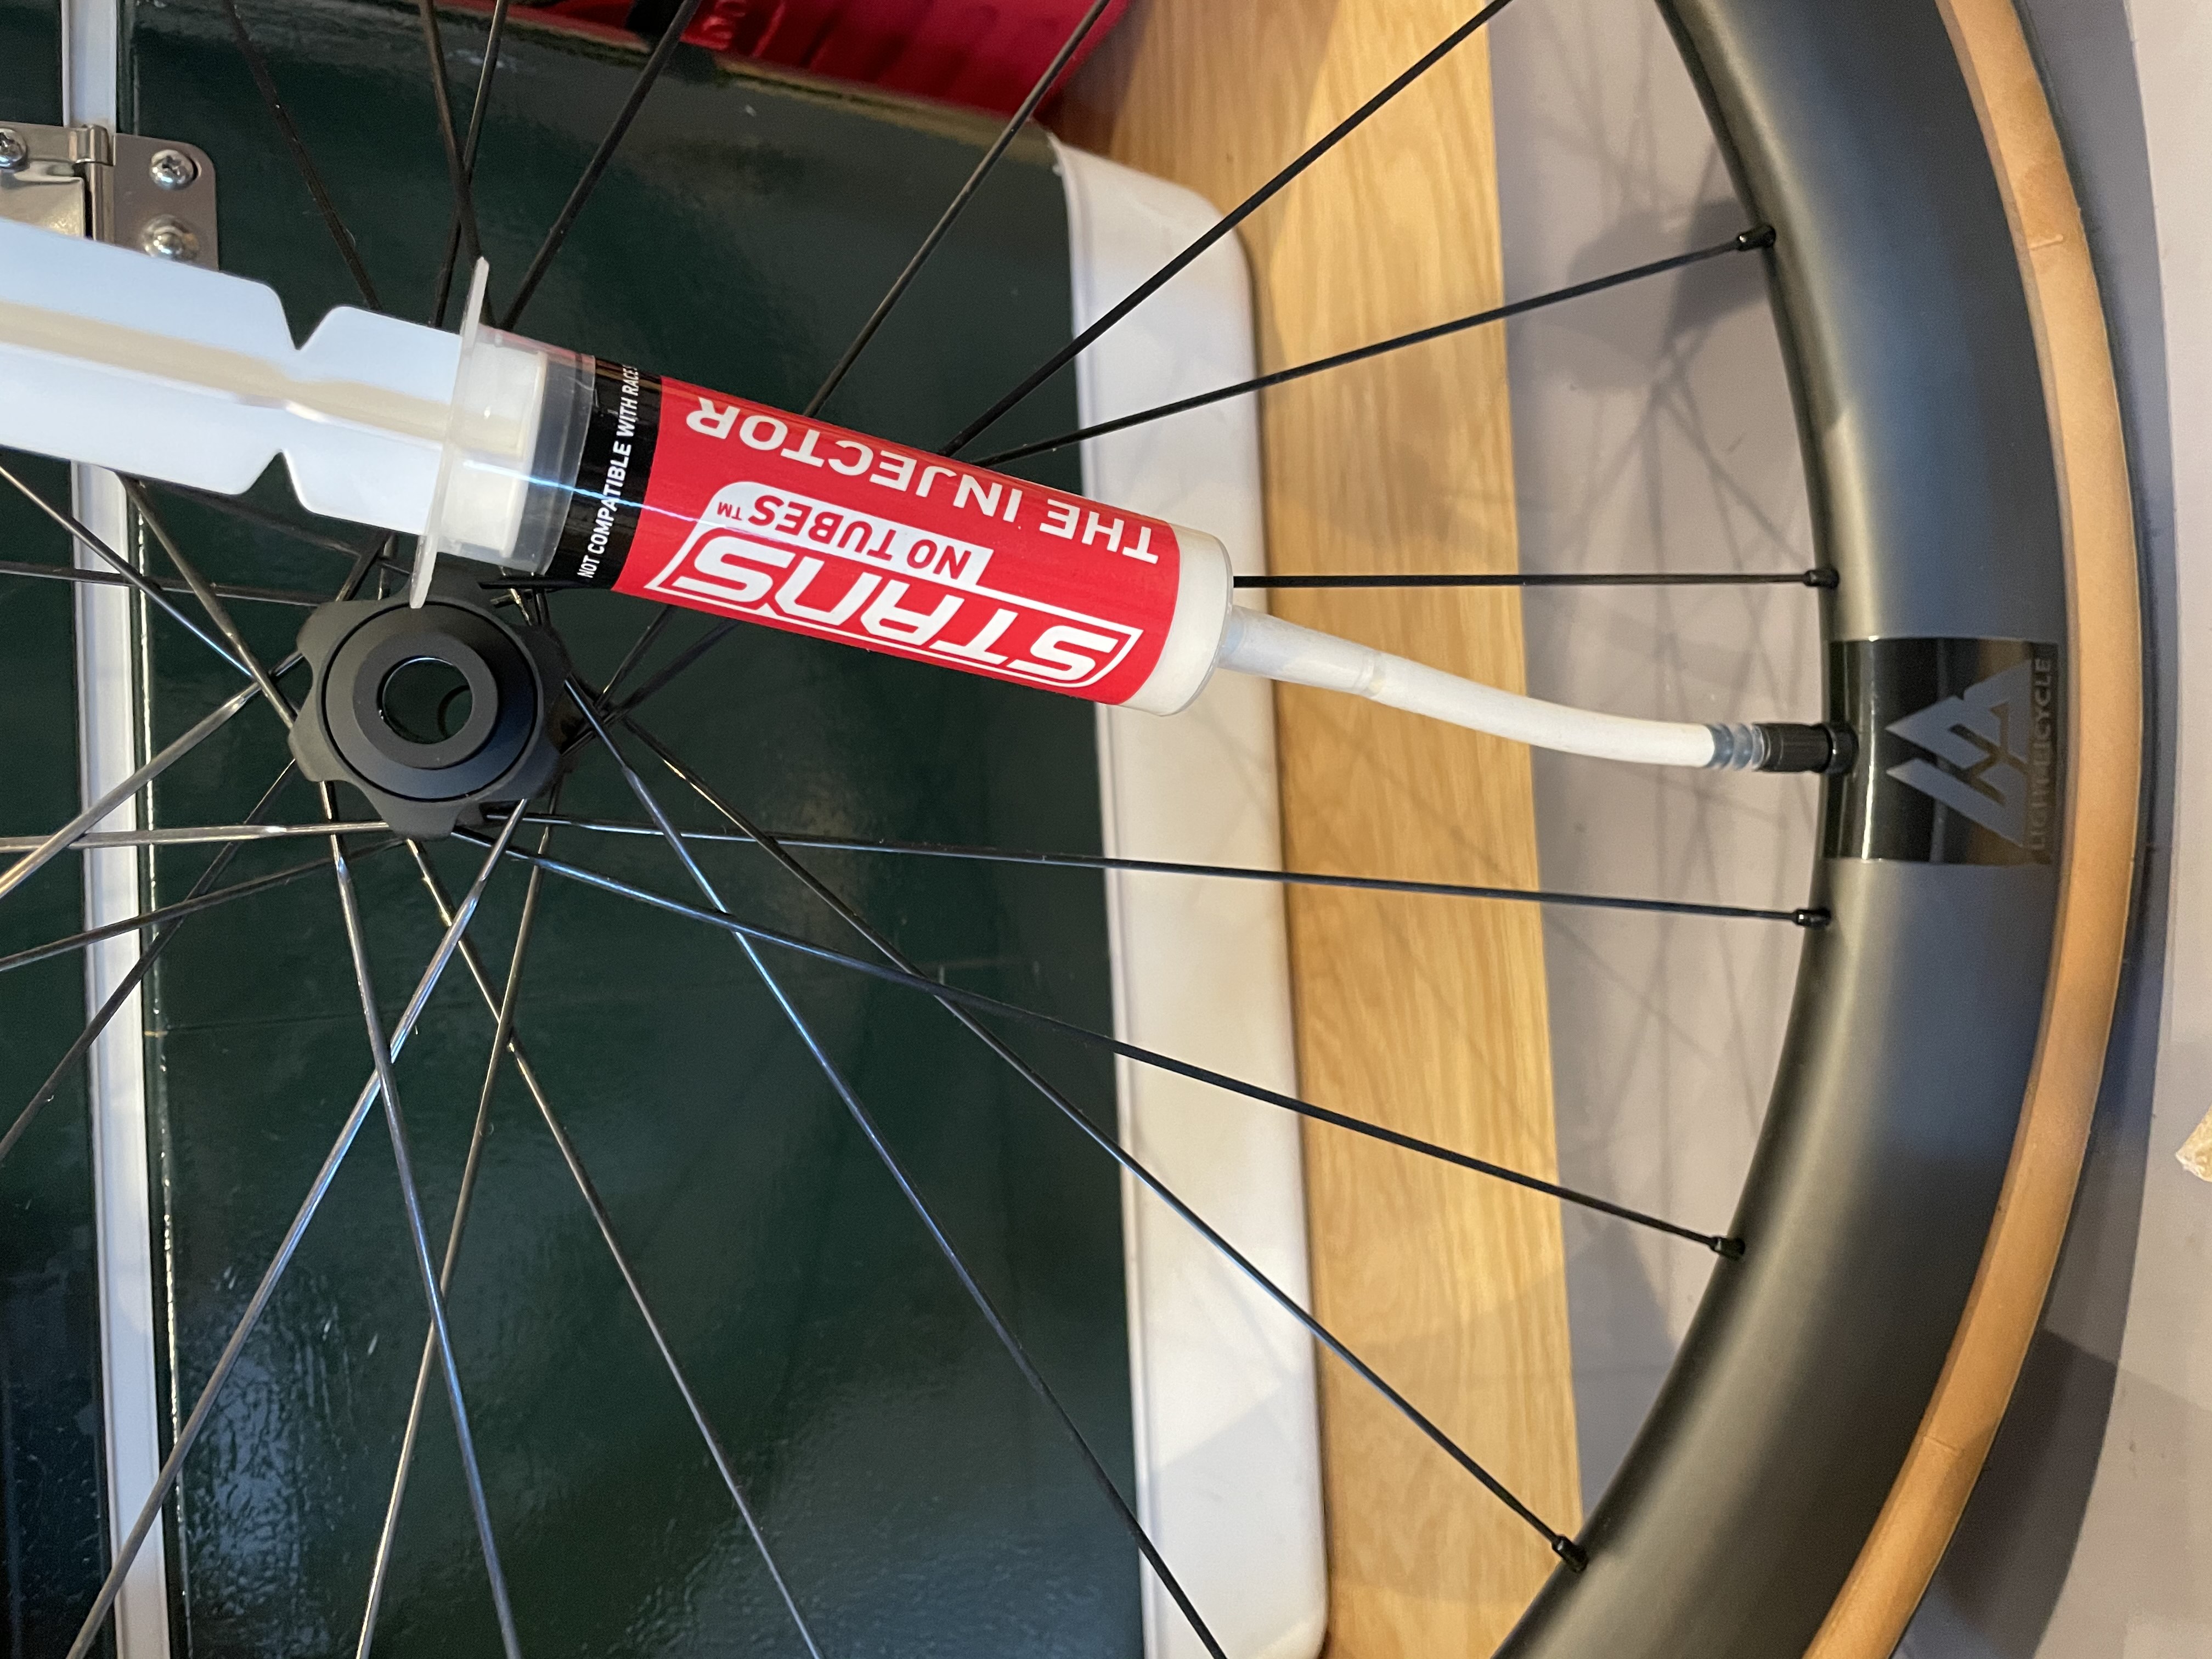
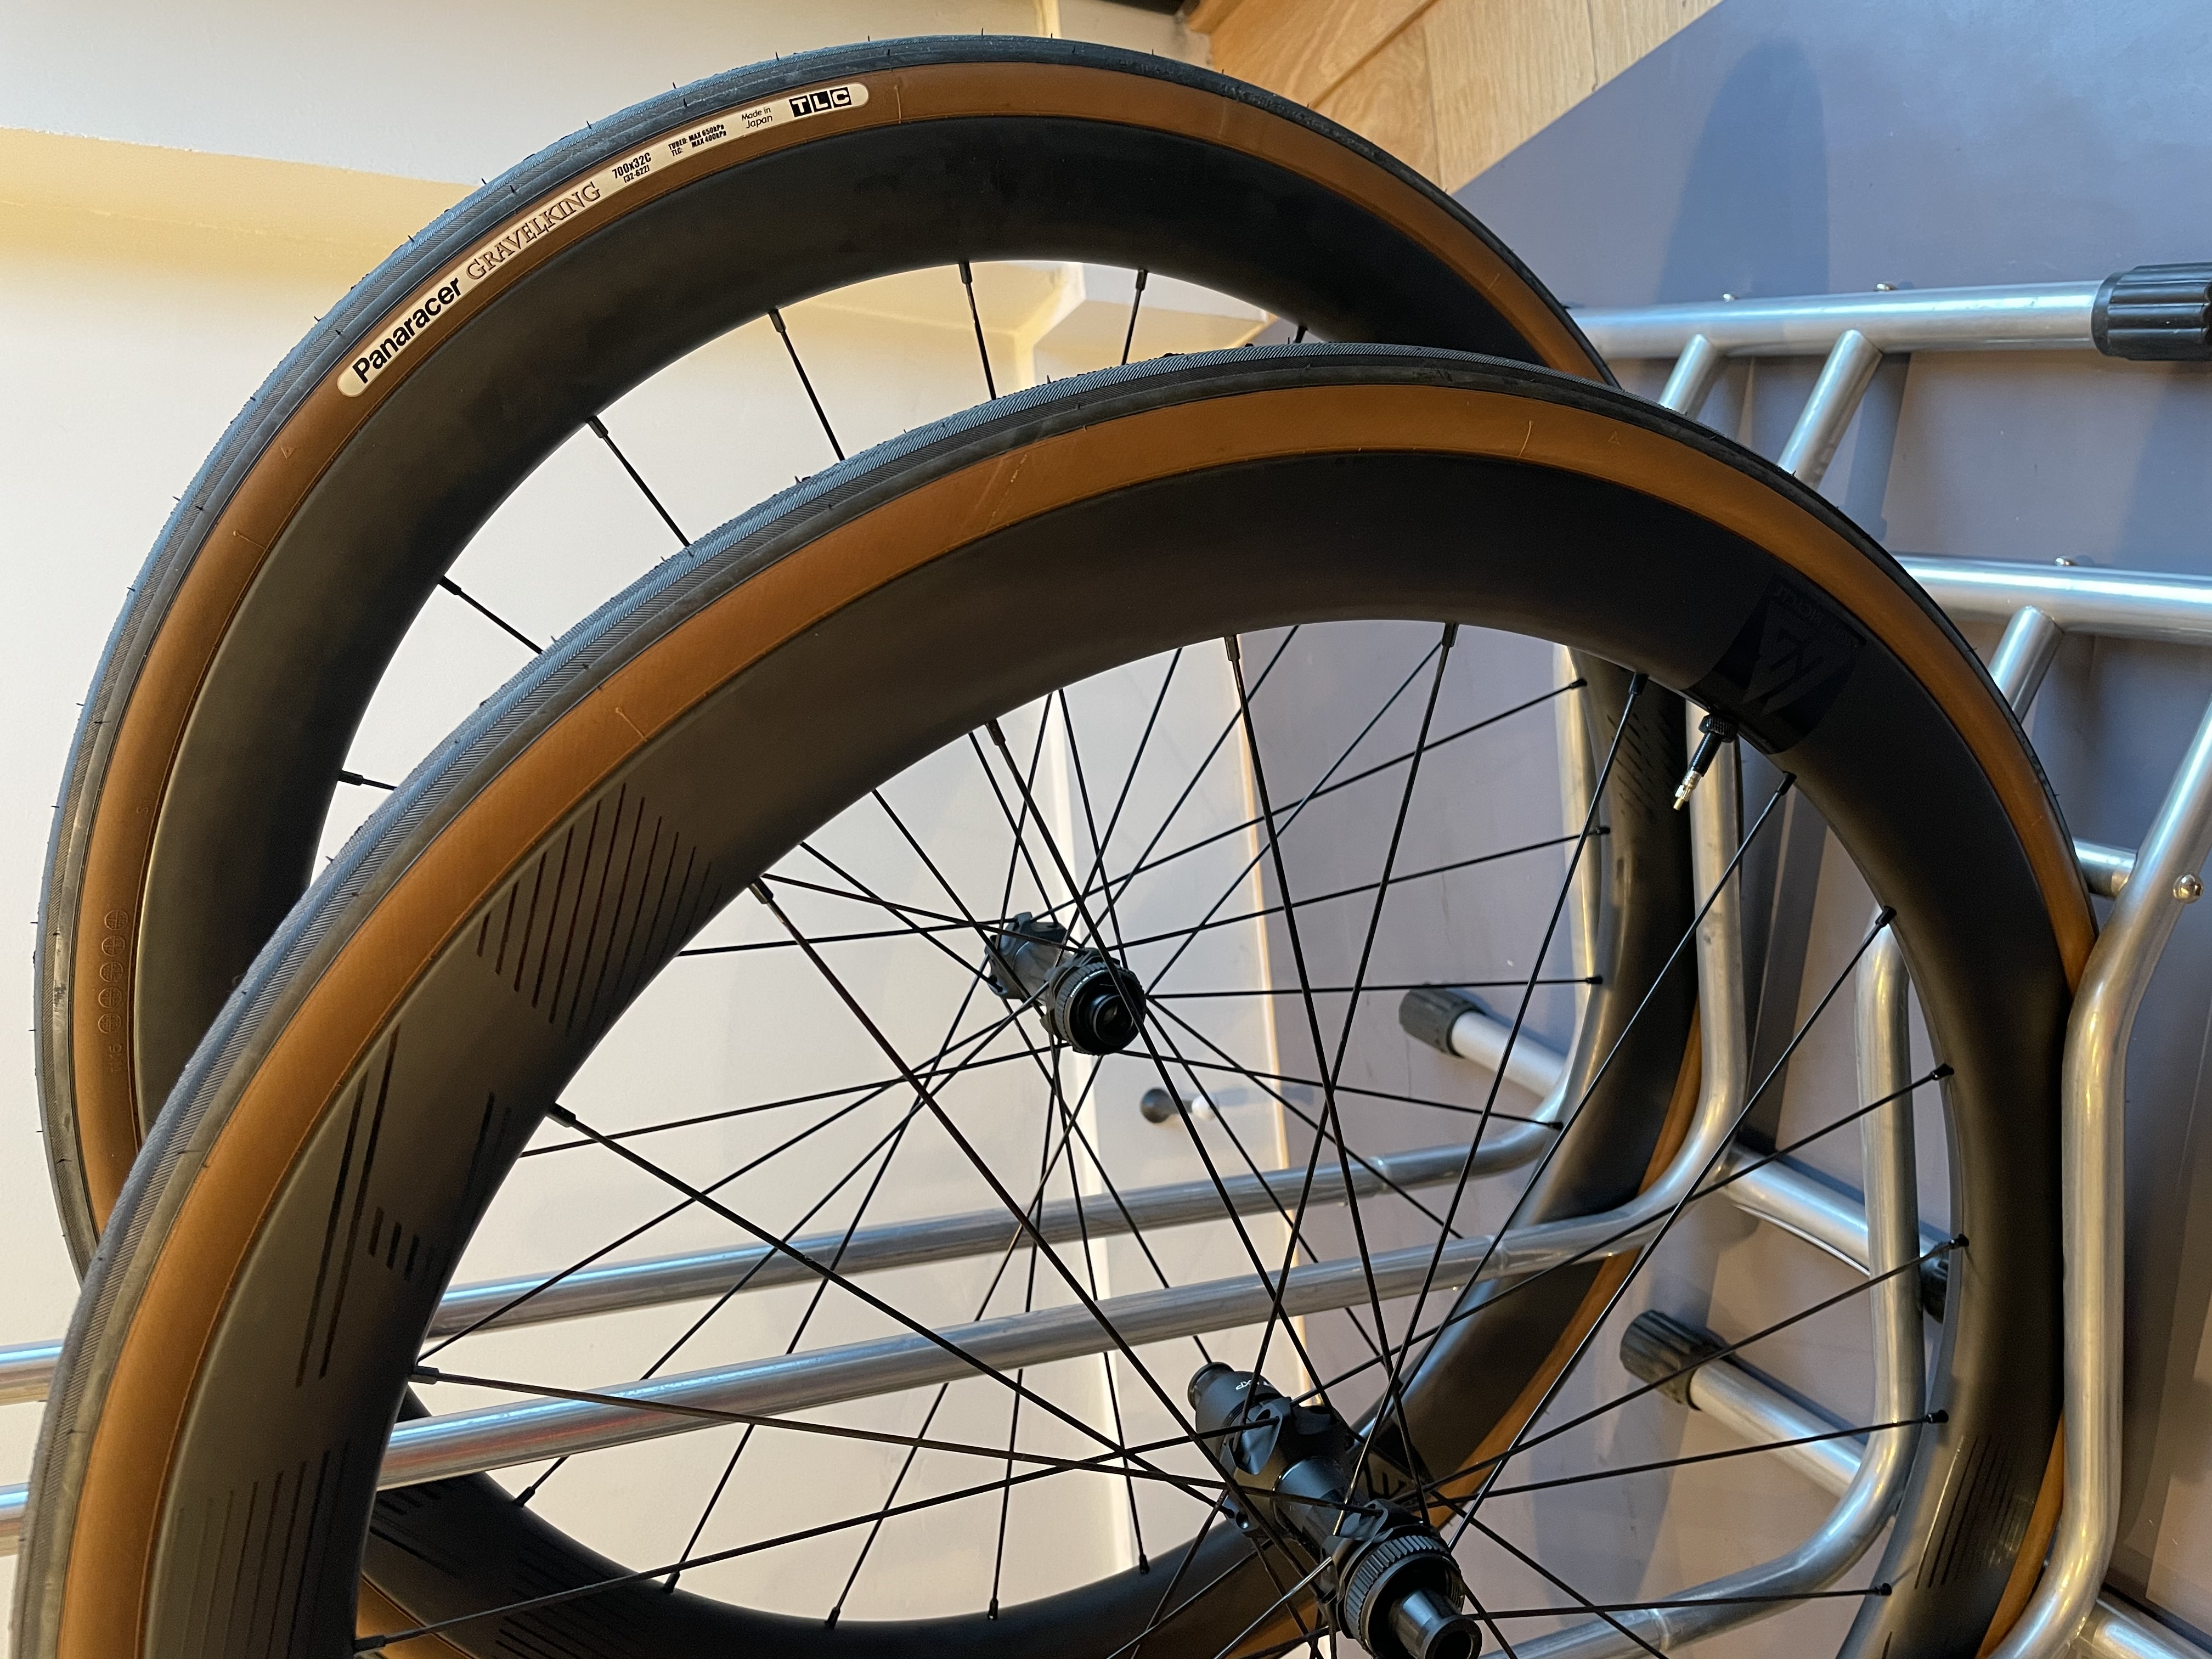
They came straight from the factory with an absolutely flawless tubeless prep. Bravo! I made the ceremonial mess with sealant once, then I got my act together and mounted the tires without further fuss. I chose 32mm Panaracer GravelKings because they have a bit of puncture protection and a nearly smooth tread which will go nicely with the mostly-road-but-I’m-actually-going-wherever-the-hell-I-want vibe I want this bike to have.

I chose SRAM Red AXS because I’ve had a great experience with SRAM Red eTap, am proficient with their hydraulic bleed procedure, and am intimidated by Di2. I’ll have more to say about the groupset later. For now, I just want to declare that the 12-speed Red cassette is beautiful and feels incredibly well-made.
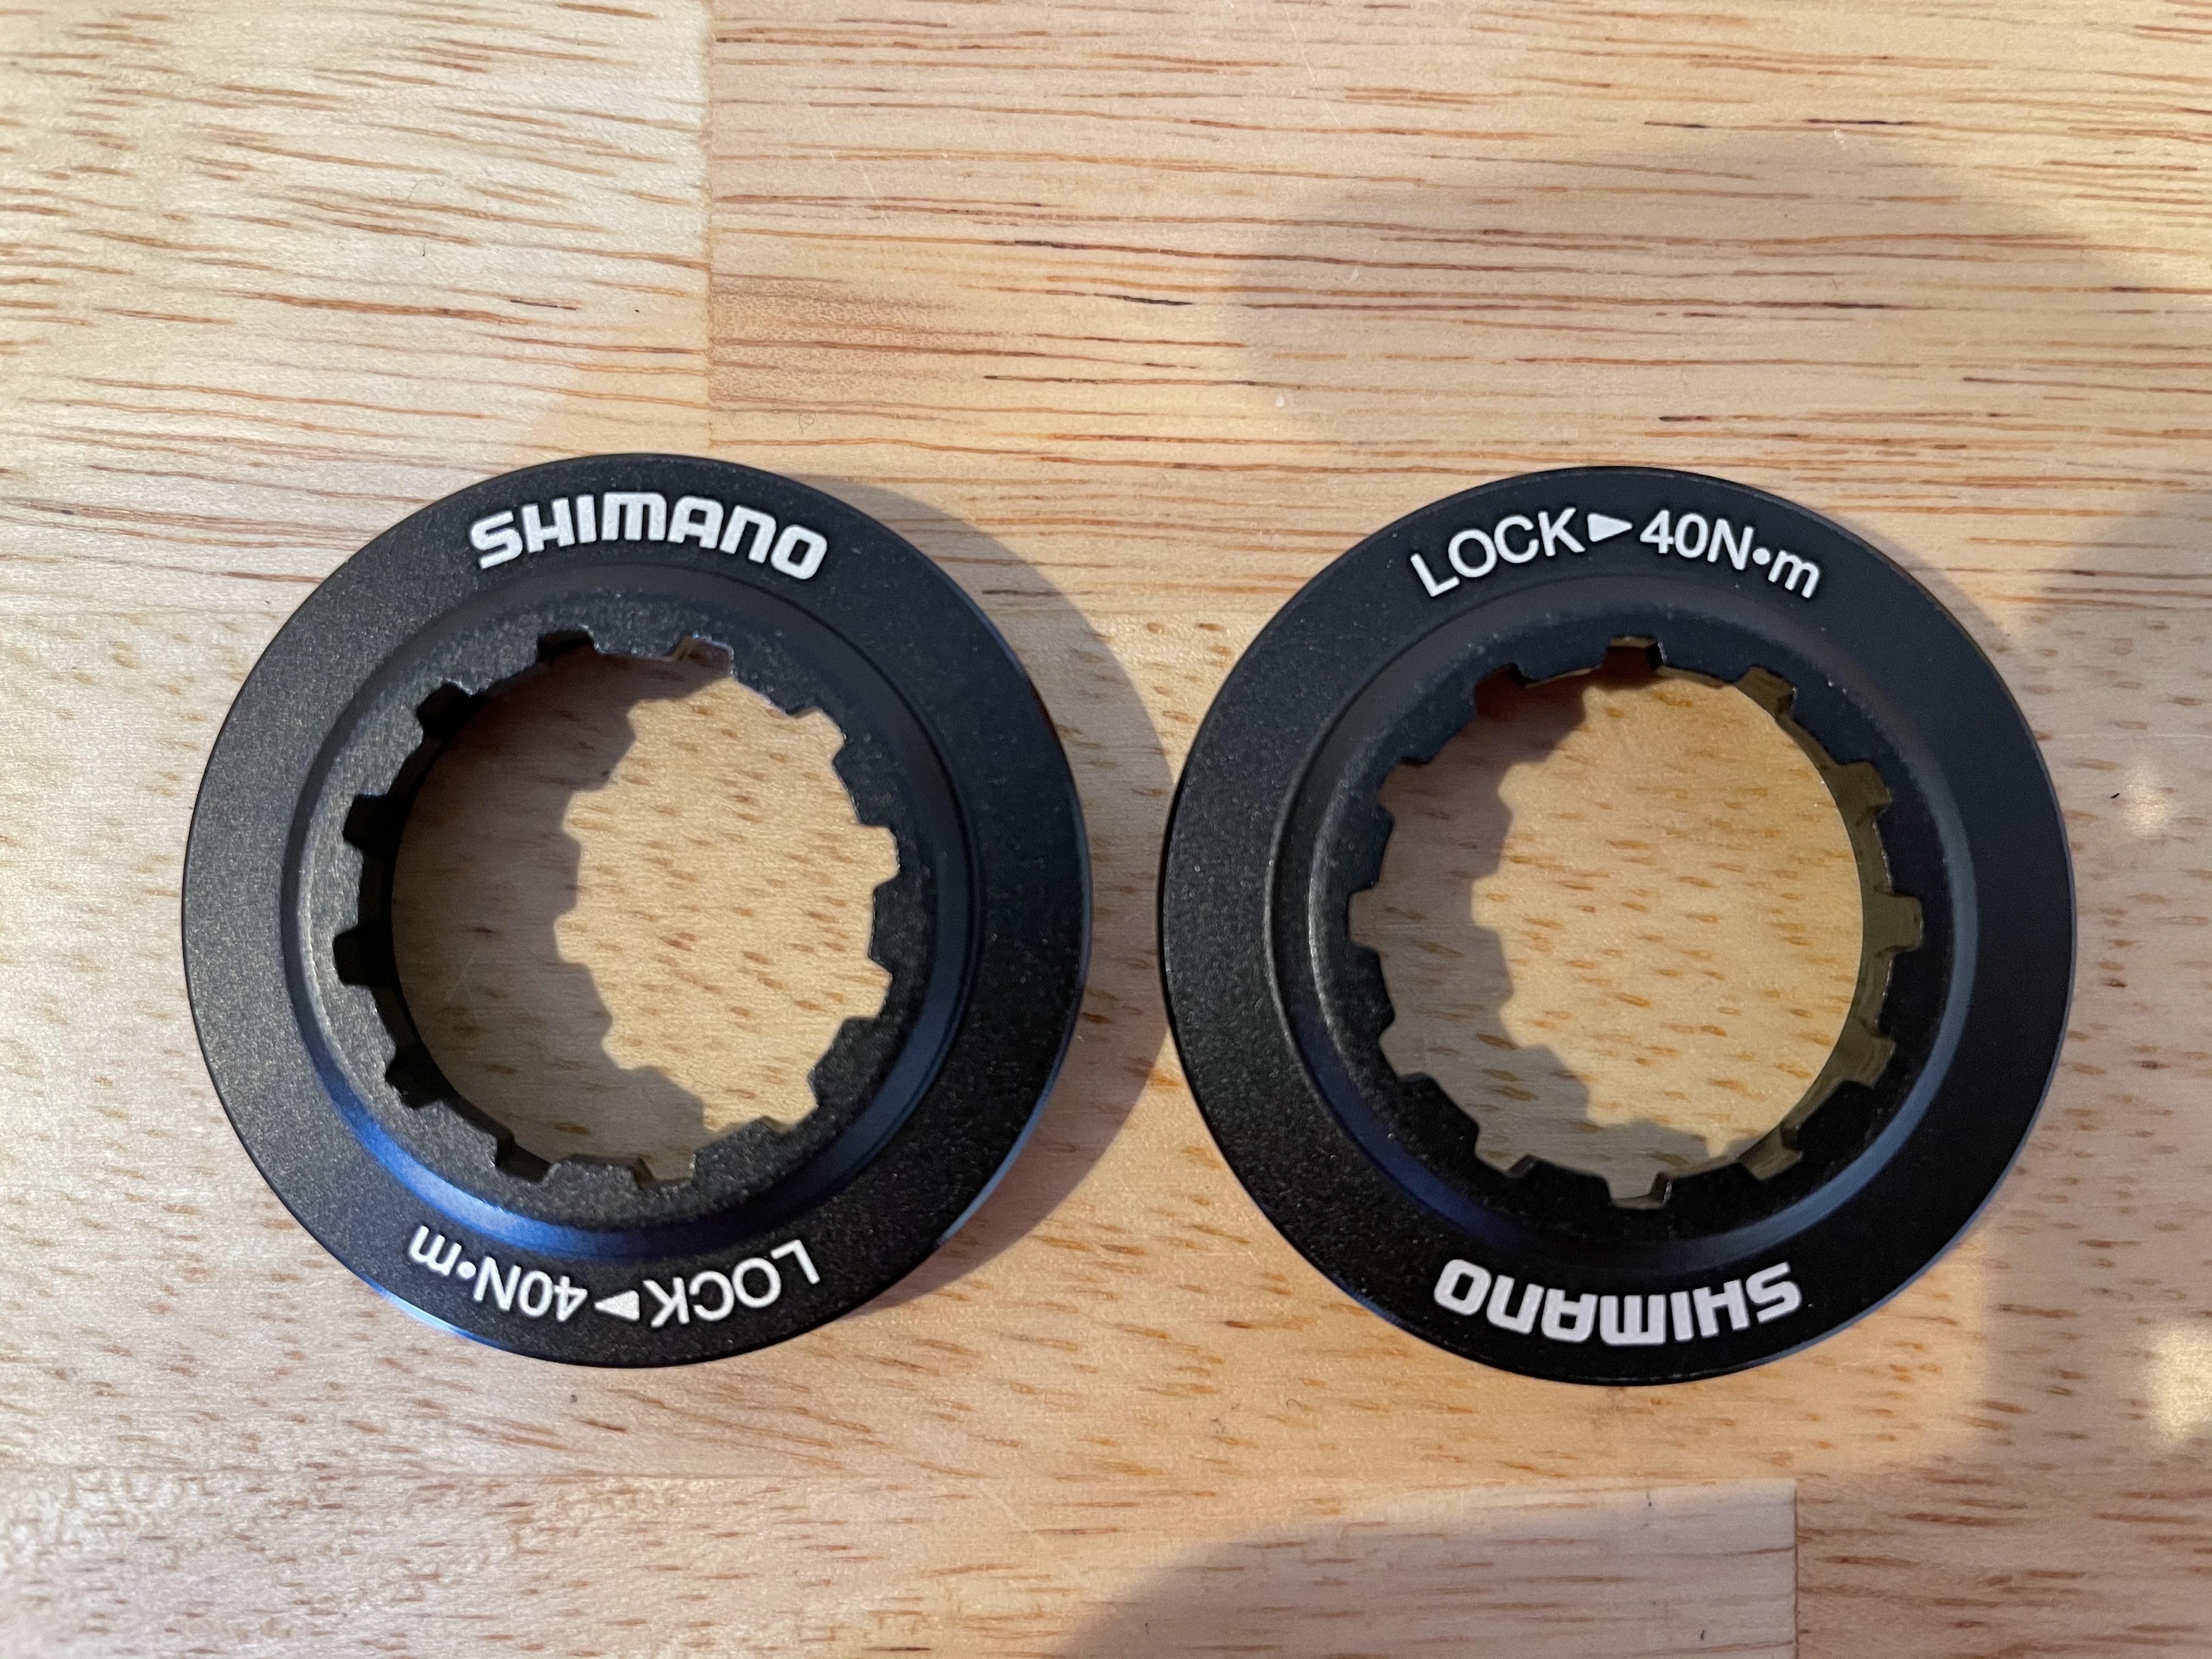
SRAM isn’t without warts, though. It’s frustrating that SRAM makes centerlock rotors but pretends the lockrings don’t exist. Seems Shimano’s cornered the market on this one. (Serves them right for inventing the standard, I guess.) For those keeping score, centerlock lockrings are (so far) the only part I forgot to account for in my spreadsheet.
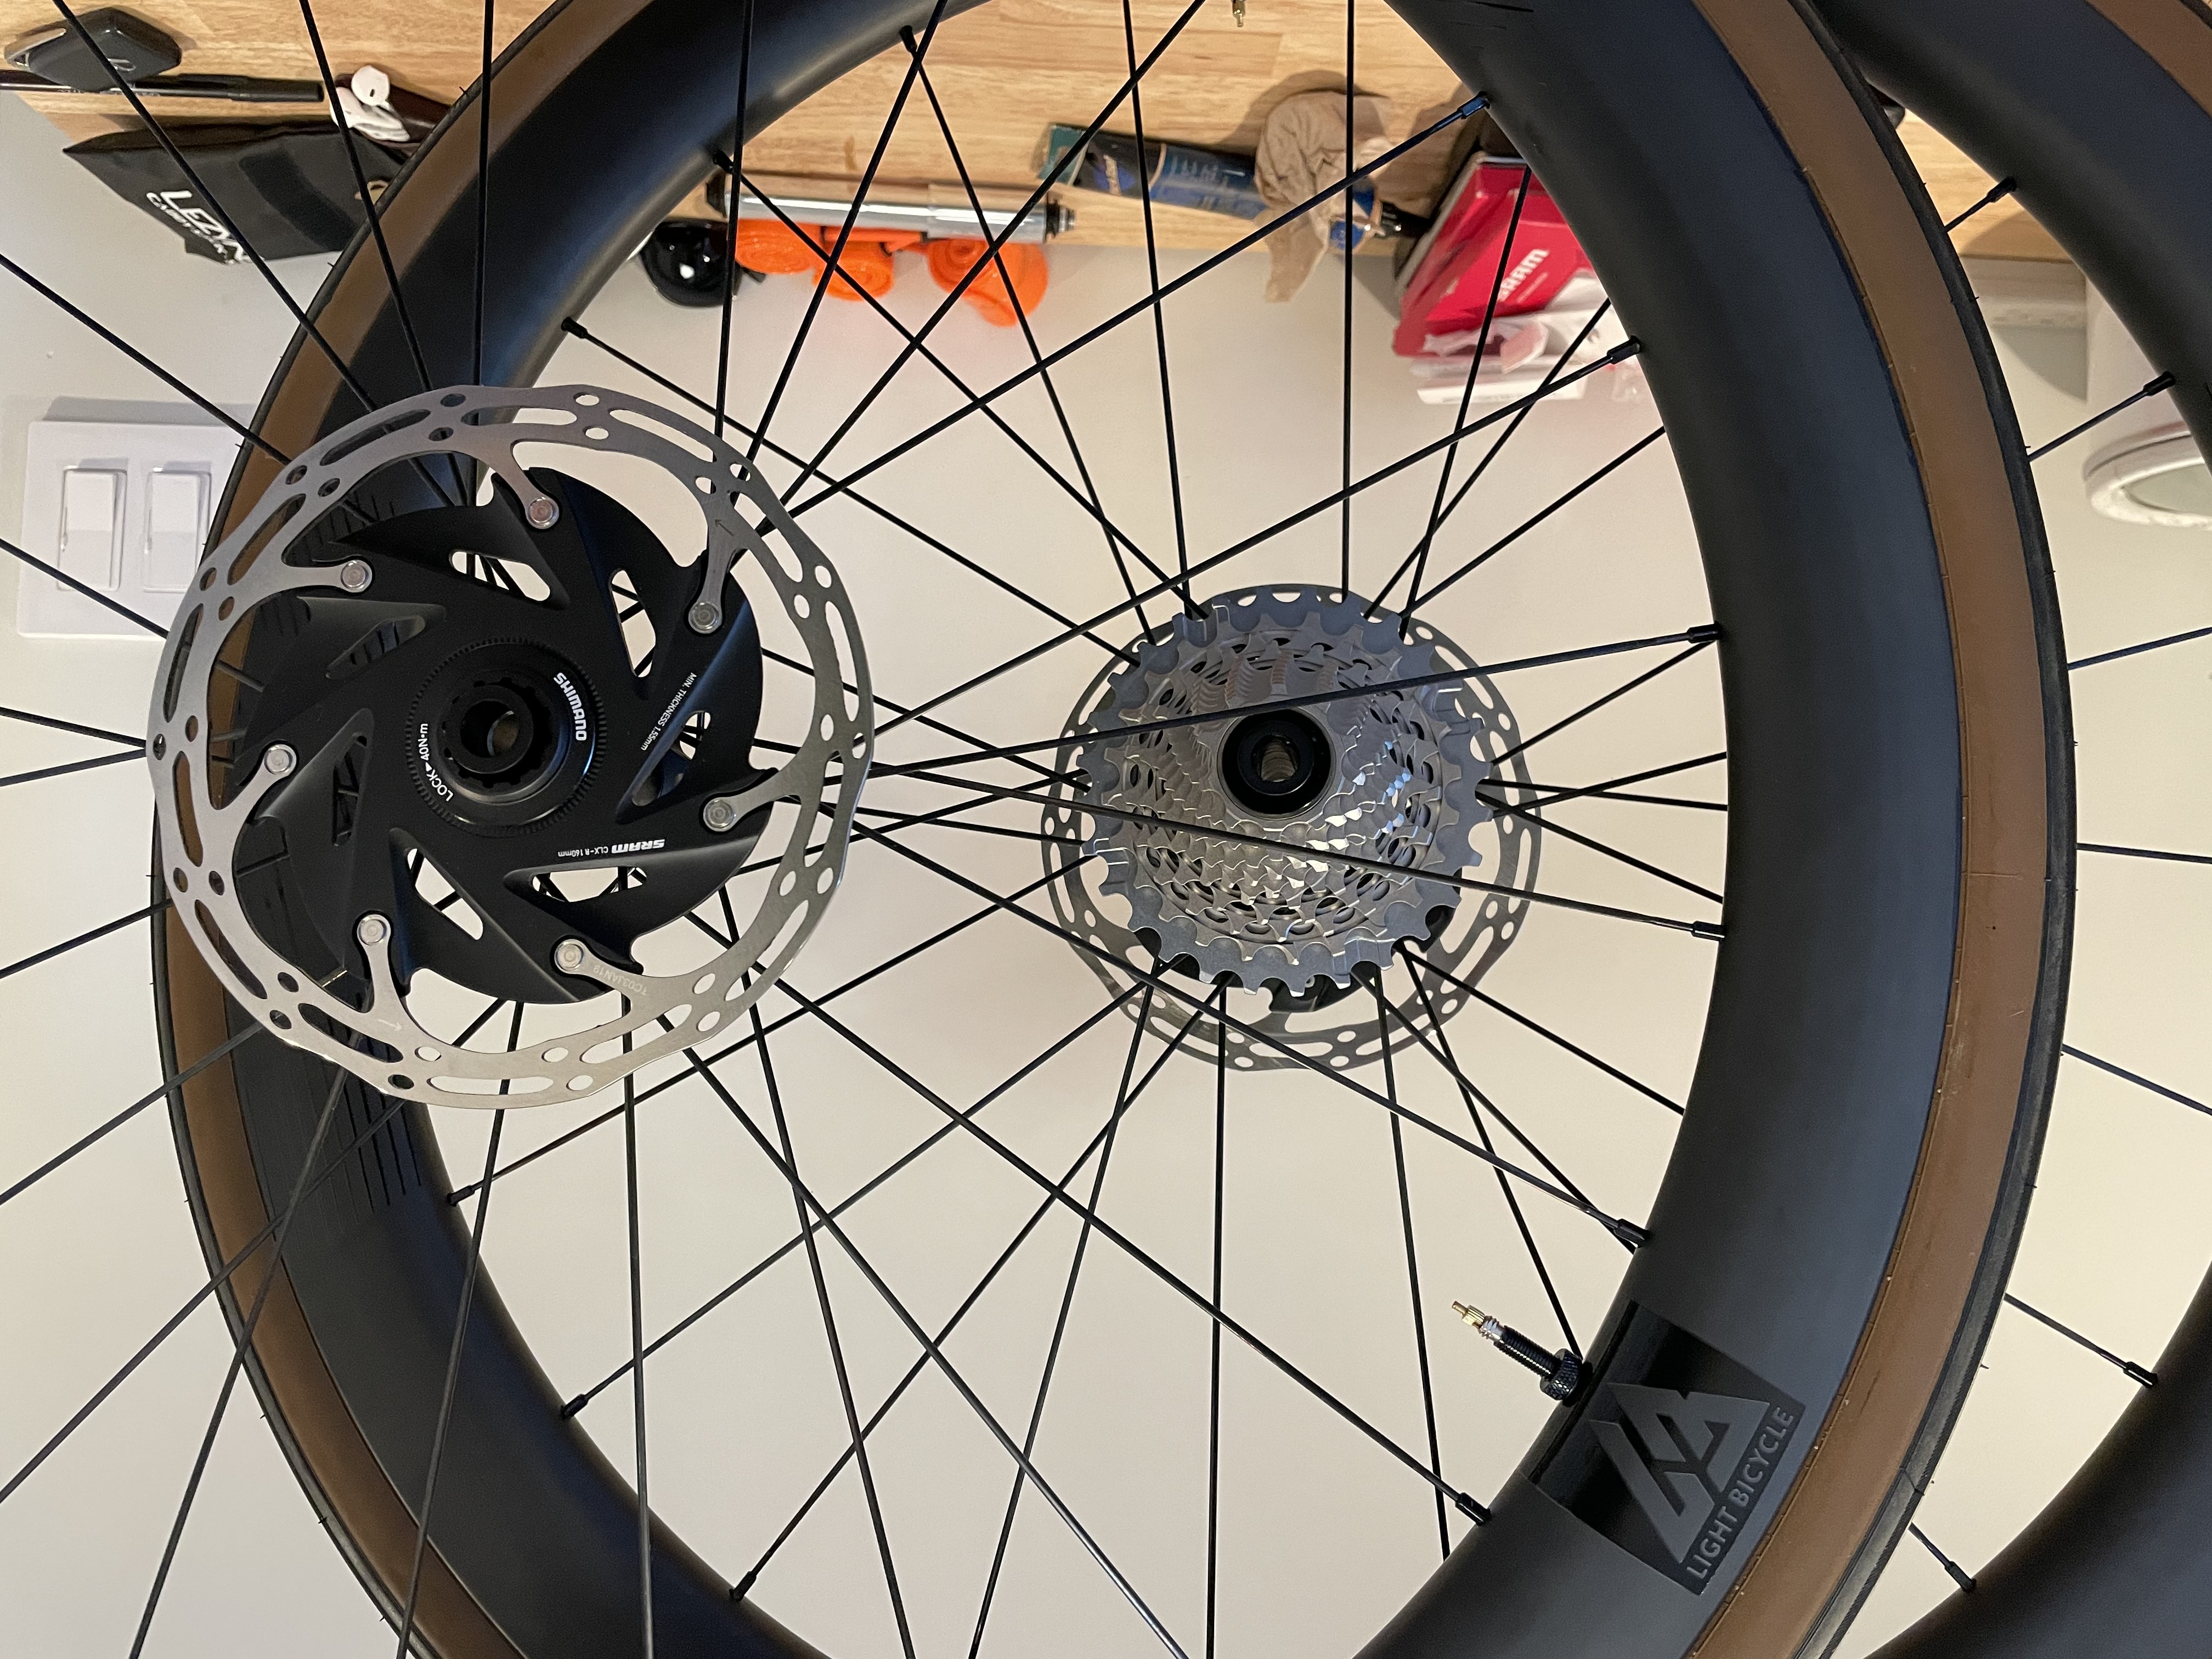
I made the boring, safe choice of SRAM Centerline XR rotors over more aesthetically appealing and utterly roastable offerings from manufacturers selling to the weight-weenie crowd. I don’t think I’ll actually regret this but the choice feels flat and uninspired.
That’s a sour note to end on but I’m just about out of parts that I can fasten together. Depending on when the frameset ships, the next installment will either be about the frameset or the crankset.
— Happy new president / still no frameset day! Today, coincidentally, I got involved in a discussion on SRAM 12-speed chainring sizes. That was just the push I needed to finish this section on the Argonaut’s crankset, etc.
“Not that we needed all that for the trip bike, but once you get locked into a serious drug bike parts collection, the tendency is to push it as far as you can.” In very much that spirit, the crankset is THM’s Clavicula. And if you think I’m self-conscious about the crankset, wait until I tell you I bolted Carbon-Ti chainrings to it.
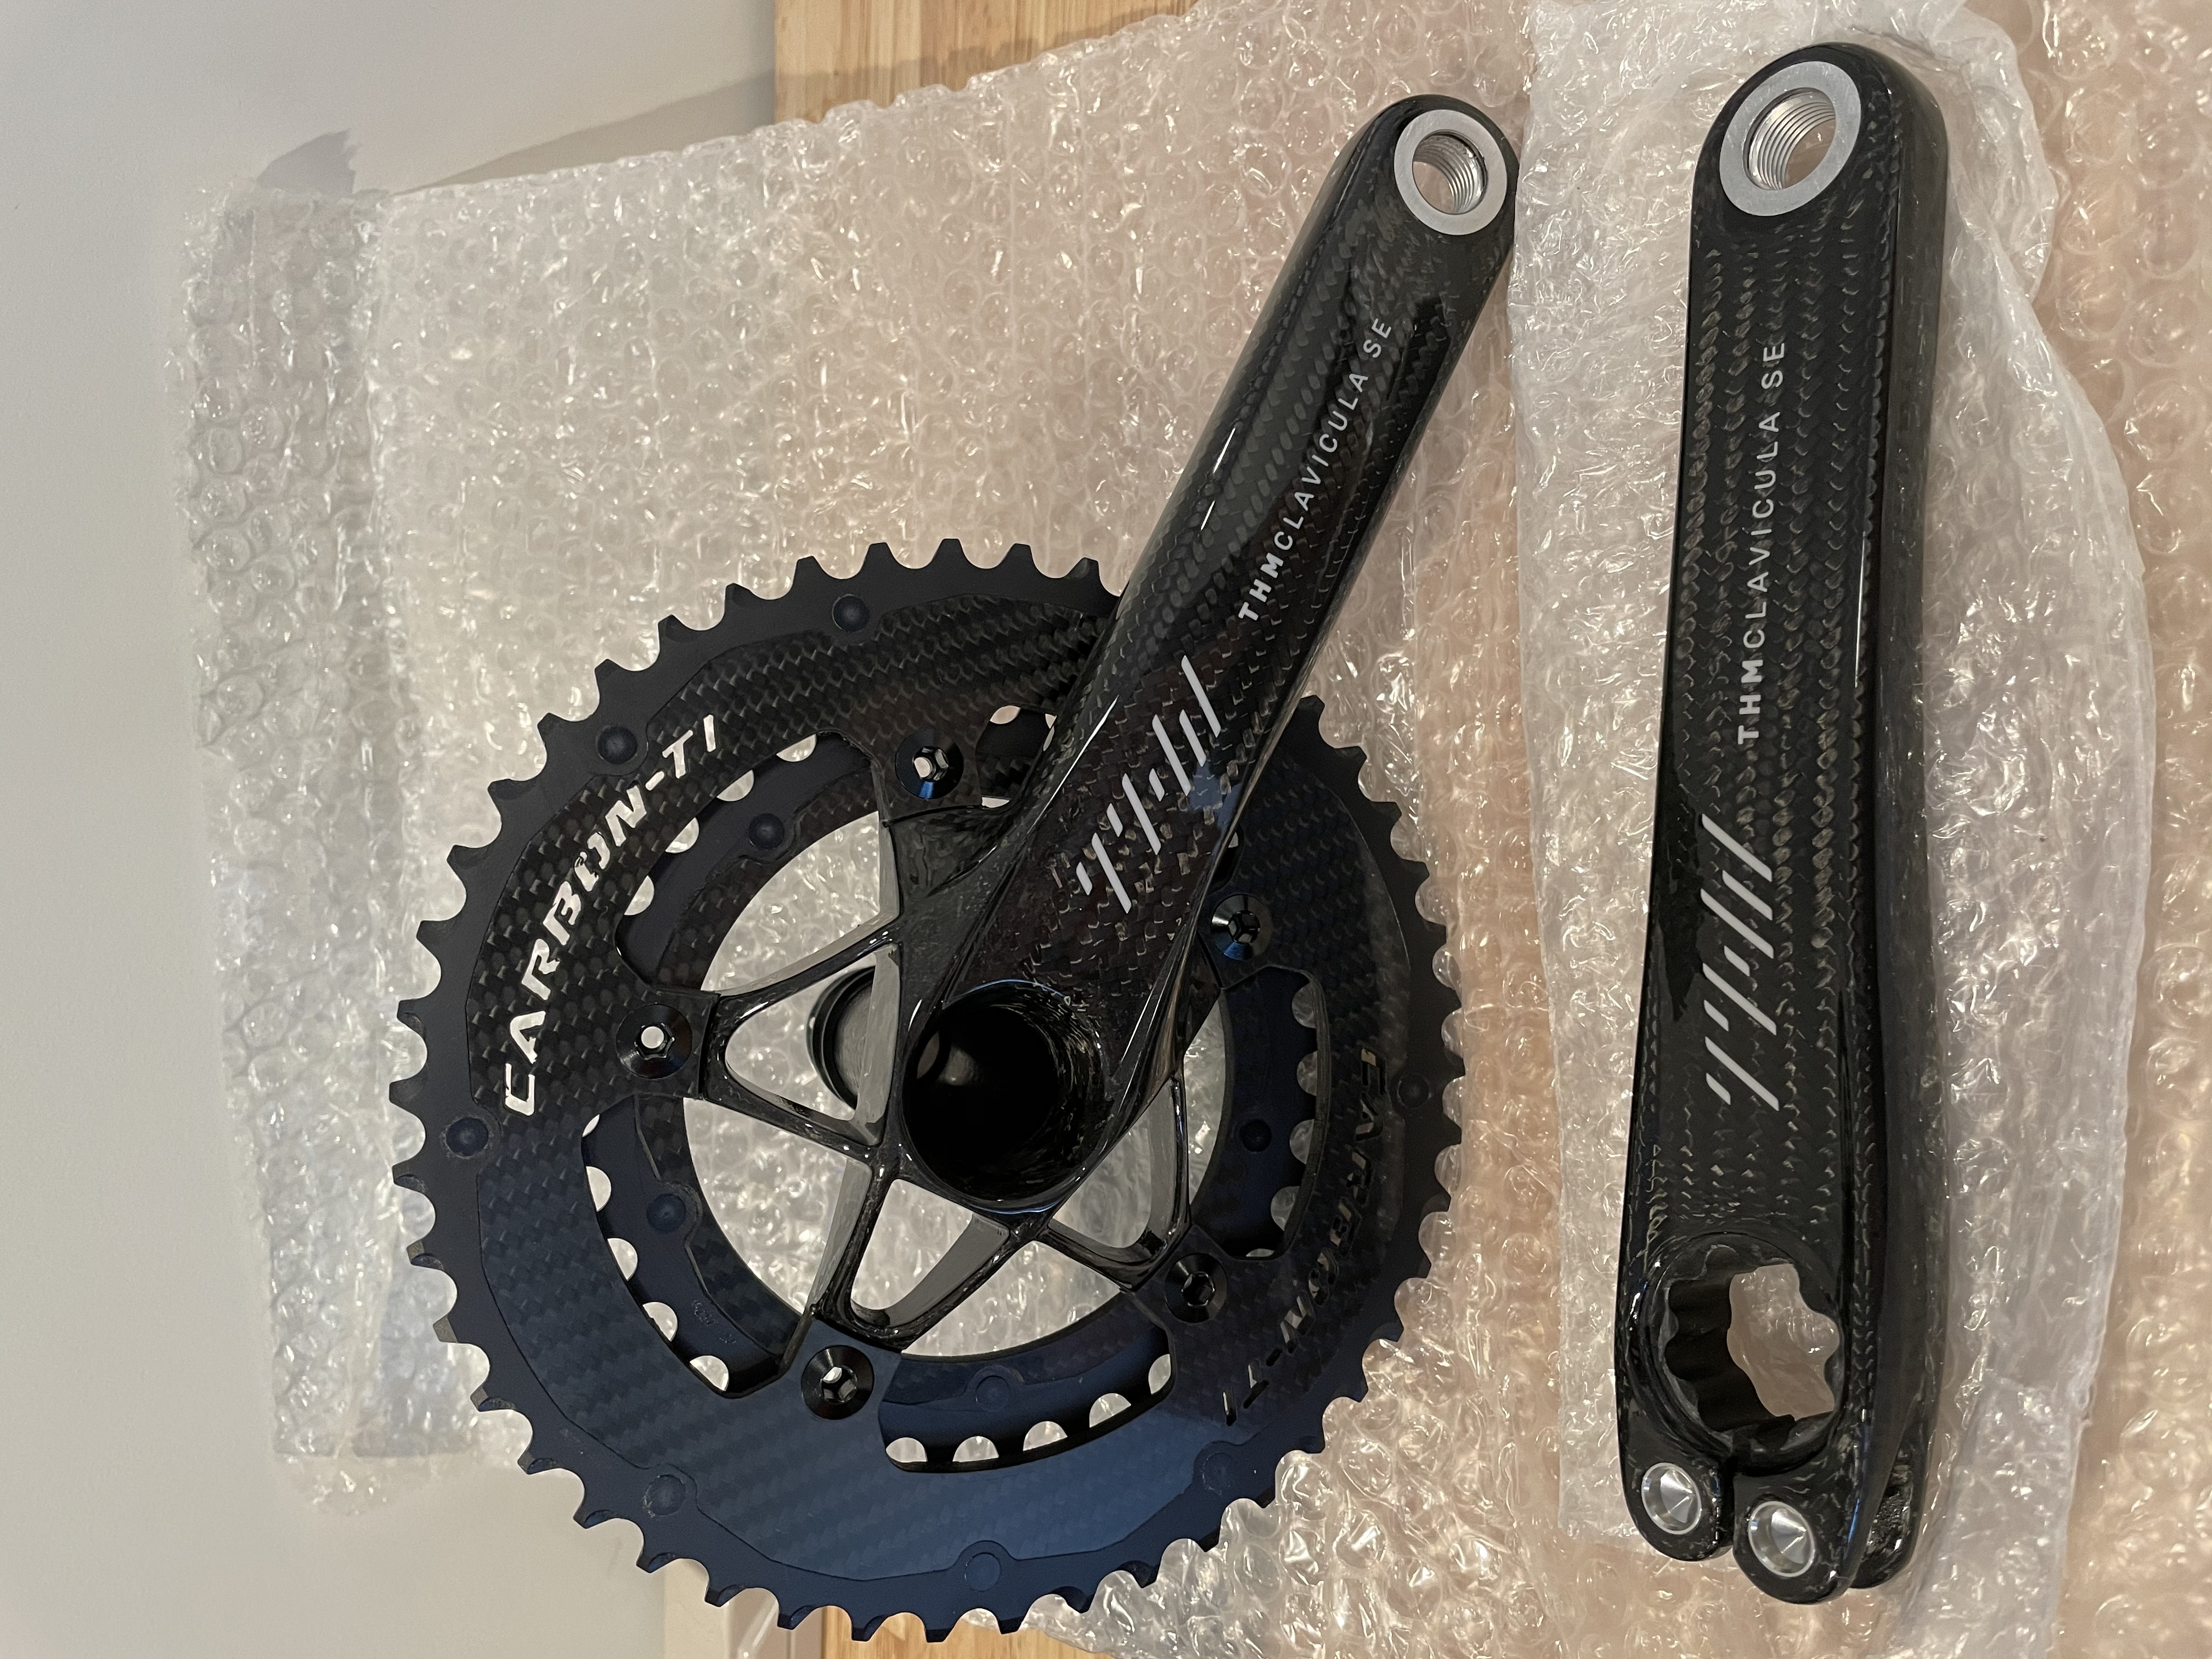
Here’s the thing, though: Carbon-Ti is the only manufacturer besides SRAM on all of planet Earth making 46/33 chainrings for SRAM 12-speed drivetrains. This was important to me. I’m coming (happily) from a drivetrain with 50/34 chainrings and an 11-28 cassette. I can’t spin out 50 by 11 so there’s no way I can spin out 50 by 10 or even 48 by 10. Hell, even 46 by 10 is a harder gear than I have now. Plus the 33-tooth small chainring meant I could choose the 10-28 cassette and actually end up with a wider range on both ends and have one more one-tooth jump and avoid a final 18% jump. In my opinion, one needs to be righteously fast to consider anything but the 46/33 chainrings on a SRAM 12-speed drivetrain. And, from this baseline, opting into the 10-33 cassette gets you a one-to-one climbing gear and still a harder top gear than 50 by 11.
I can’t be faulted for trying to find alternatives, either. I steeled my stomach for some trips to the post office for returns and I ordered the THM + Carbon-Ti, SRAM’s standard Red AXS, and Rotor’s Aldhu (in 48/35, even). THM + Carbon-Ti won. I mean, look at it. It’s not without risk, though. While Carbon-Ti say that they designed these chainrings specifically so one could combine SRAM 12-speed, 46/33 chainrings, and a THM crankset, the way they fit a 33-tooth small chainring onto a 110 BCD spider is unnervingly lacking in space between the chain and the spider. It fits but only just. It almost makes me wish for 47/34 chainrings, which are a good idea that someone should make.
The bottom bracket this will be mated to is CeramicSpeed and I don’t want to talk about it. T47, though.
OK, fine, it matches the headset and that was stupidly important to me.
I’m told my frameset exists and they seem to be running out of things to do to it so I’m hopeful it’ll be in my stand very, very soon. That’s good because I’m officially out of things to bolt together.
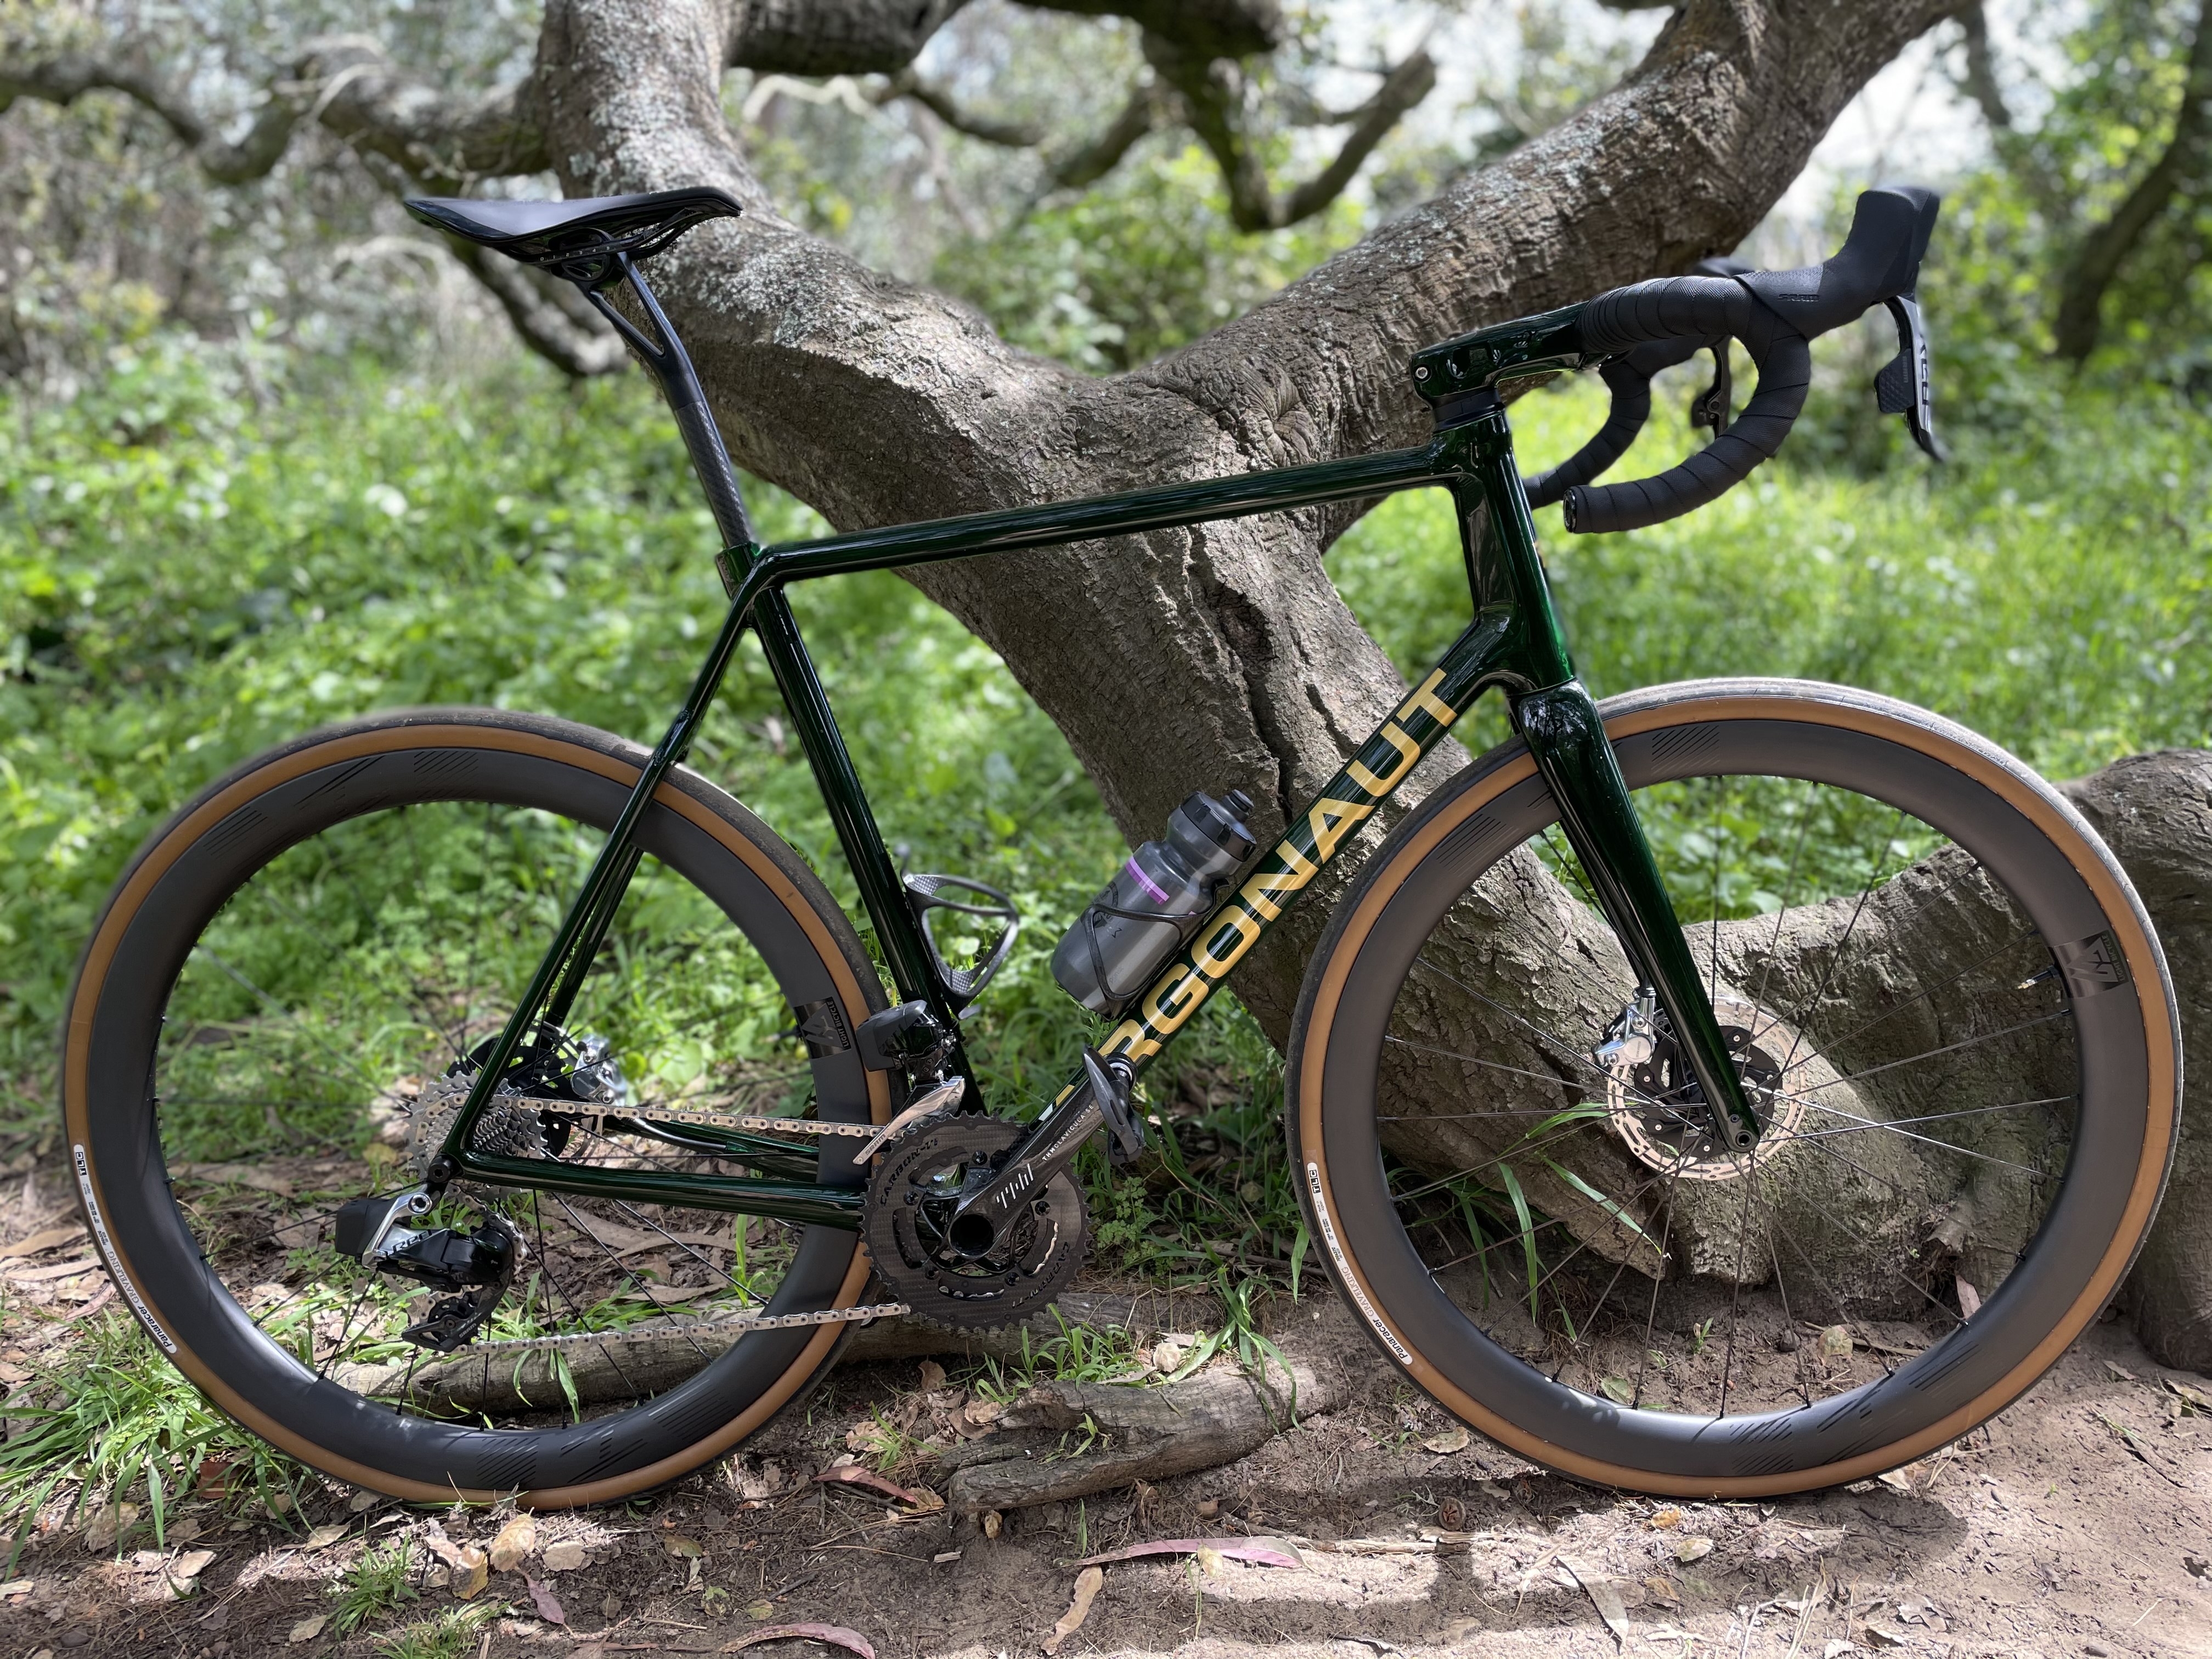
— Part of the reason Argonaut became my dream bike is how far they go to hone their craft. They’re a tiny operation practicing cutting-edge fabrication techniques. The gearhead in me enjoys every little glimpse I get into their process and tooling. The actual cyclist in me, who is not the least bit aerodynamic, appreciates their focus on ride quality instead of seconds saved over 40km. I think bikes should excite you and almost compel you to ride them; I am very, very excited to ride this one. It might not be possible to do this frameset justice with a photograph.
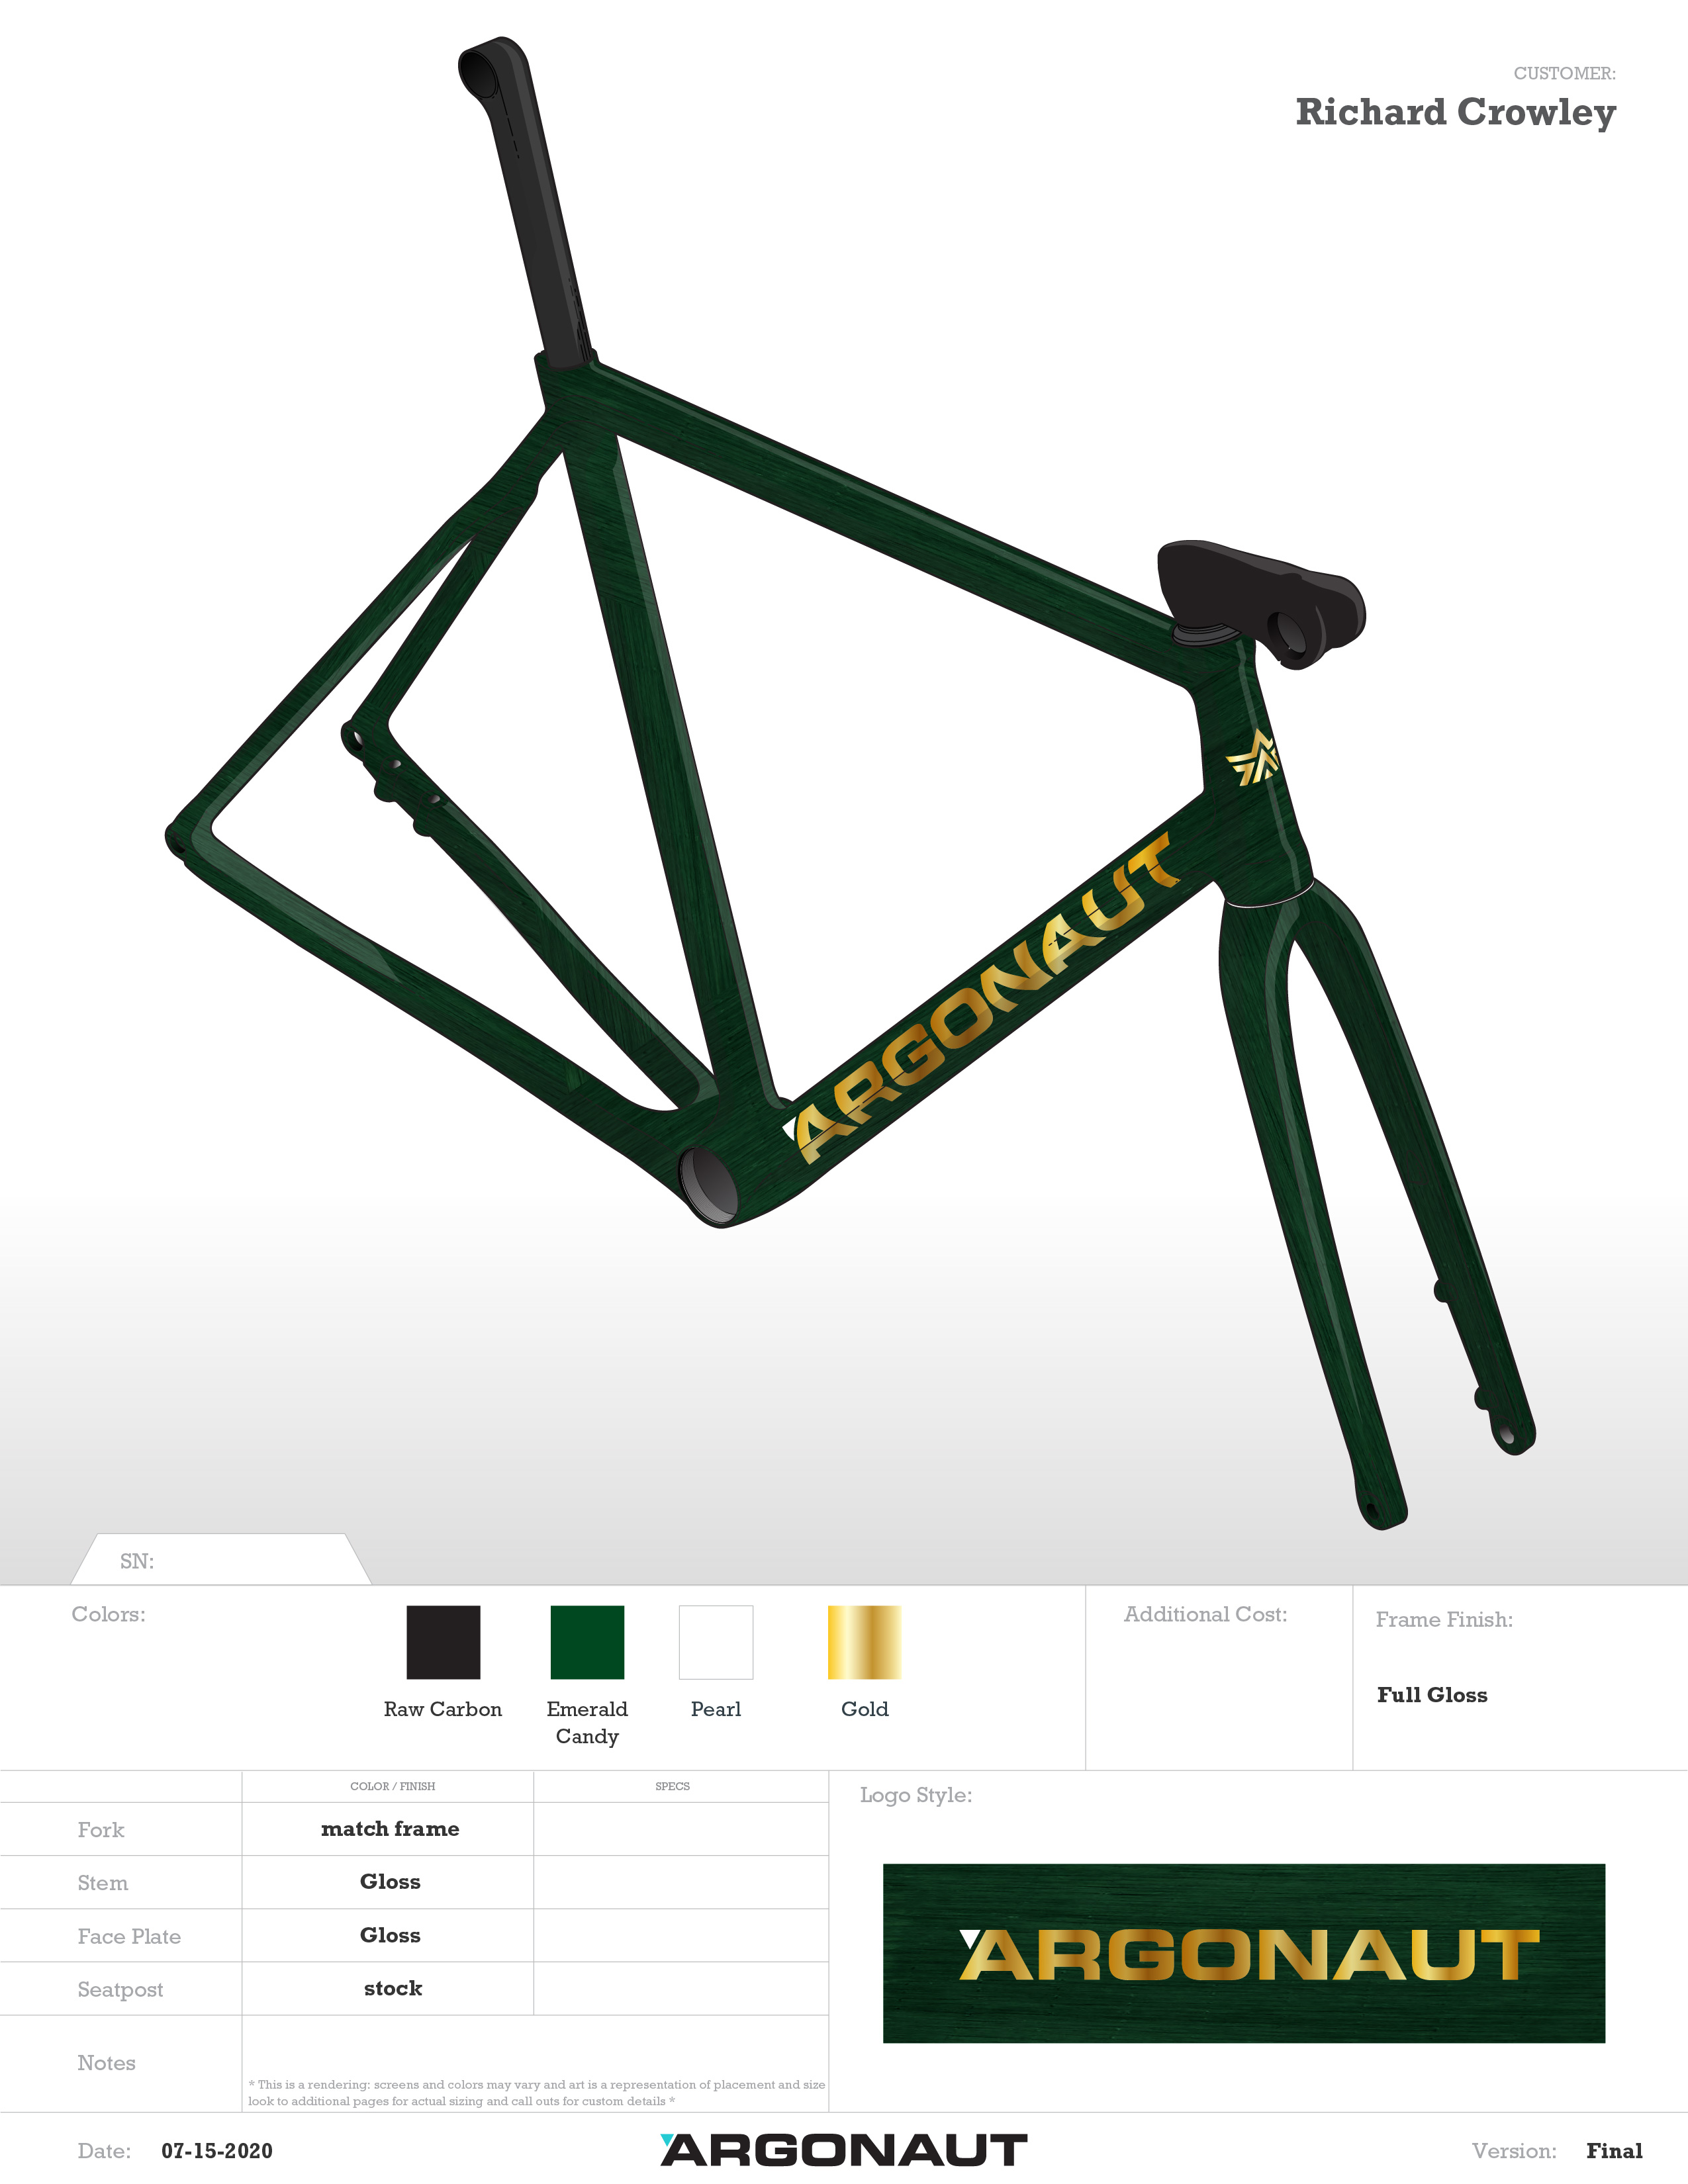
Choosing a custom frame meant the paint was not chosen for me by some product manager. Though I do love things that are red, yellow, and blue, I thought having a carbon-fiber frame painted like that would take the presumed Look fandom too far. I thought about a truly unique paint scheme of several dark greens and blues to evoke rolling forested hills receding into the distance. I chickened out. I oscillated all the way back to “just clearcoat the carbon.” I started to notice other folks’ bikes, especially ones with gold logos and accents. Gold logos and clearcoated carbon? A base color would be nice, especially if the carbon could still show through a bit. A dark green would look pretty great with the gold logos, a bit like the elusive old green Notre Dame football uniforms with their gold helmets. (Note well: Not the new green uniforms that look like they think they’re Oregon.) The proof settled it. Green and gold.

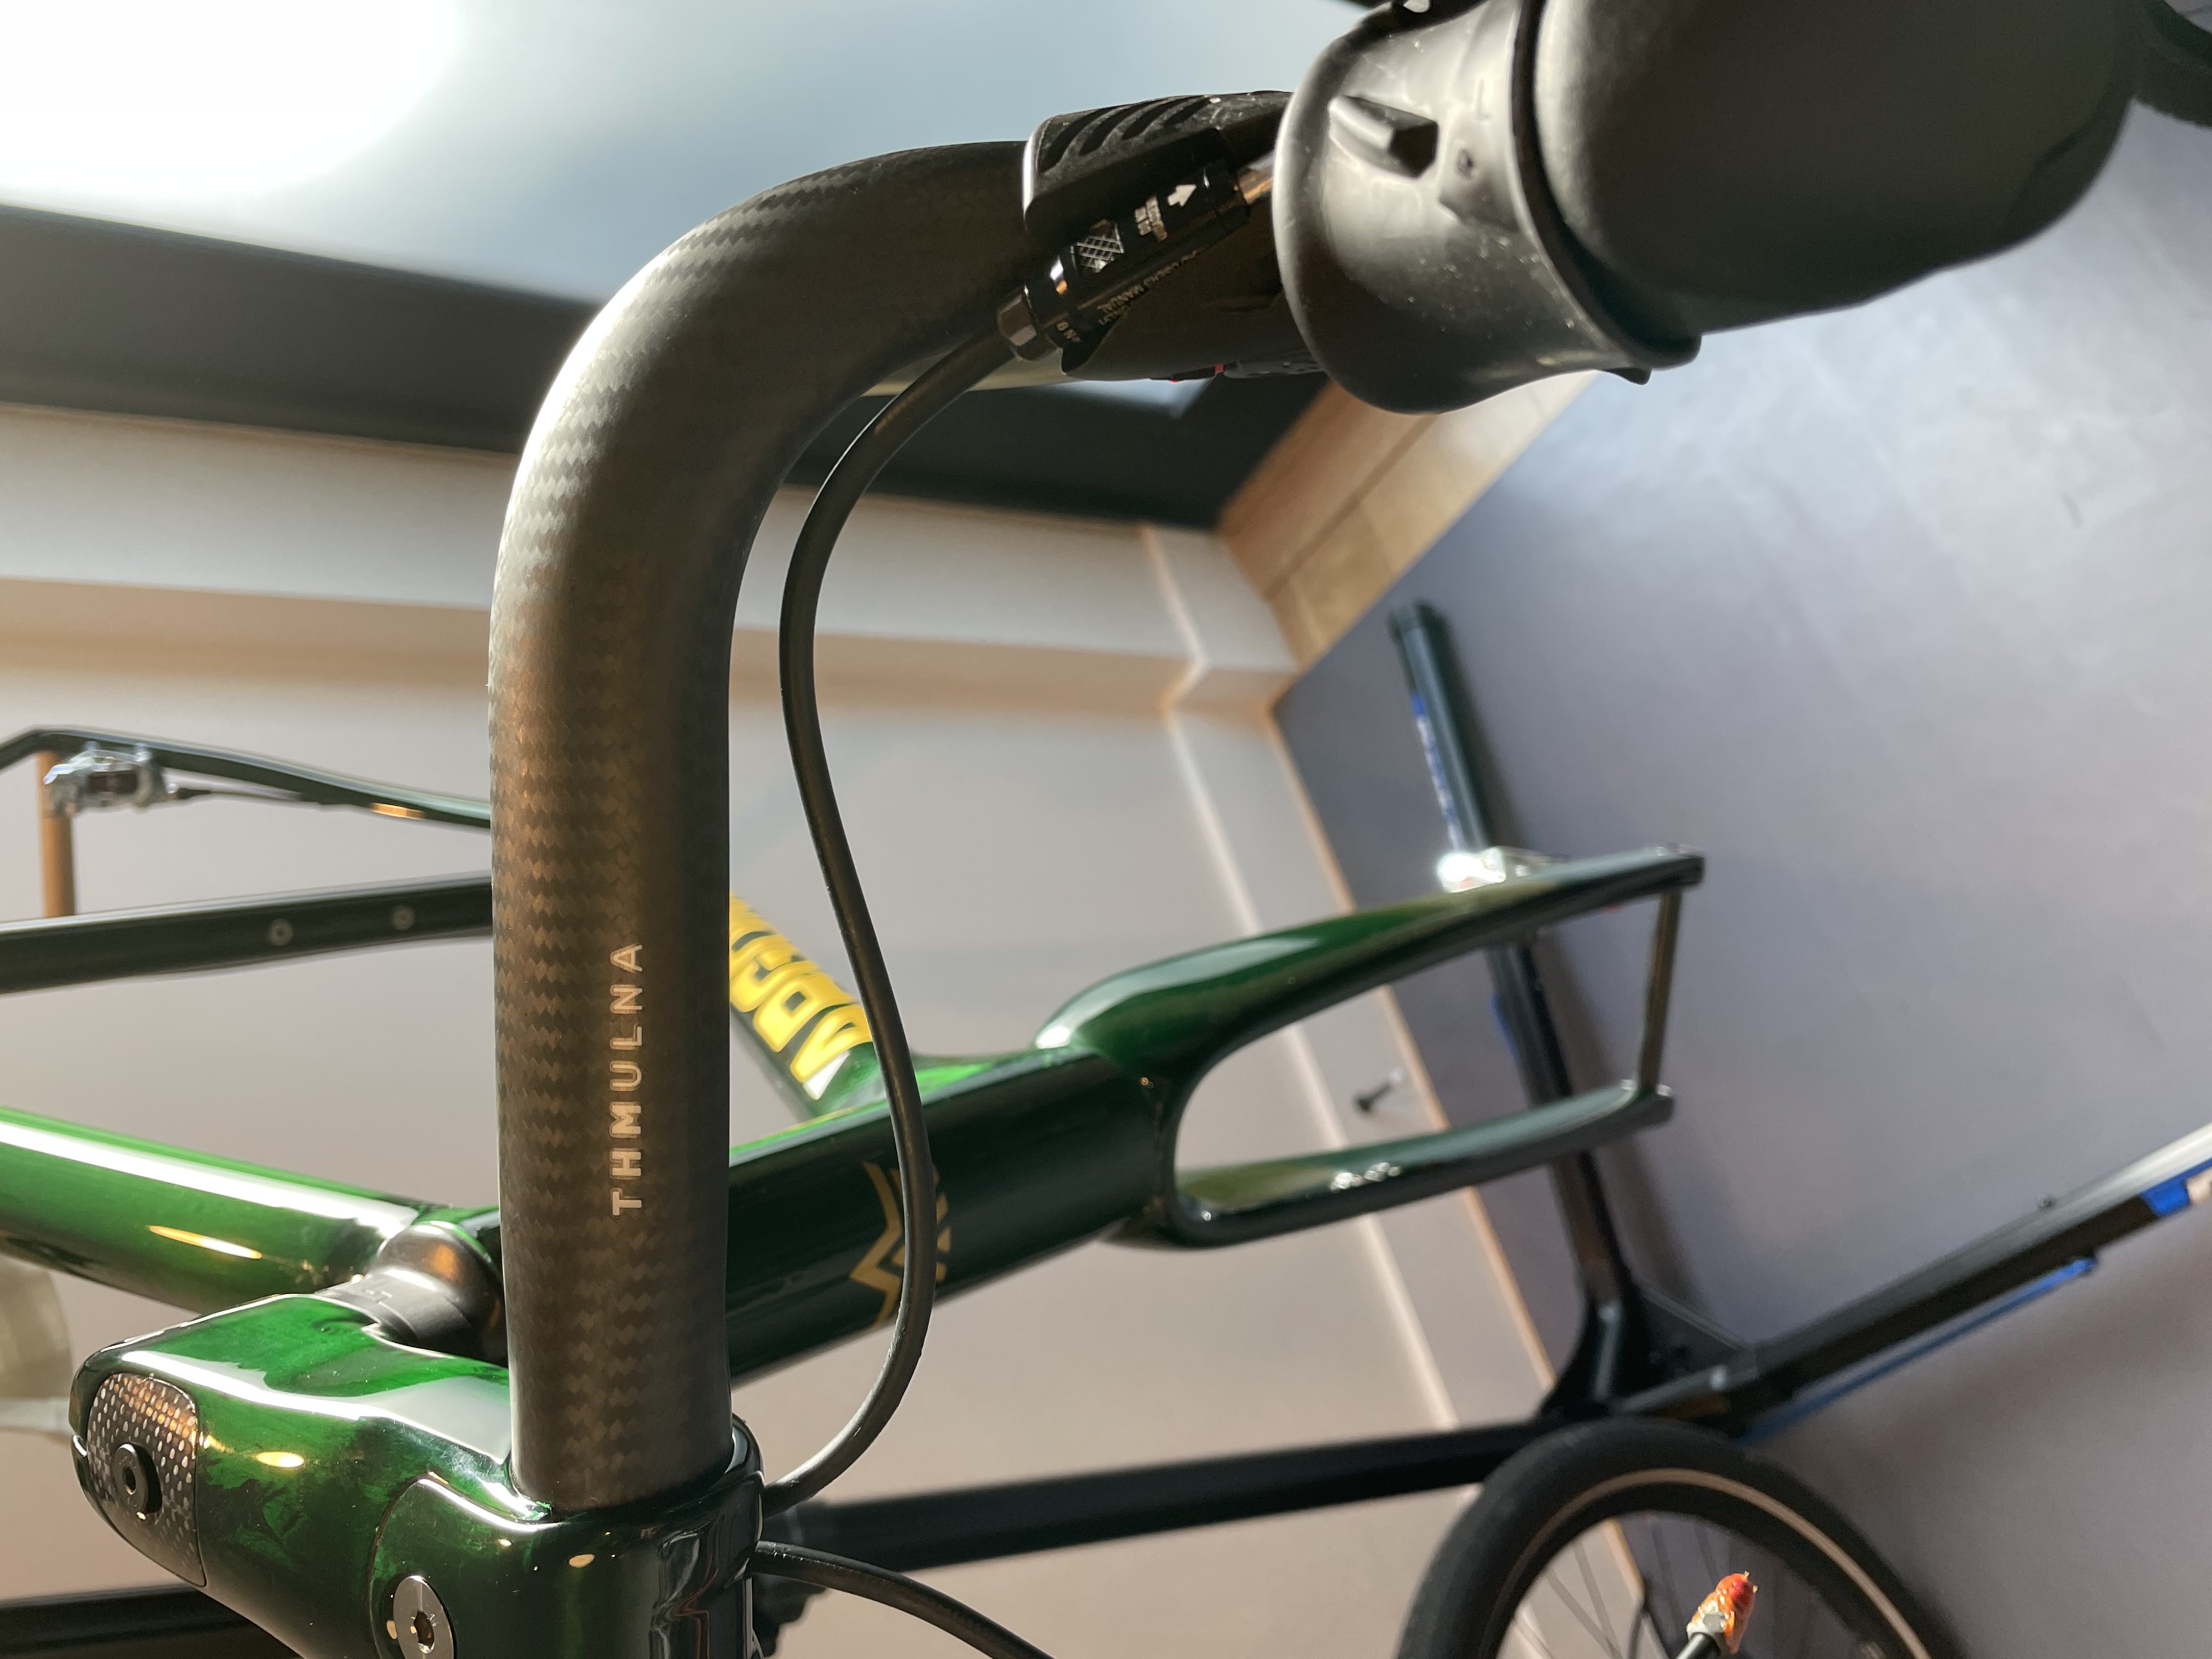
It turned out better than I expected. At first, I wasn’t going to paint-match the stem. Frankly, I didn’t think it was a very attractive stem and wanted to downplay it by matching it to the raw carbon handlebar. But, after seeing photos of the first few RM3 builds, I asked them to paint my stem, too.
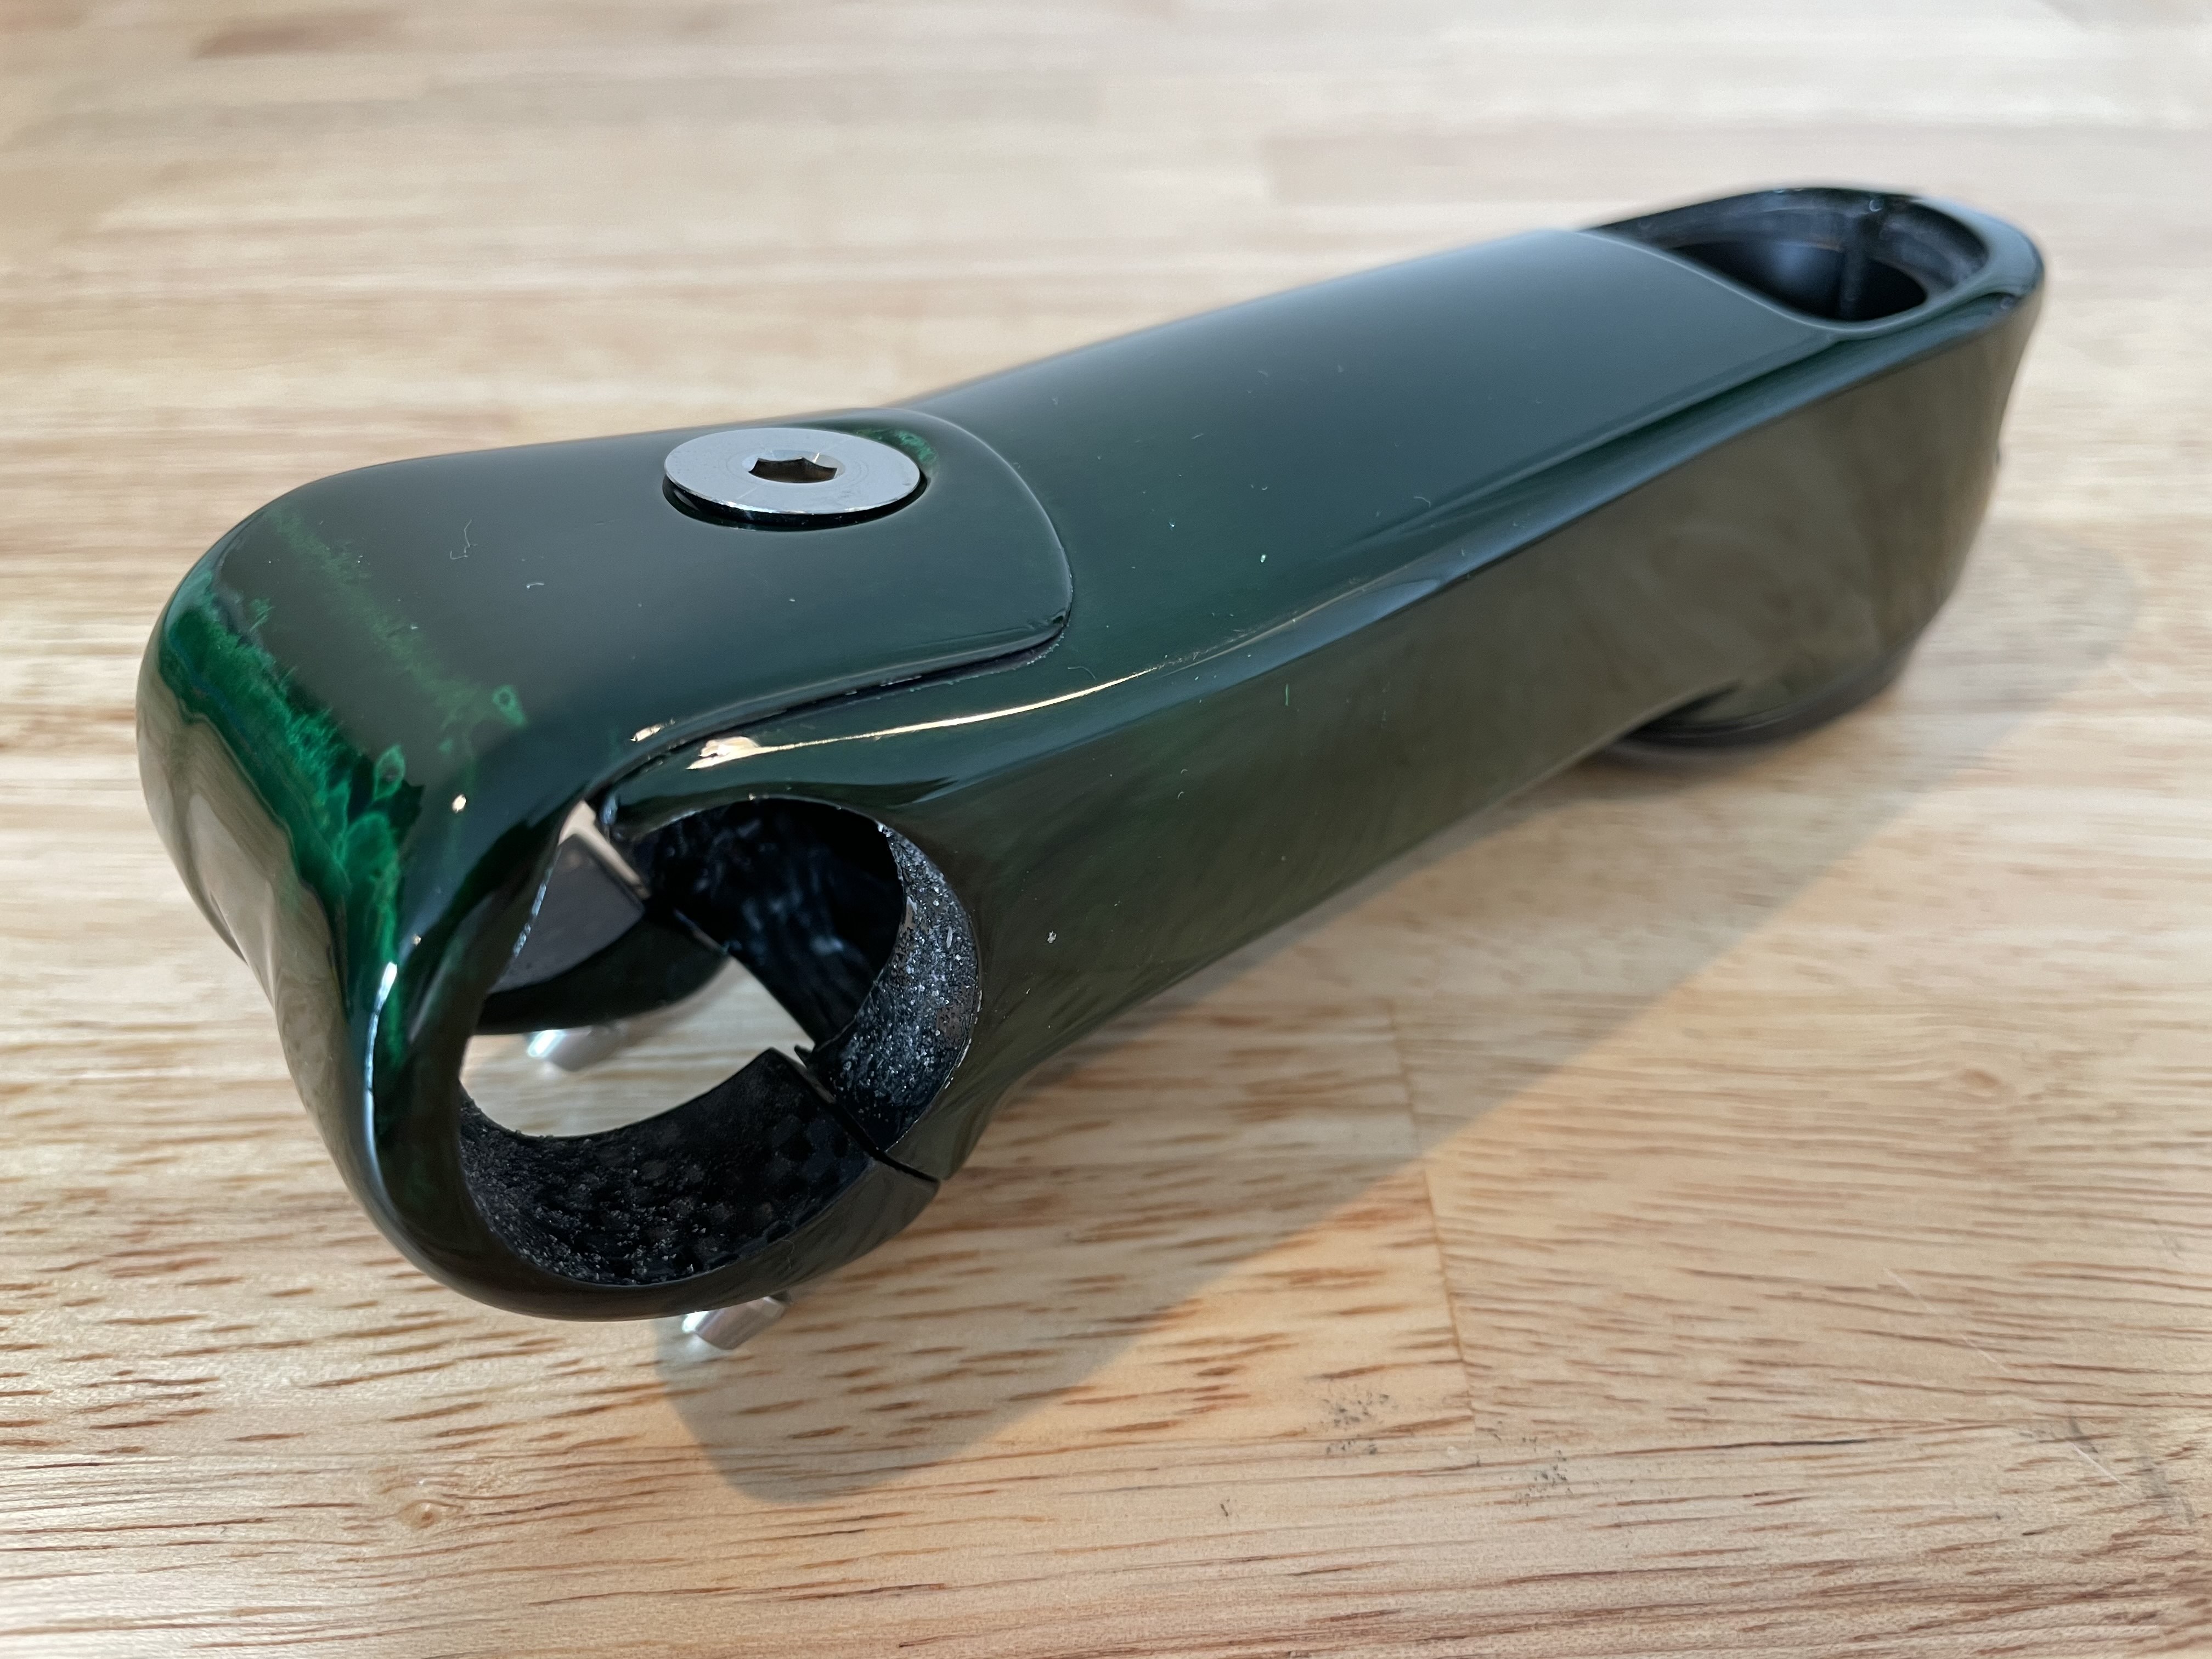
I’m glad I had the stem painted.
![]()
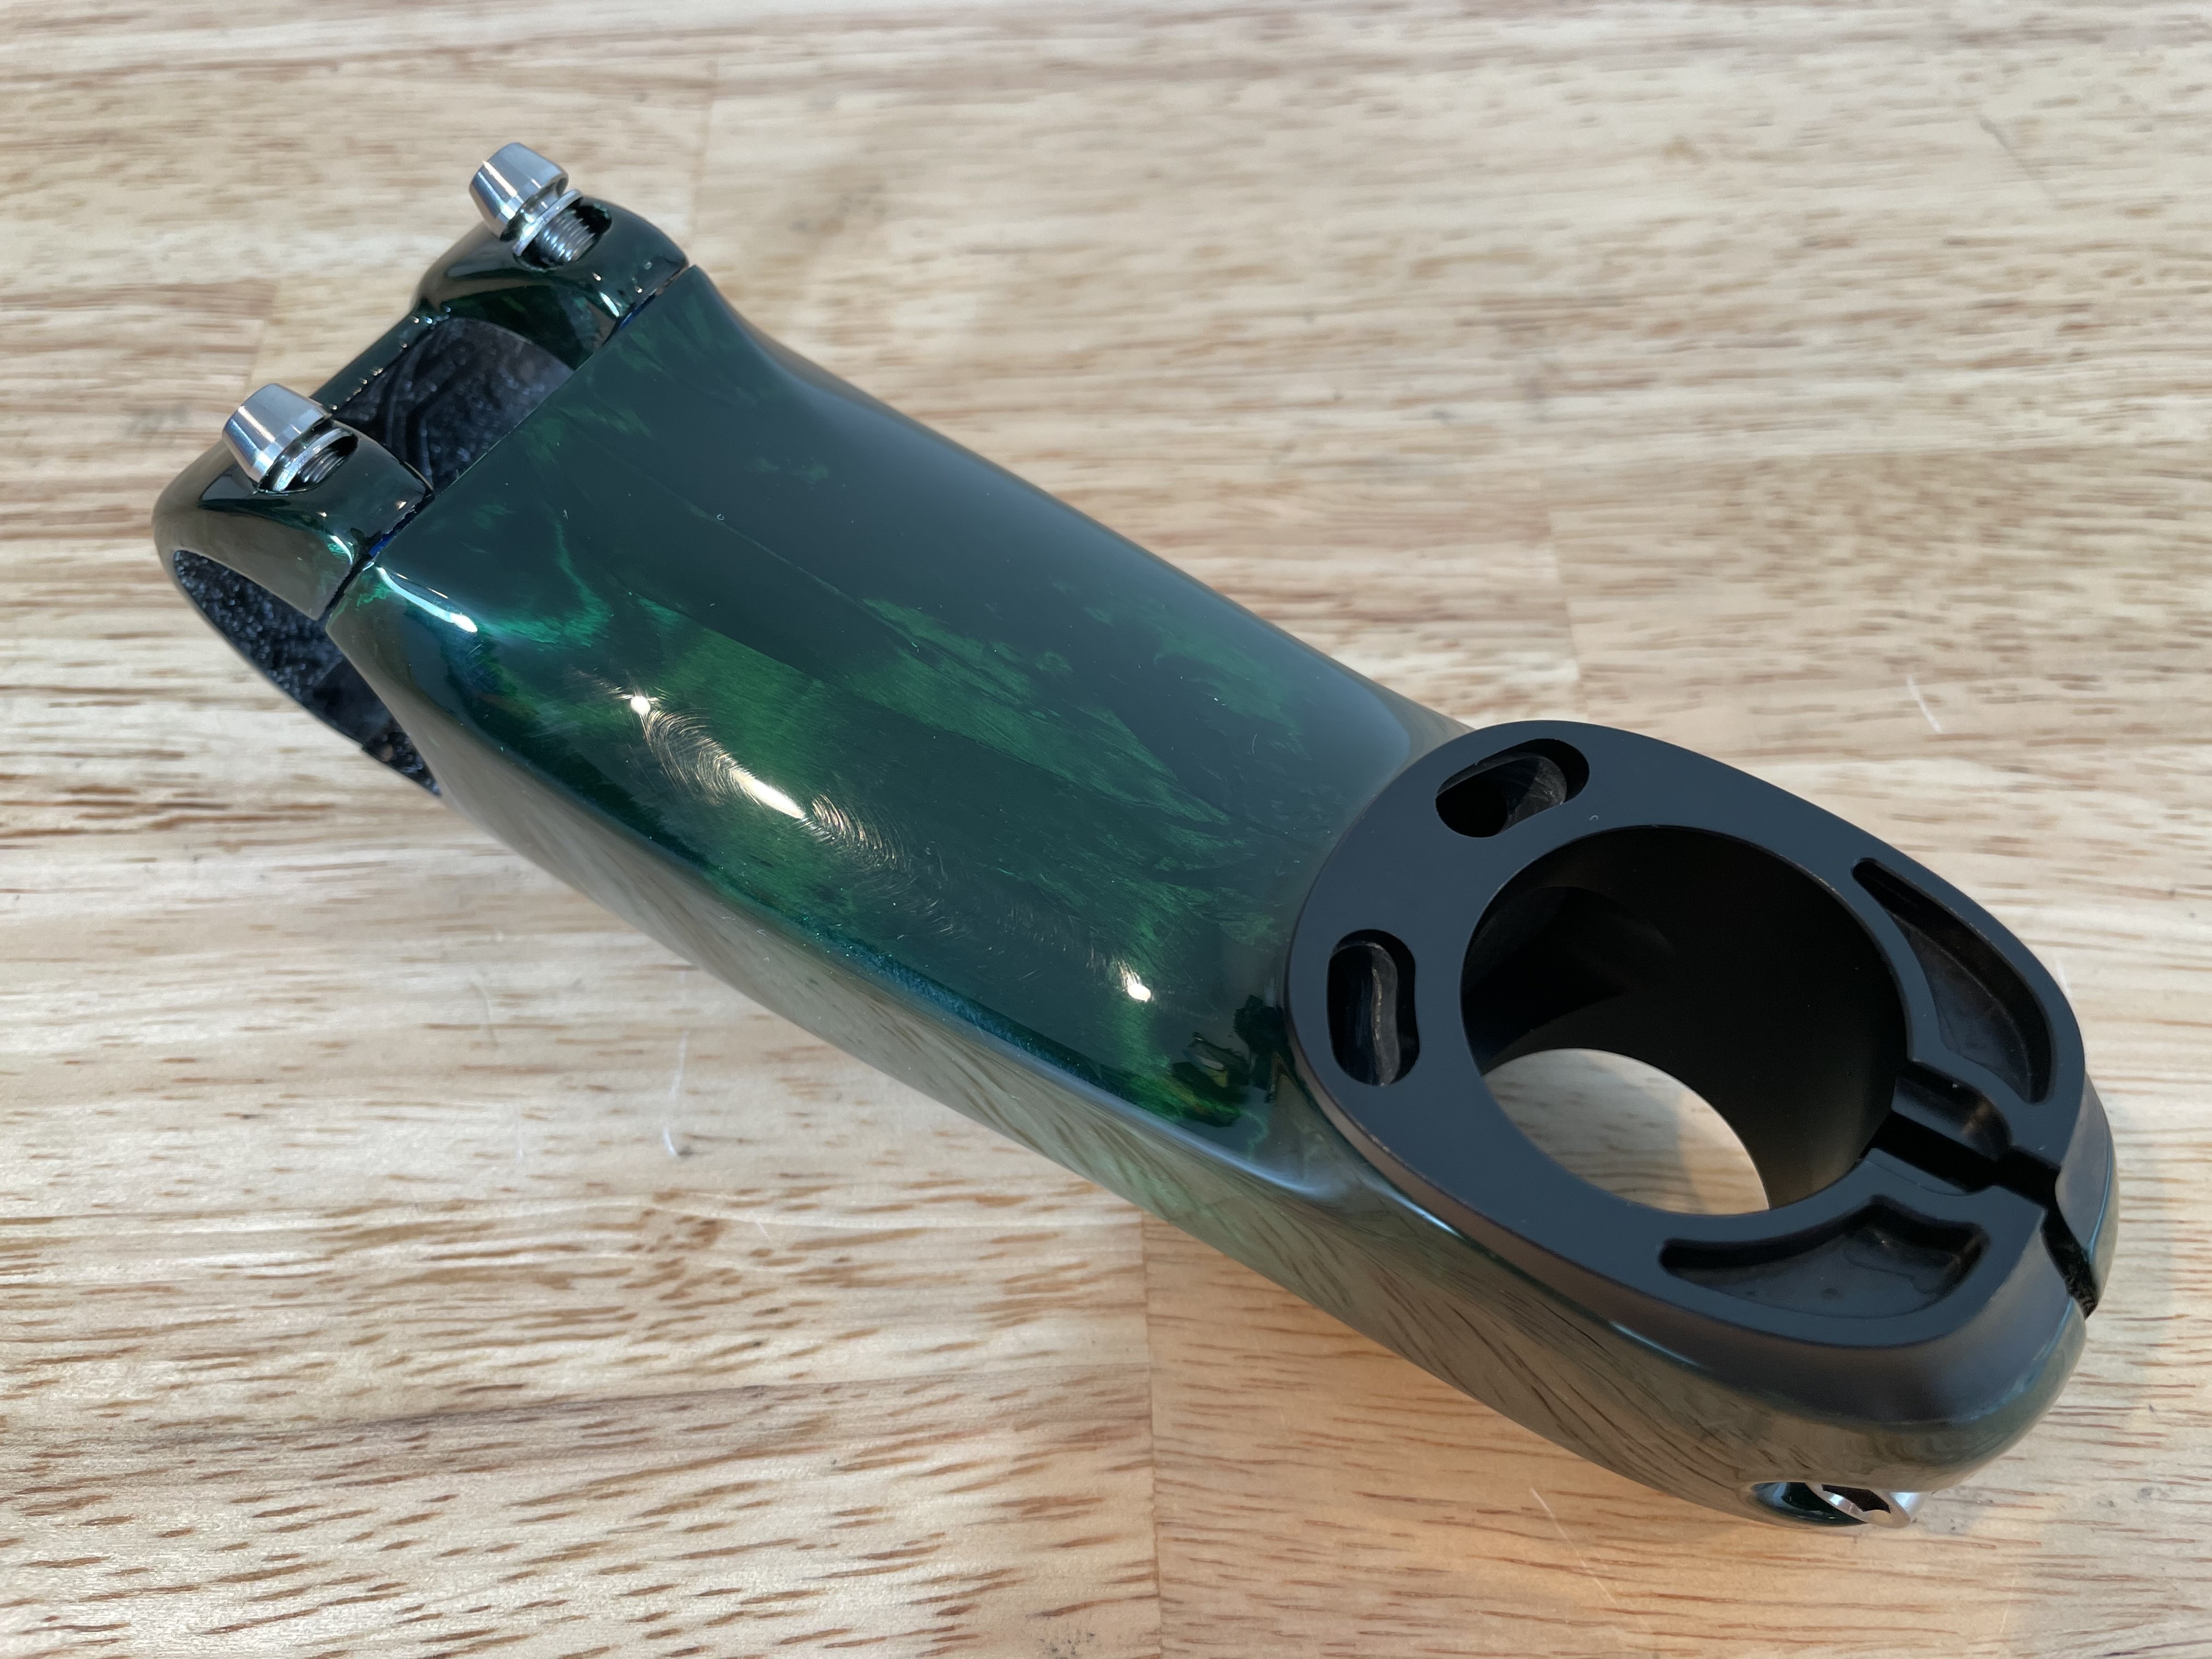
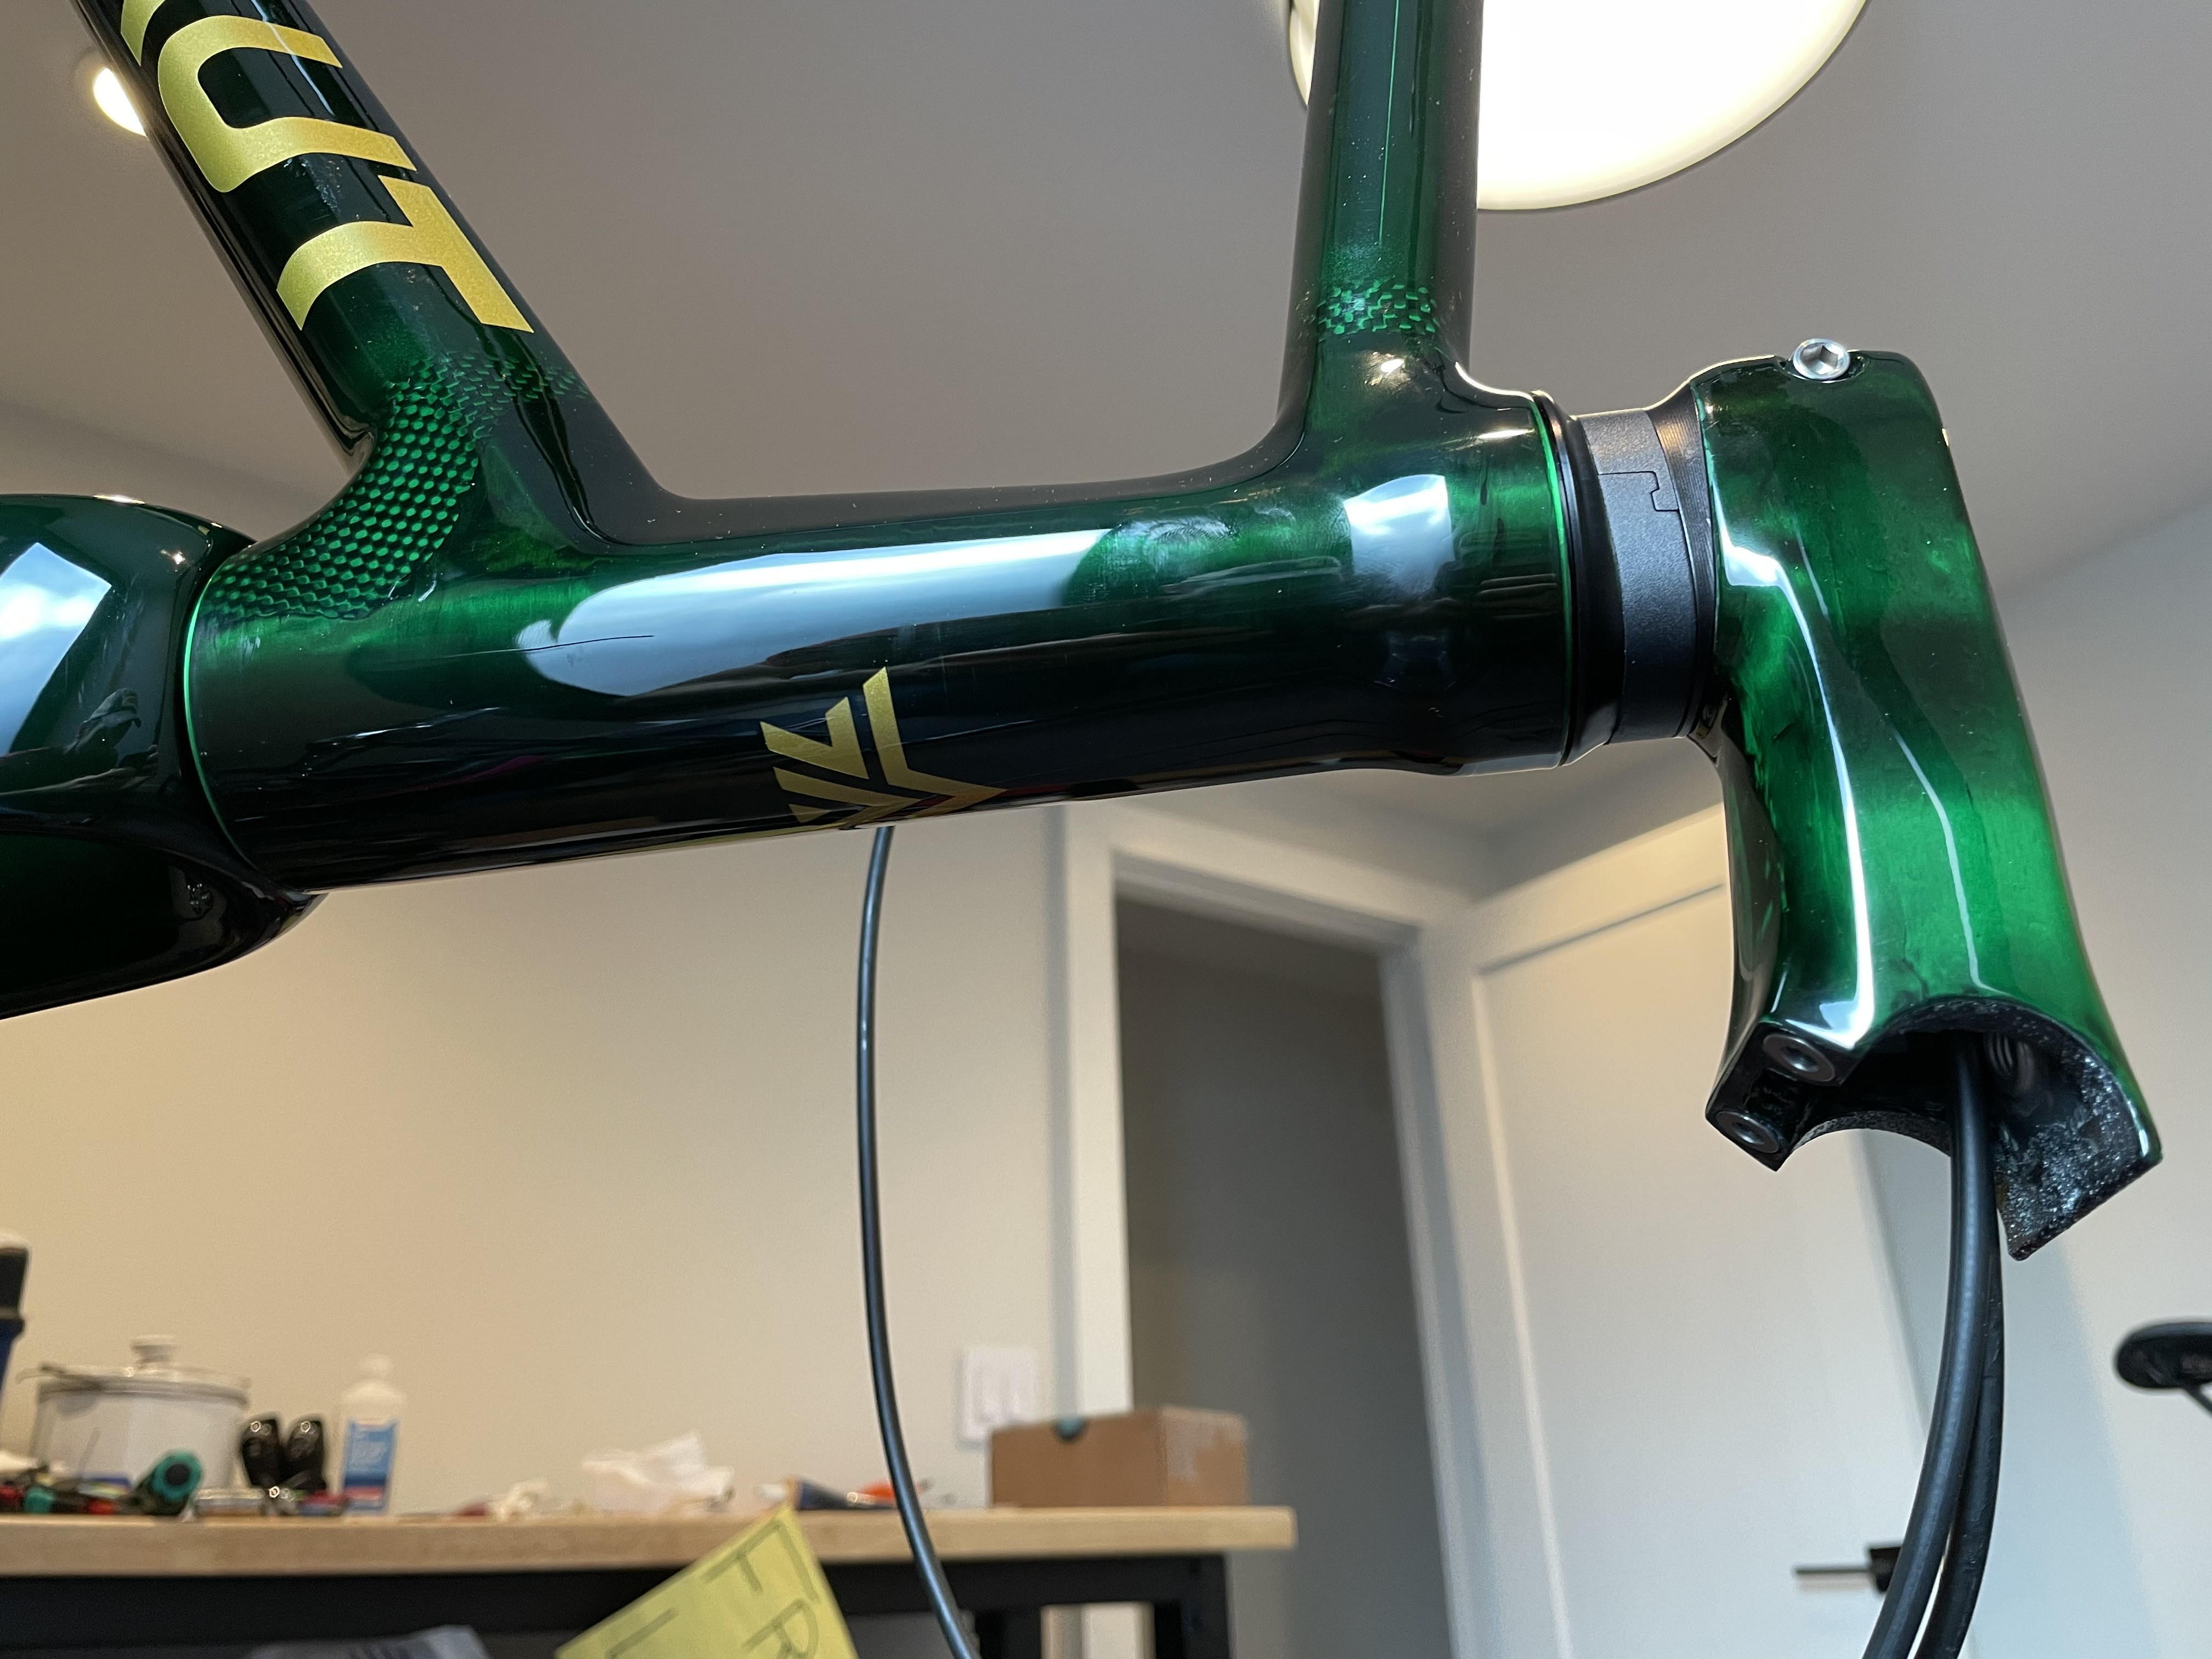
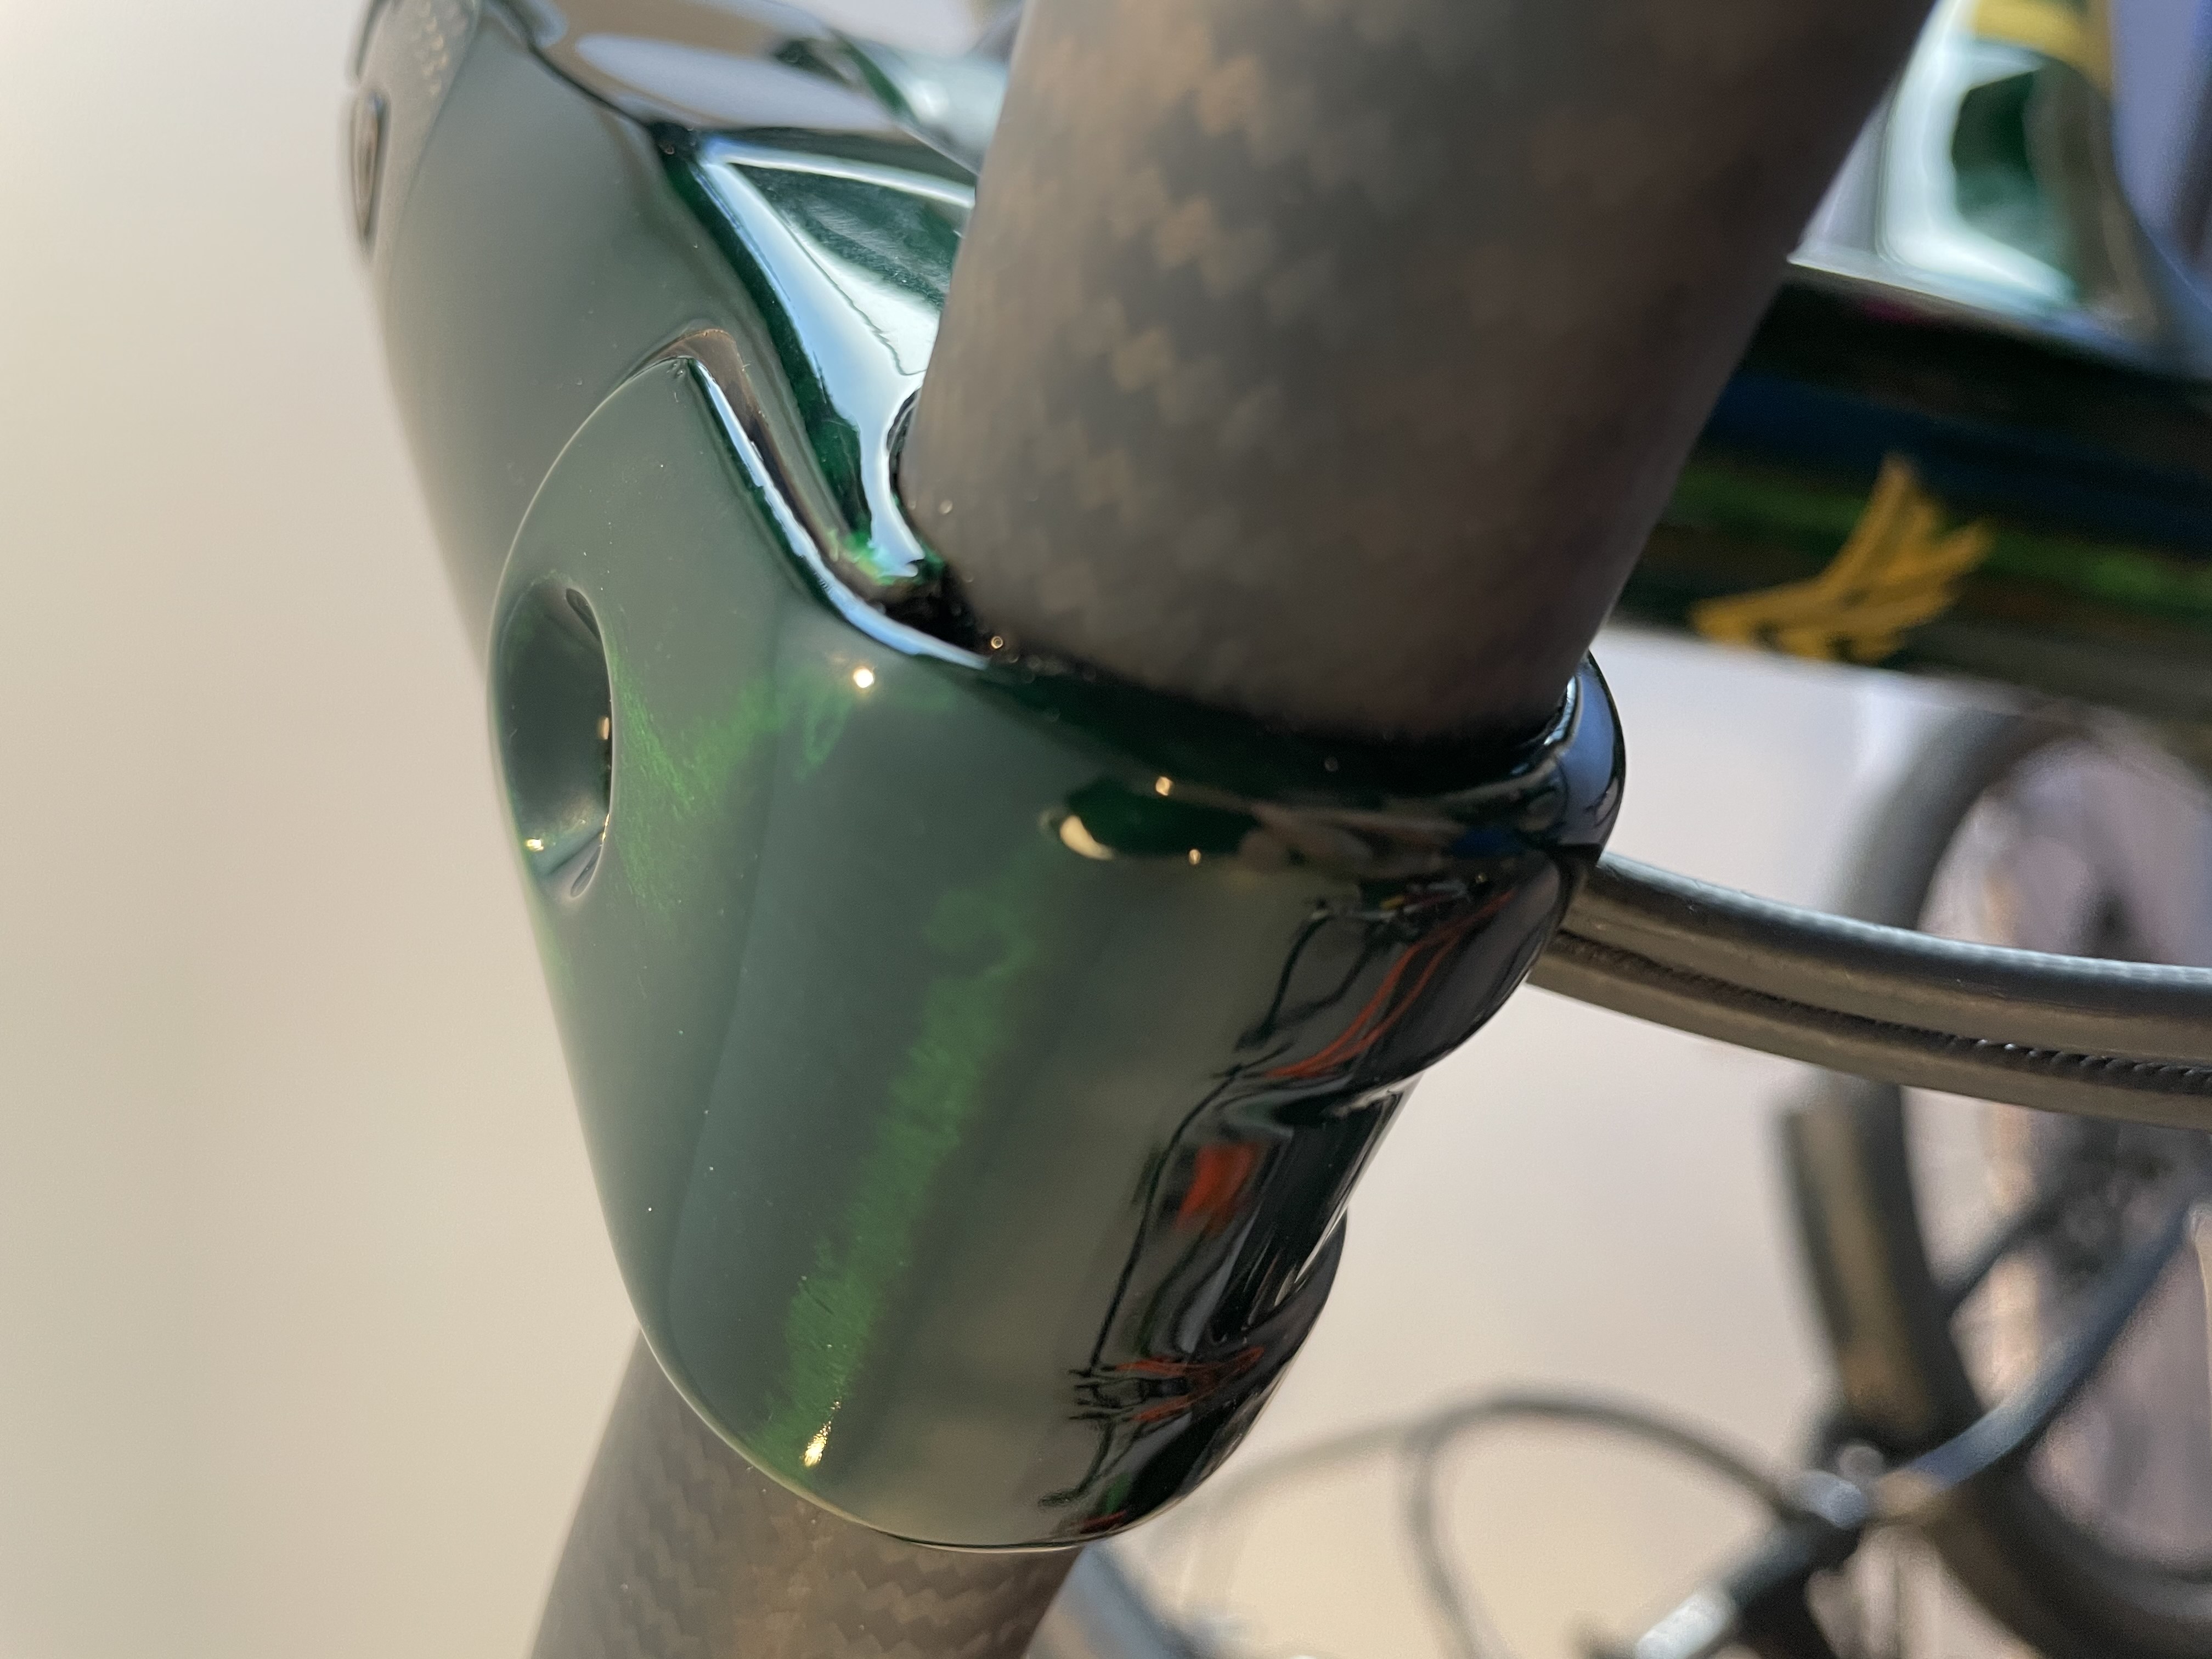
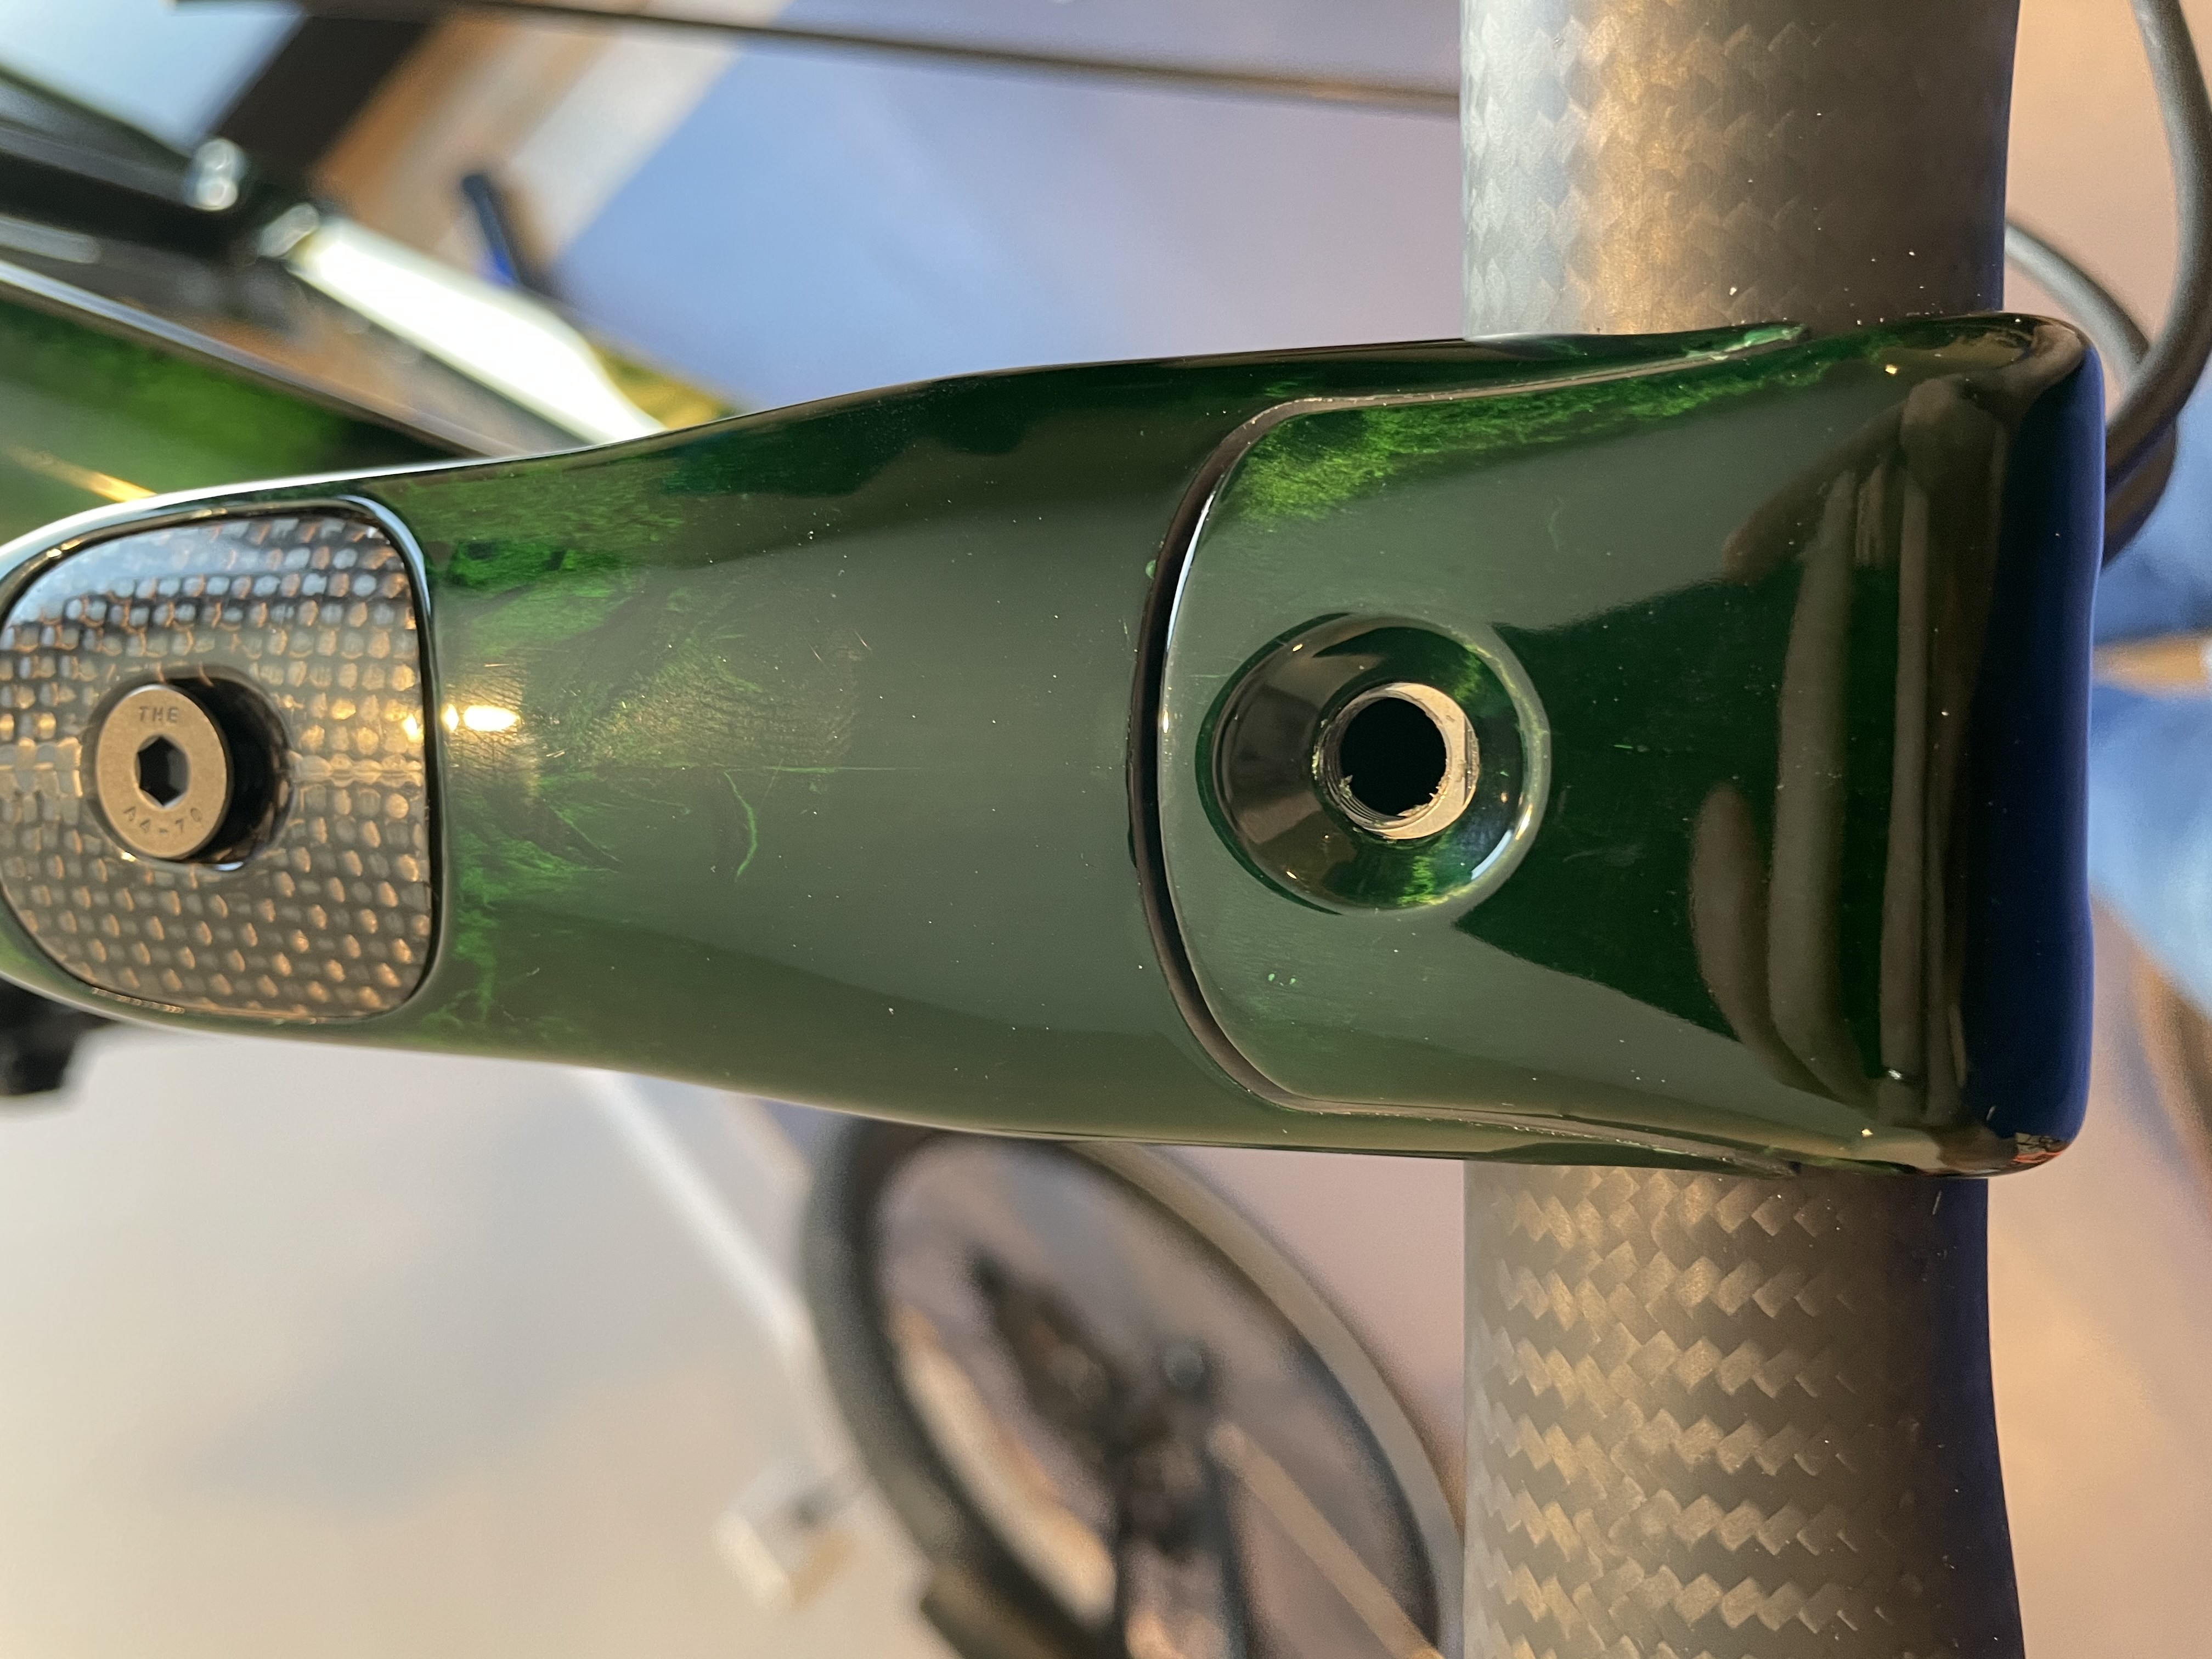
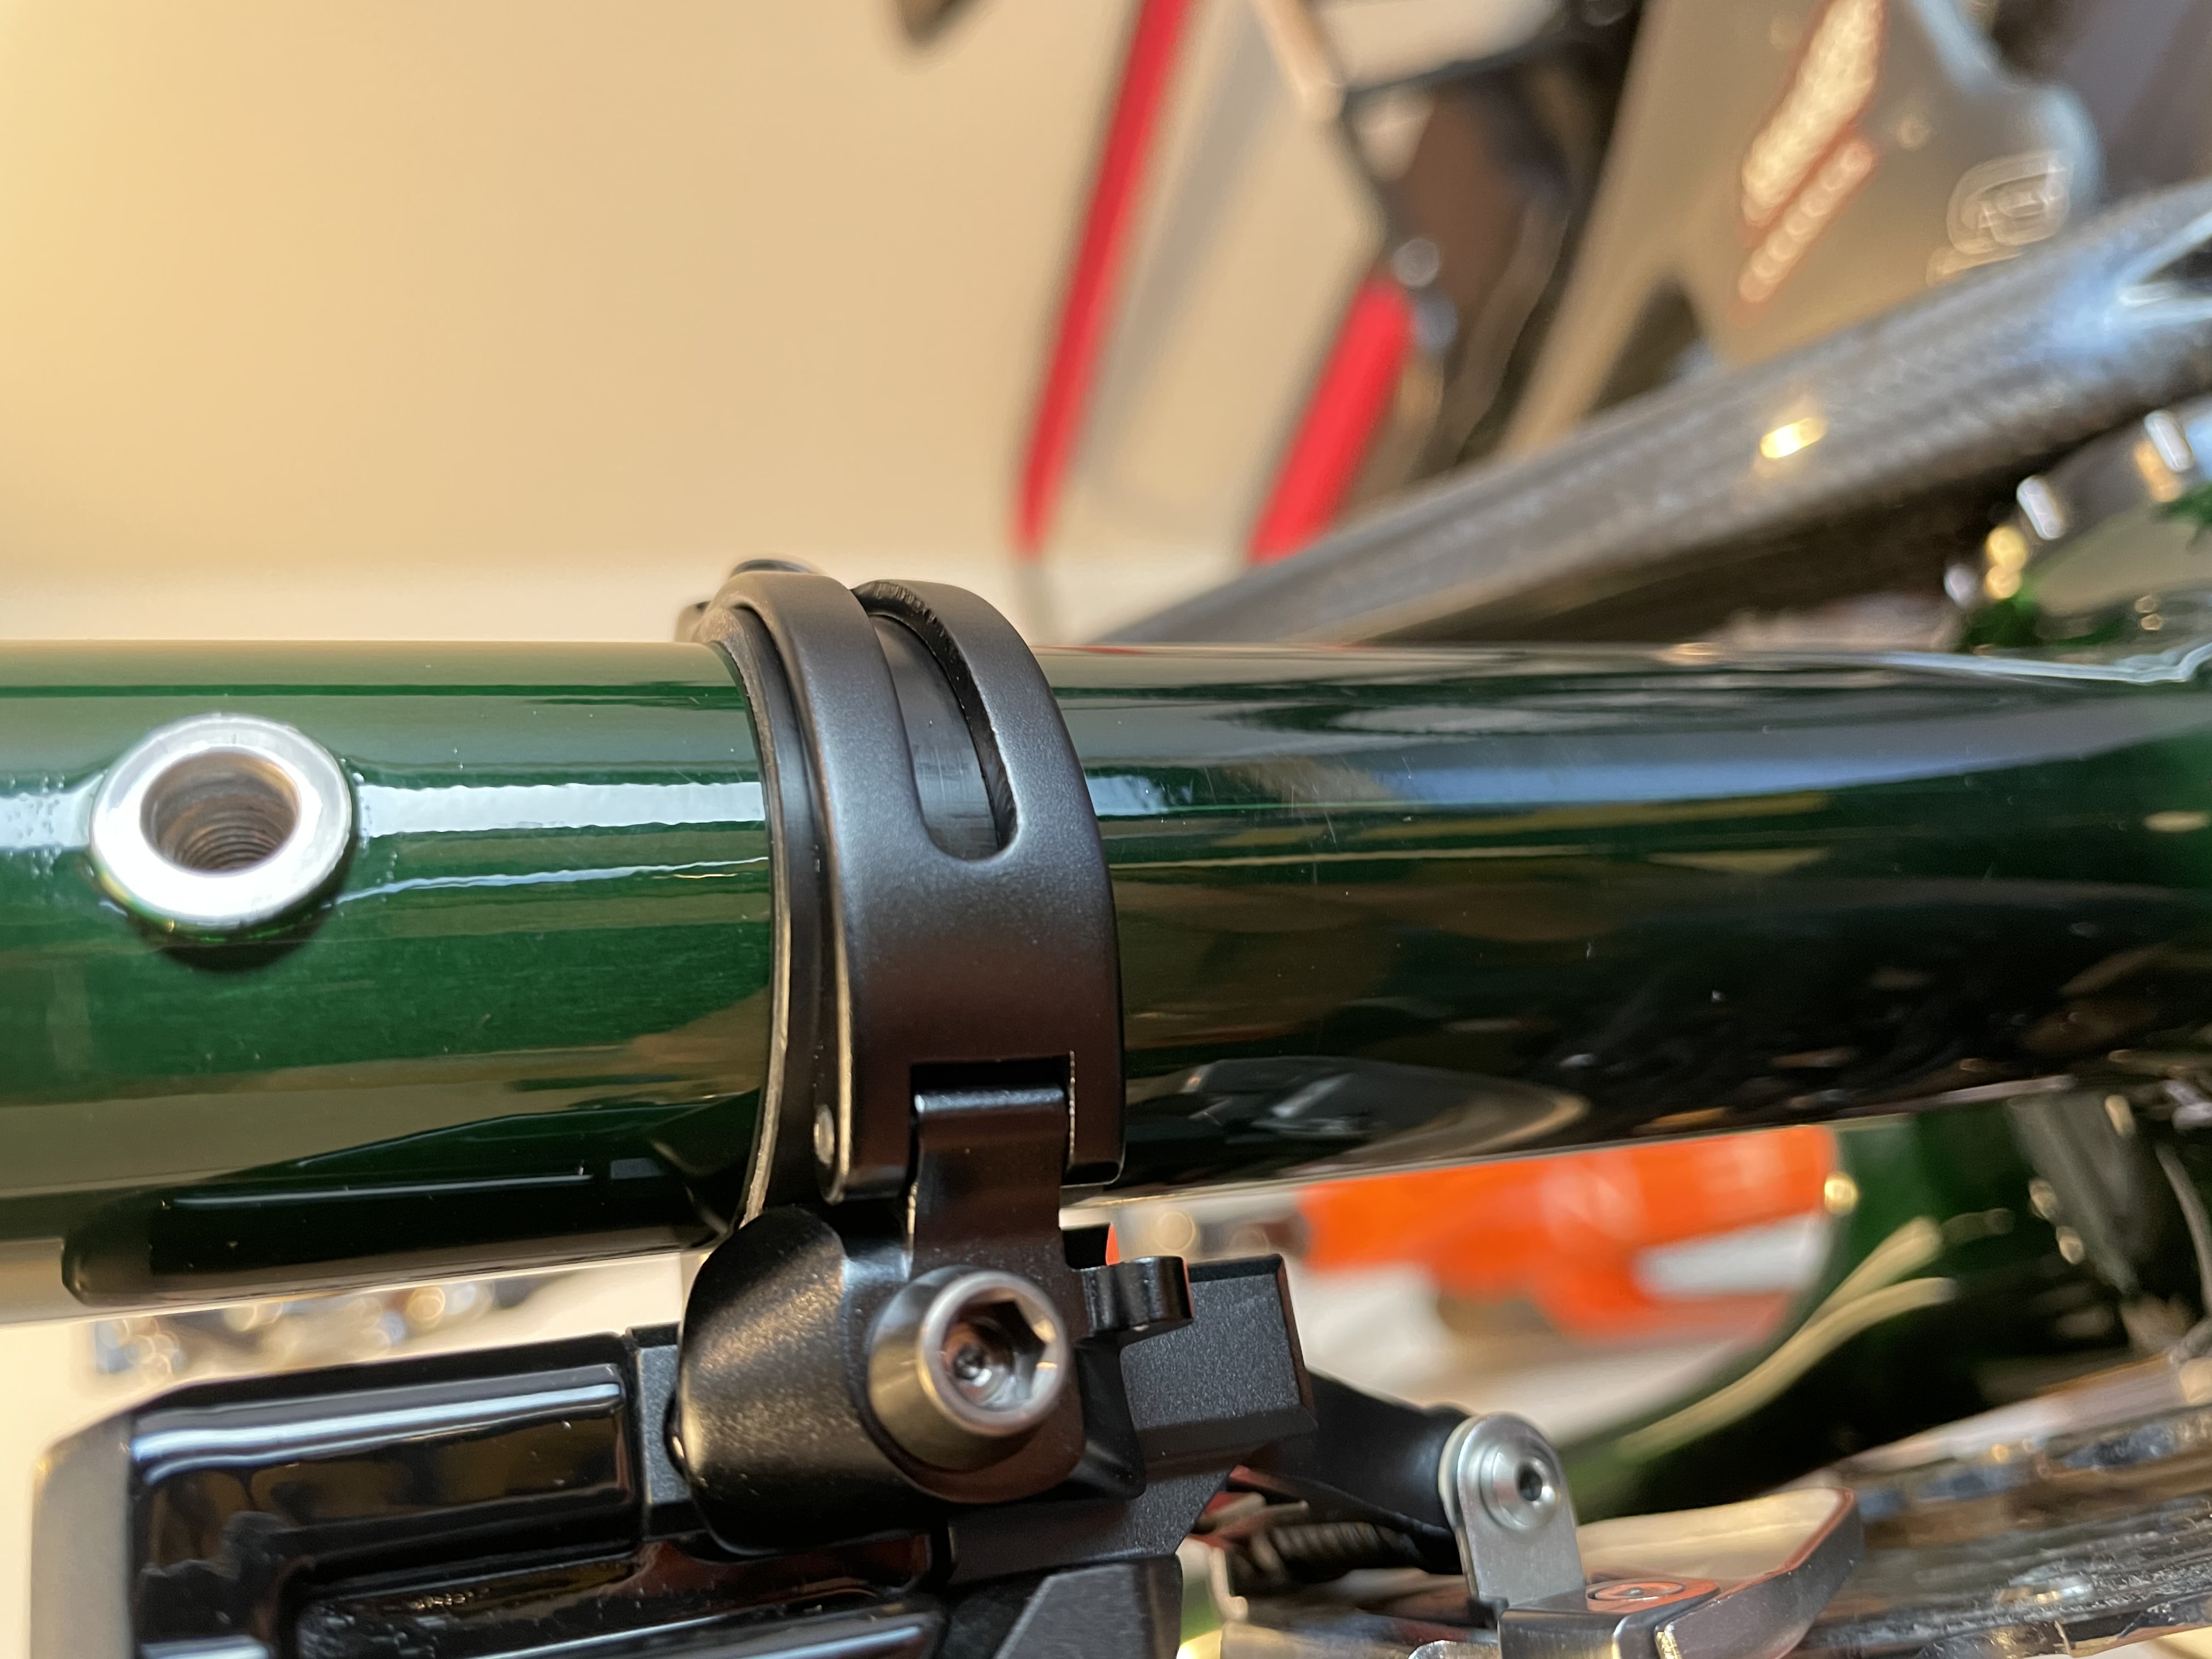
The RM3 features internal brake hose routing starting at the stem. The hoses enter the stem between the handlebar clamp bolts and exit through these two holes just in front of the steerer tube clamp. The head tube is gigantic and there’s a machined spacer to bridge the gap between the bearing and the steerer tube while reserving two holes for the brake hoses.
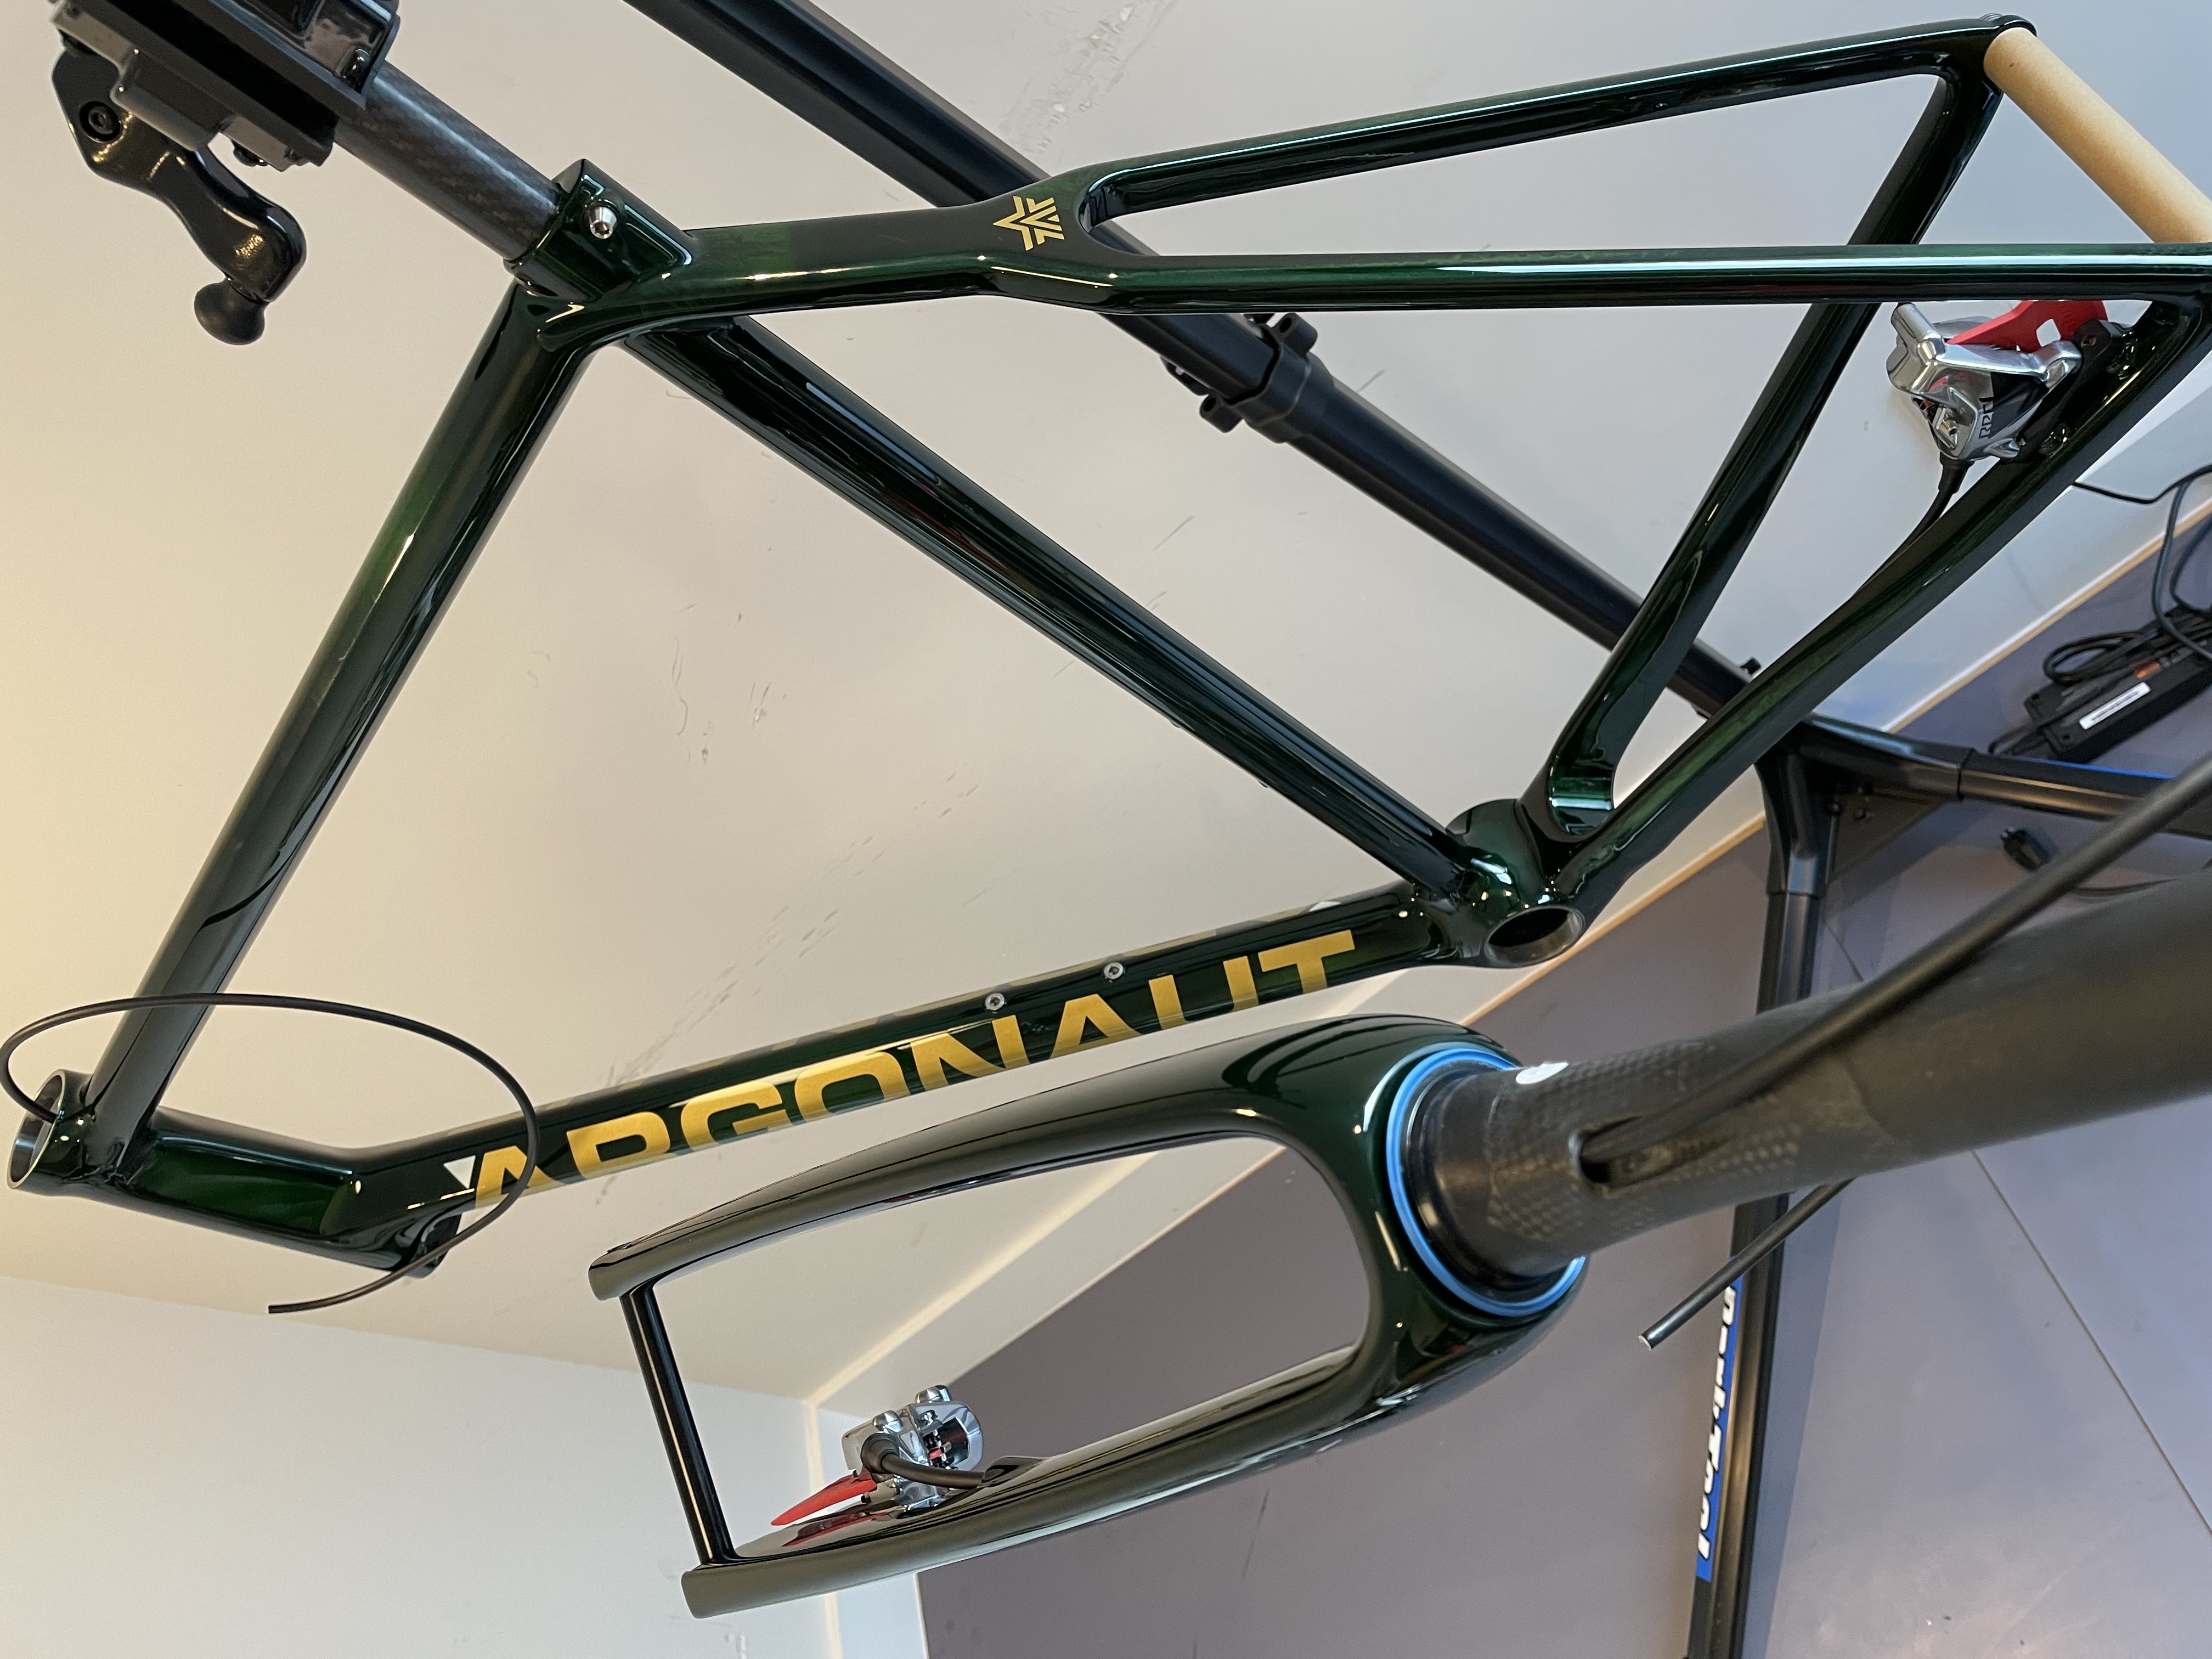
Never have I experienced such a smooth internal brake hose routing process. The channels in the downtube and fork leg are simply perfect.
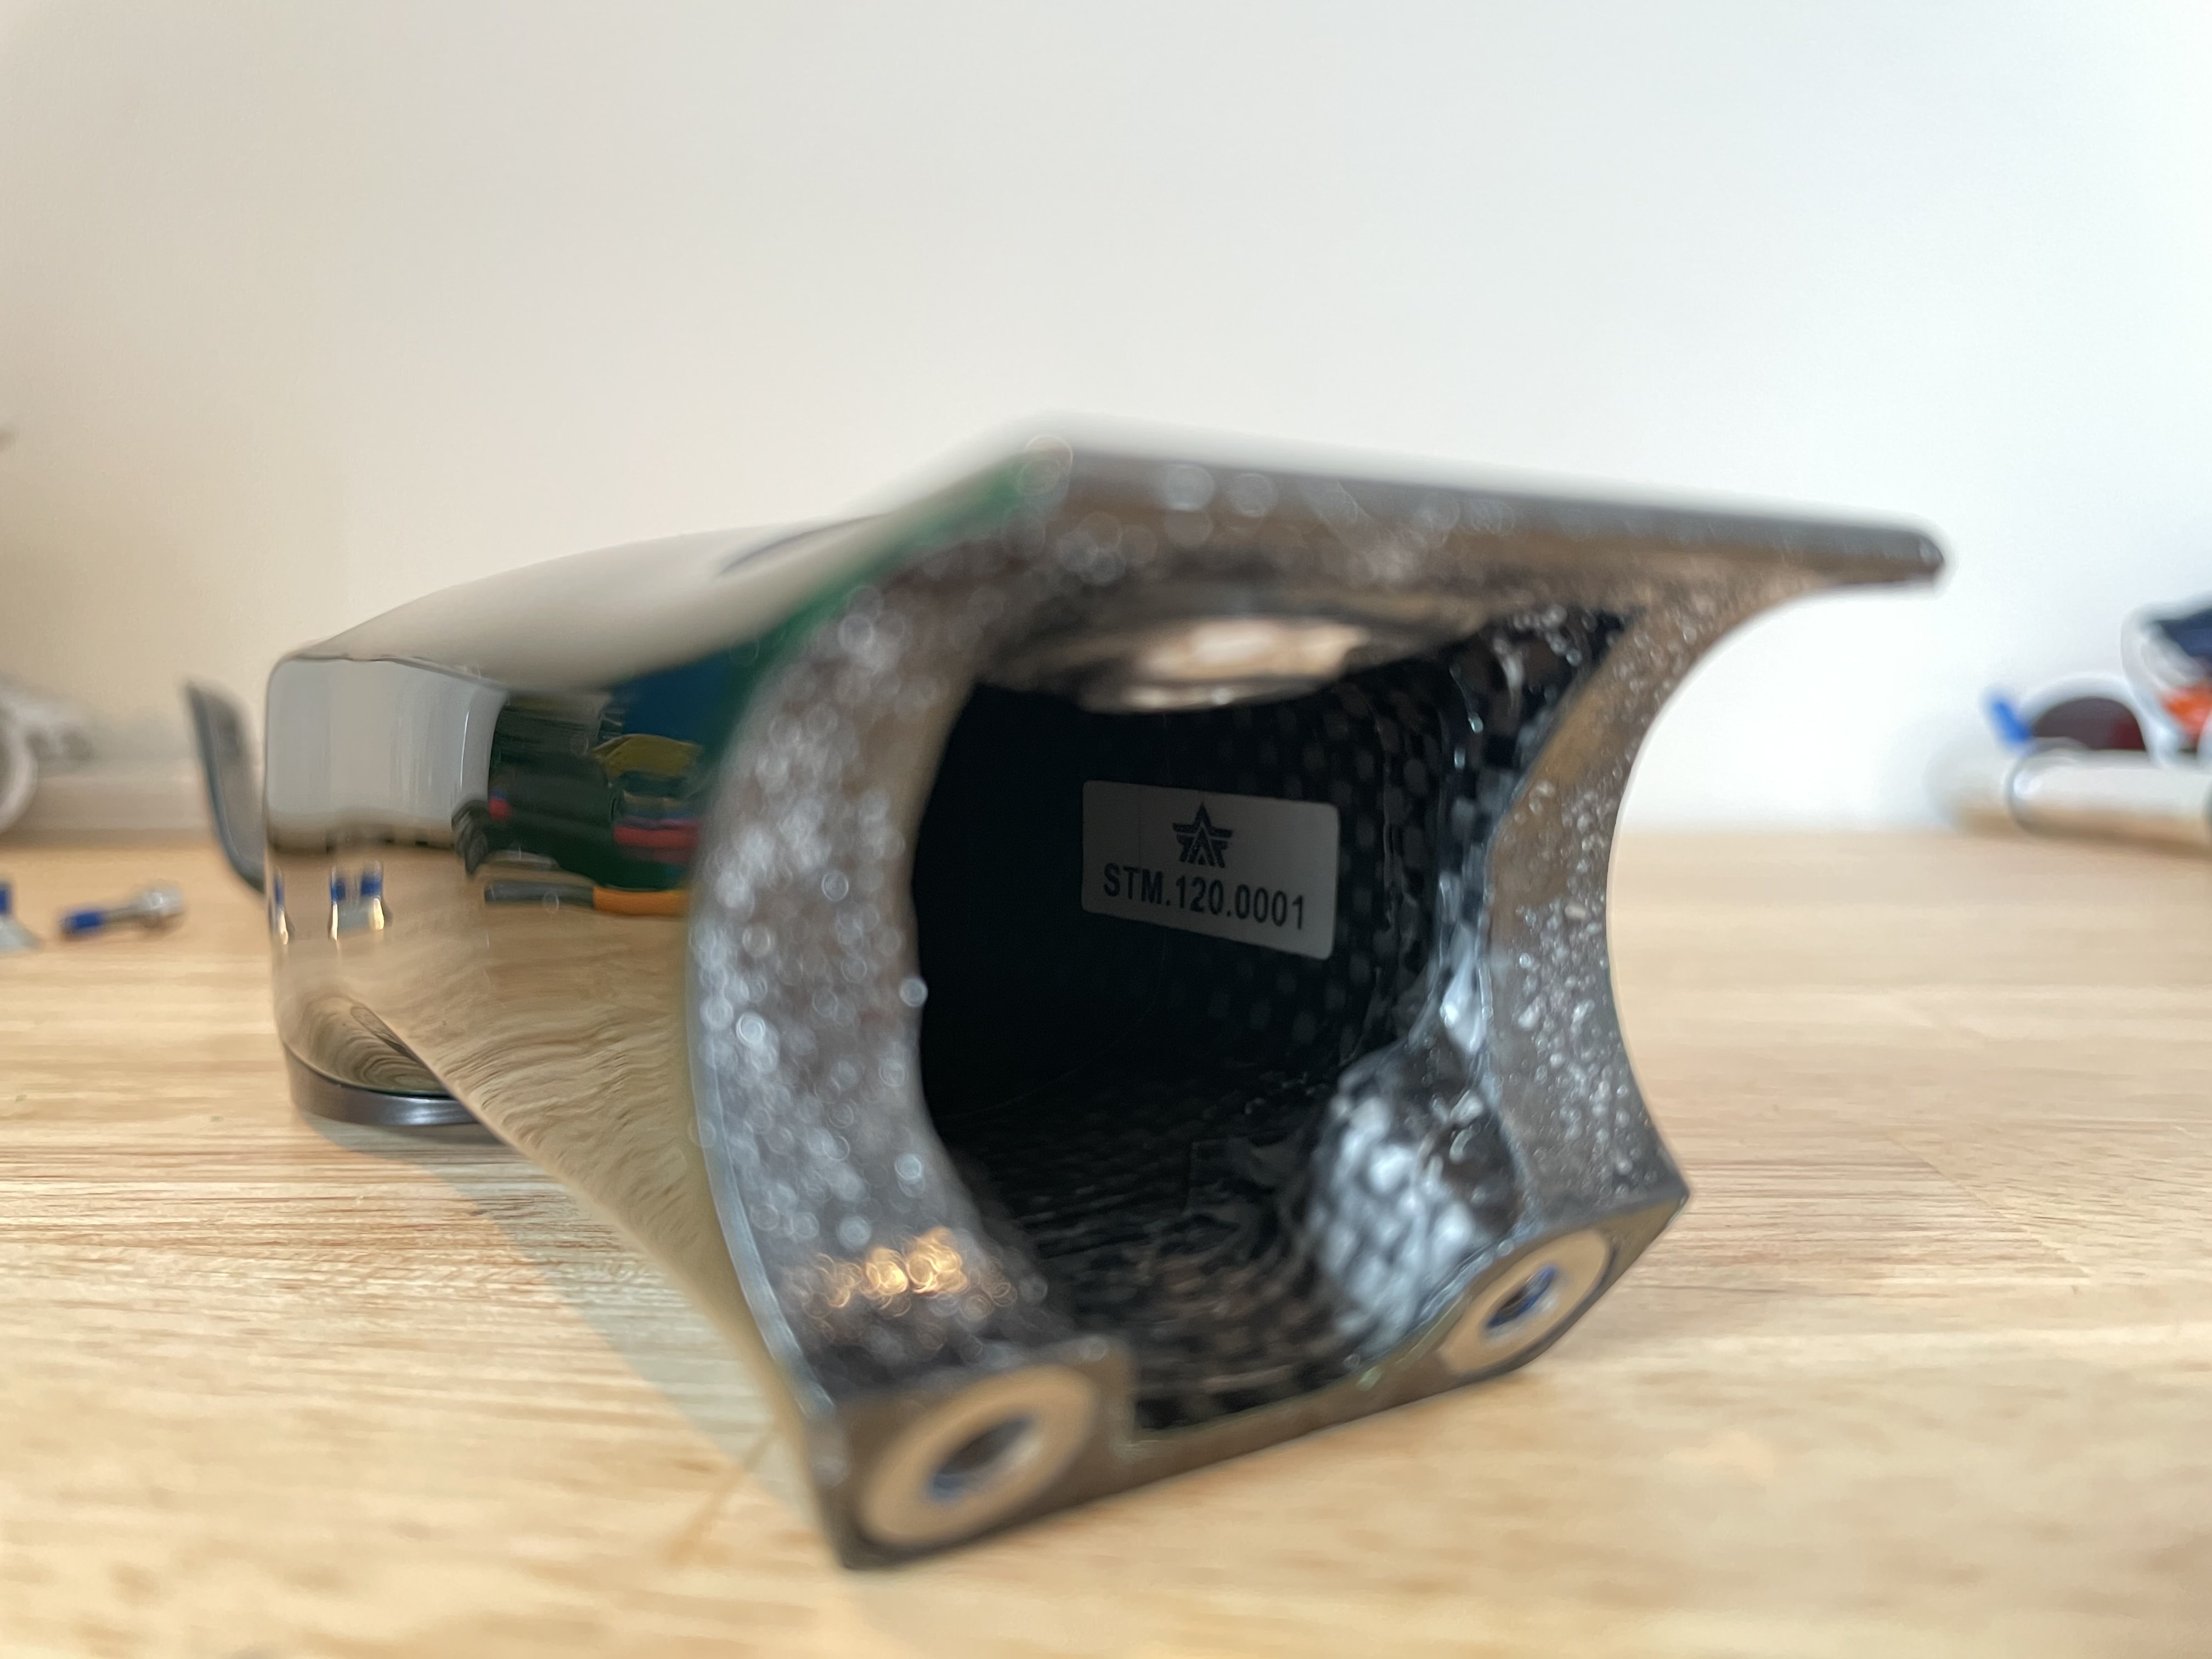
Unfortunately, this is as far as I can really go today because they painted and shipped the wrong size stem! (Note the “120” on the label inside the stem. It’s supposed to be 100mm, not 120mm.)
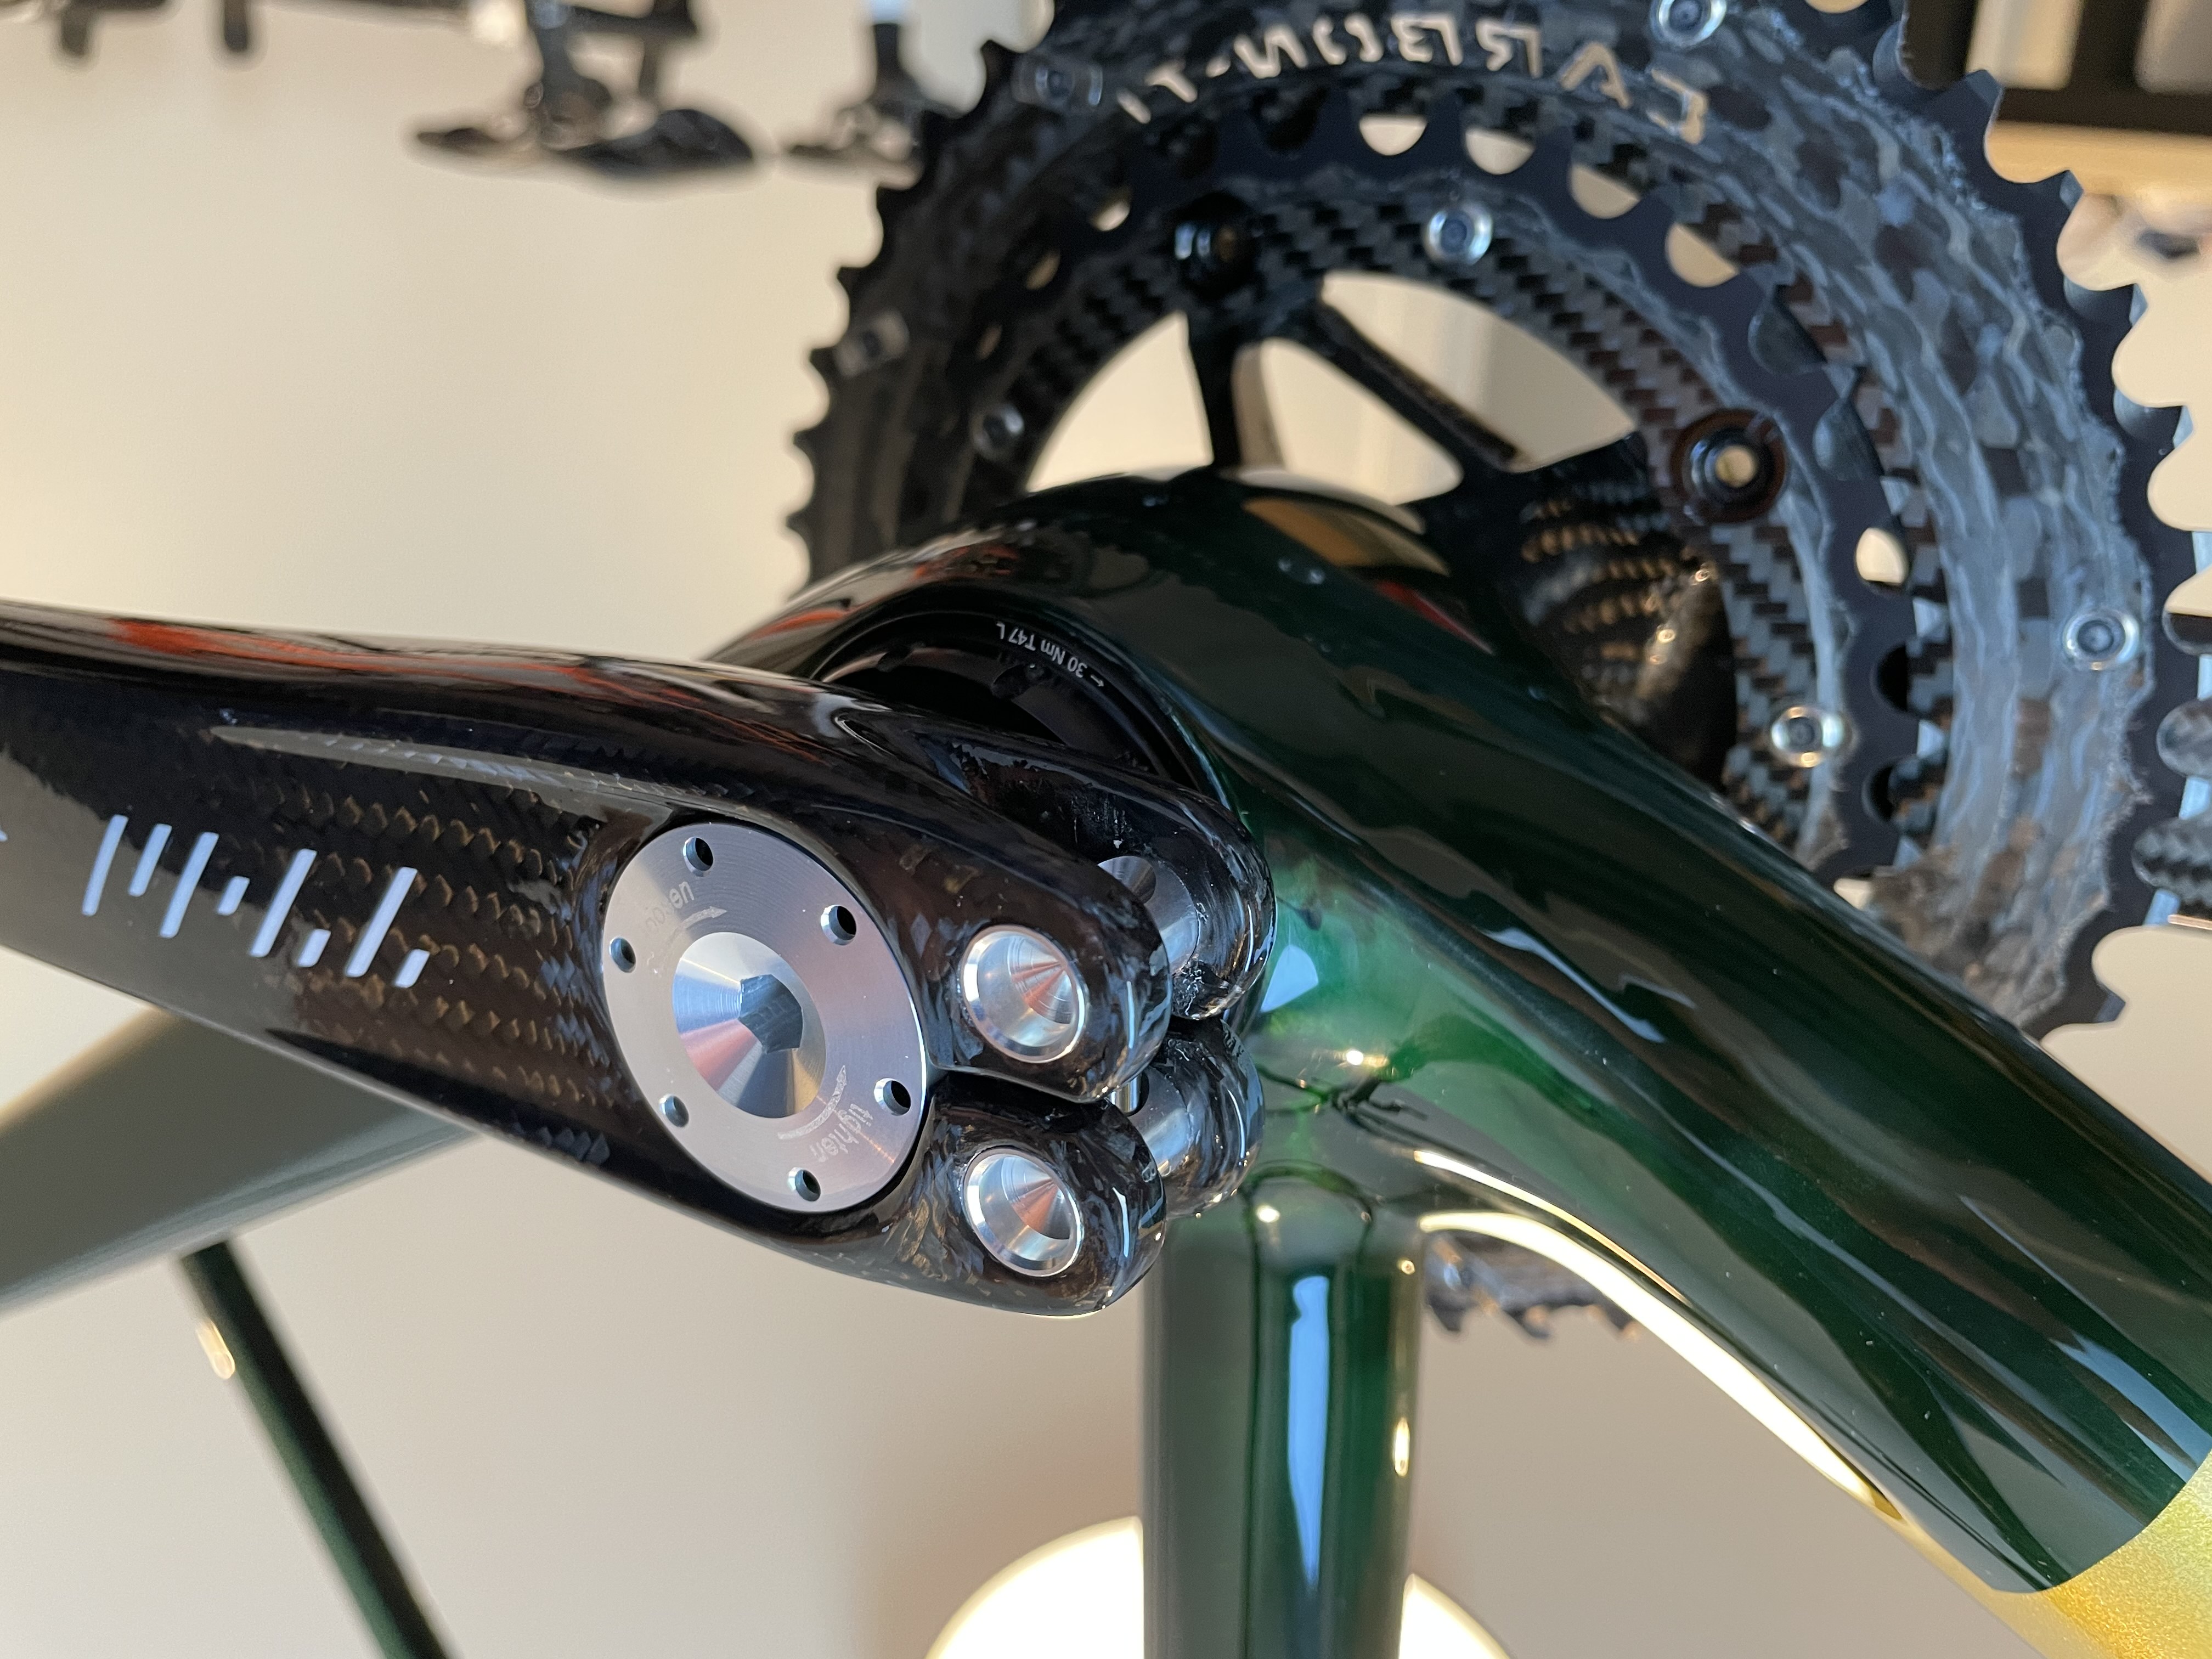
— Buckle up, the RM3 stem is quite a saga. The original one’s excessive length paused the build last week but Ben and his team got me the correct 100mm length, painted and polished, within a week.
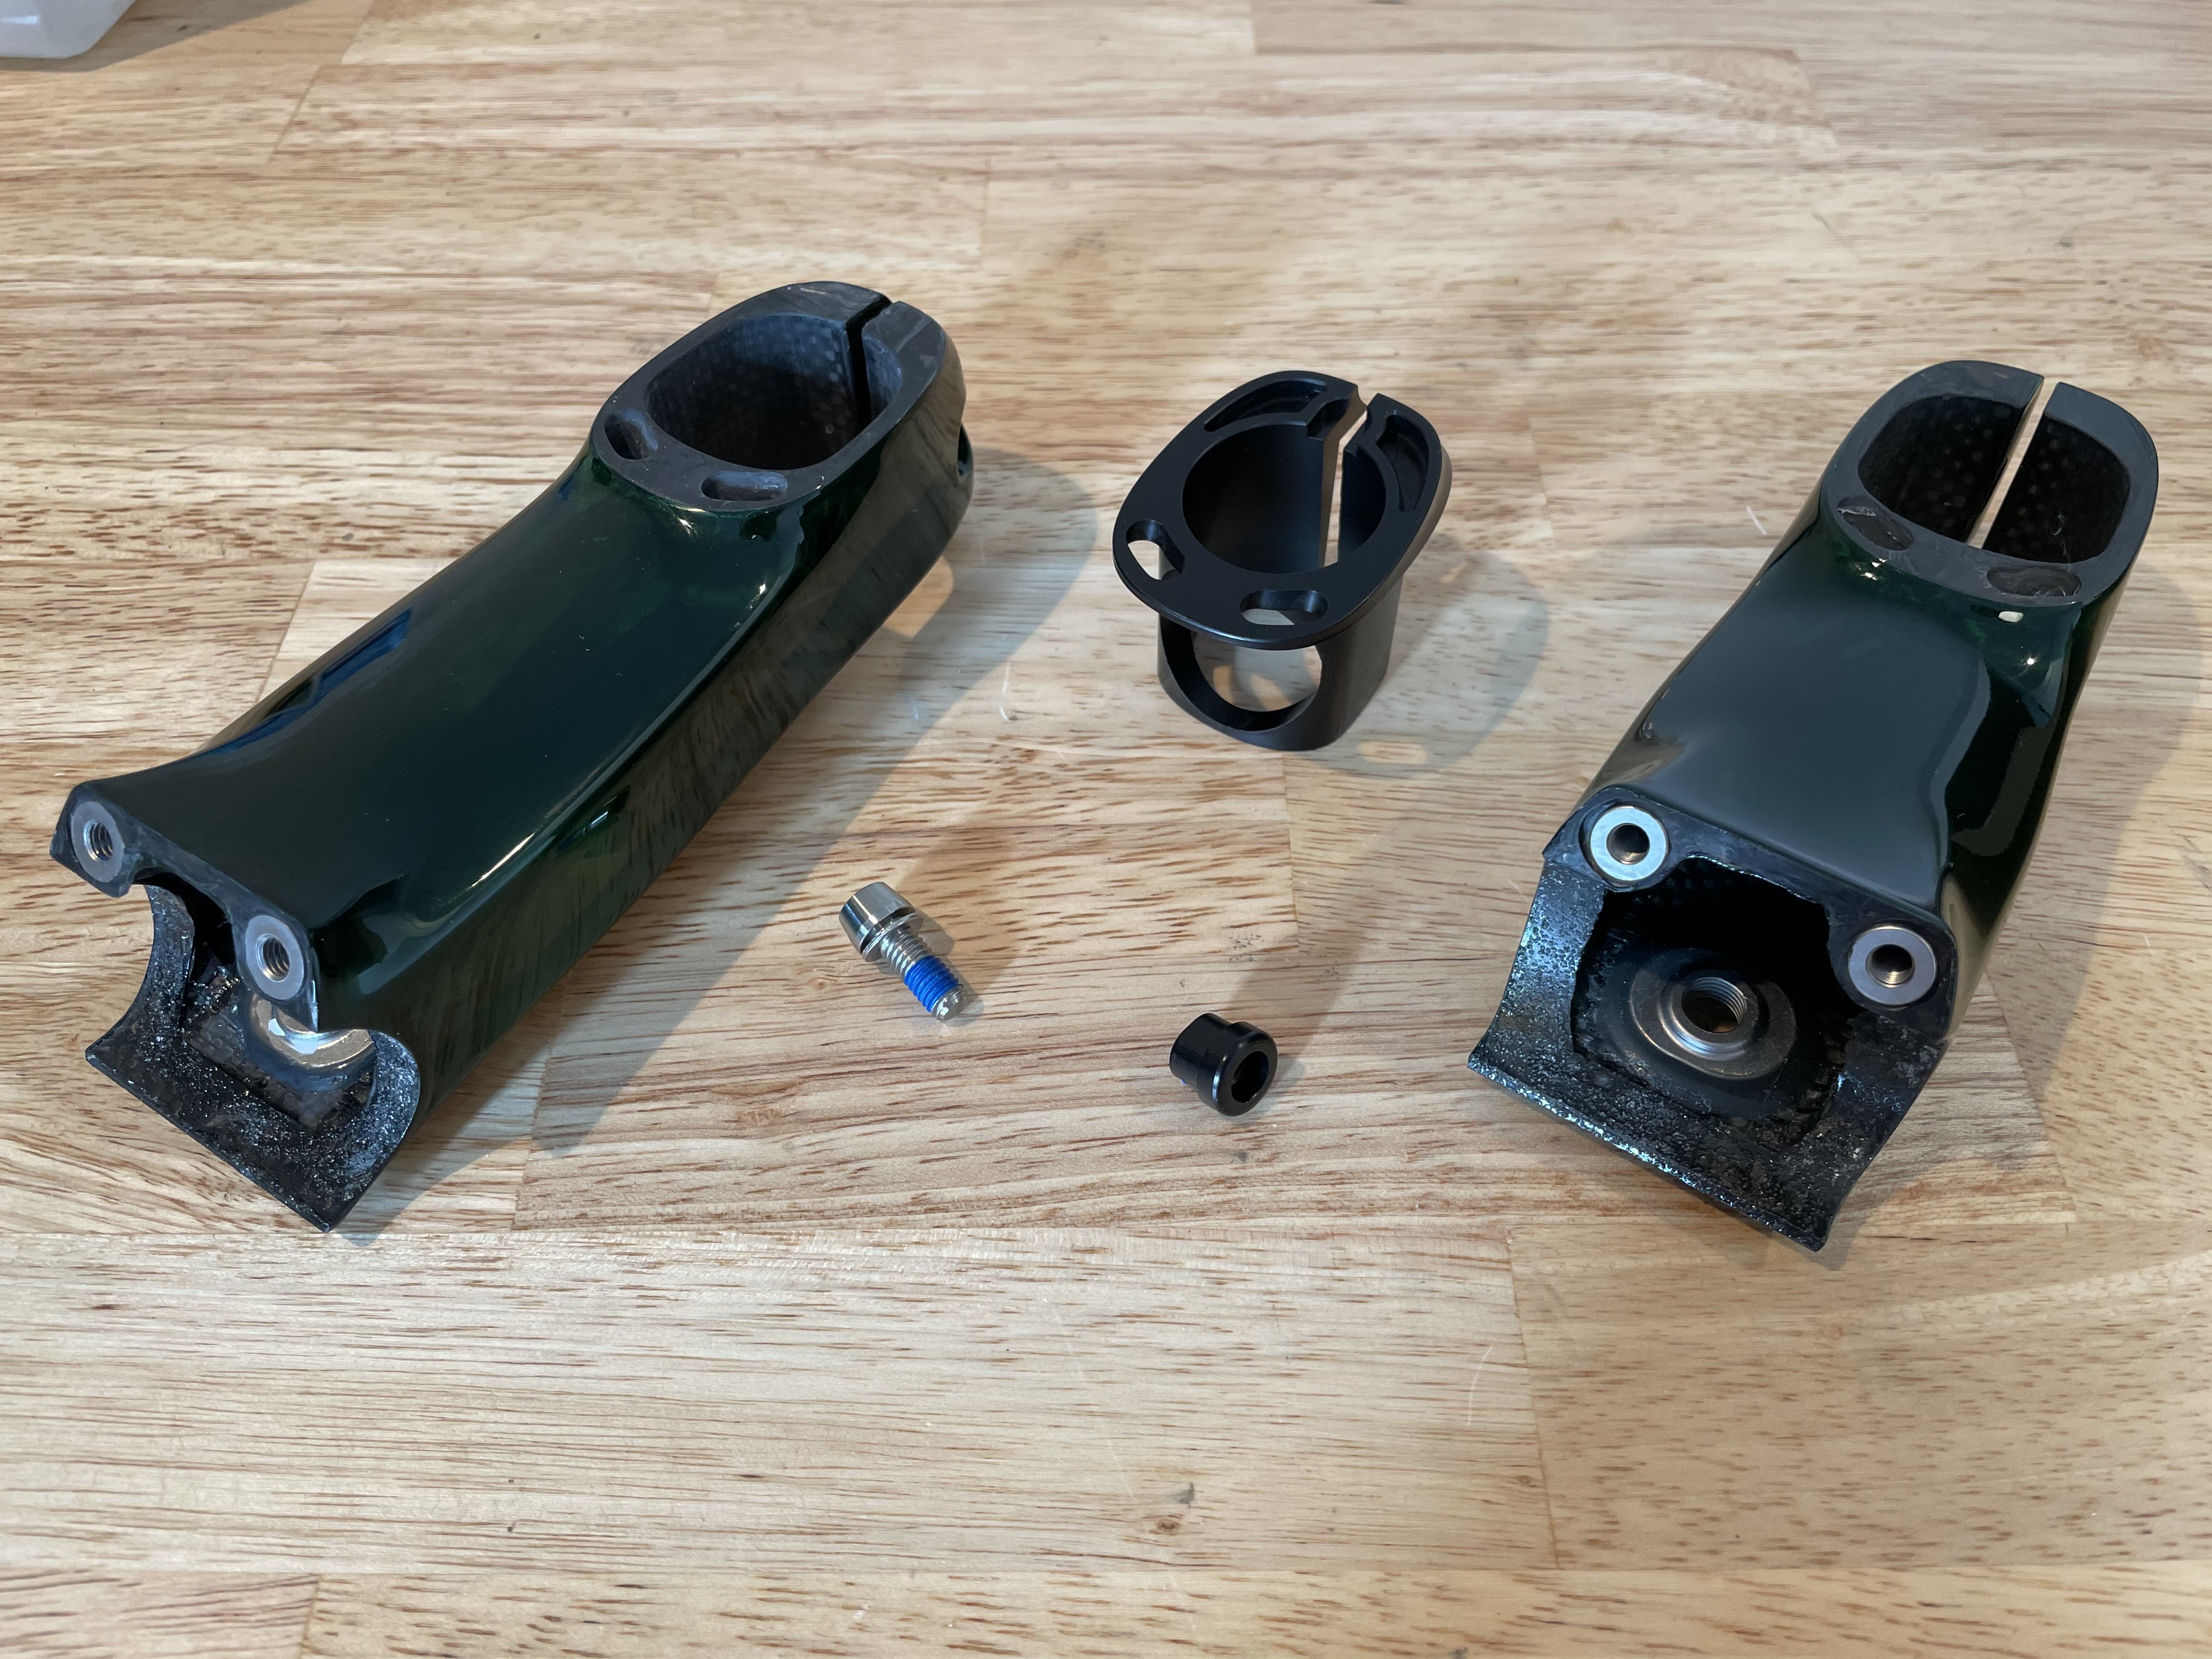
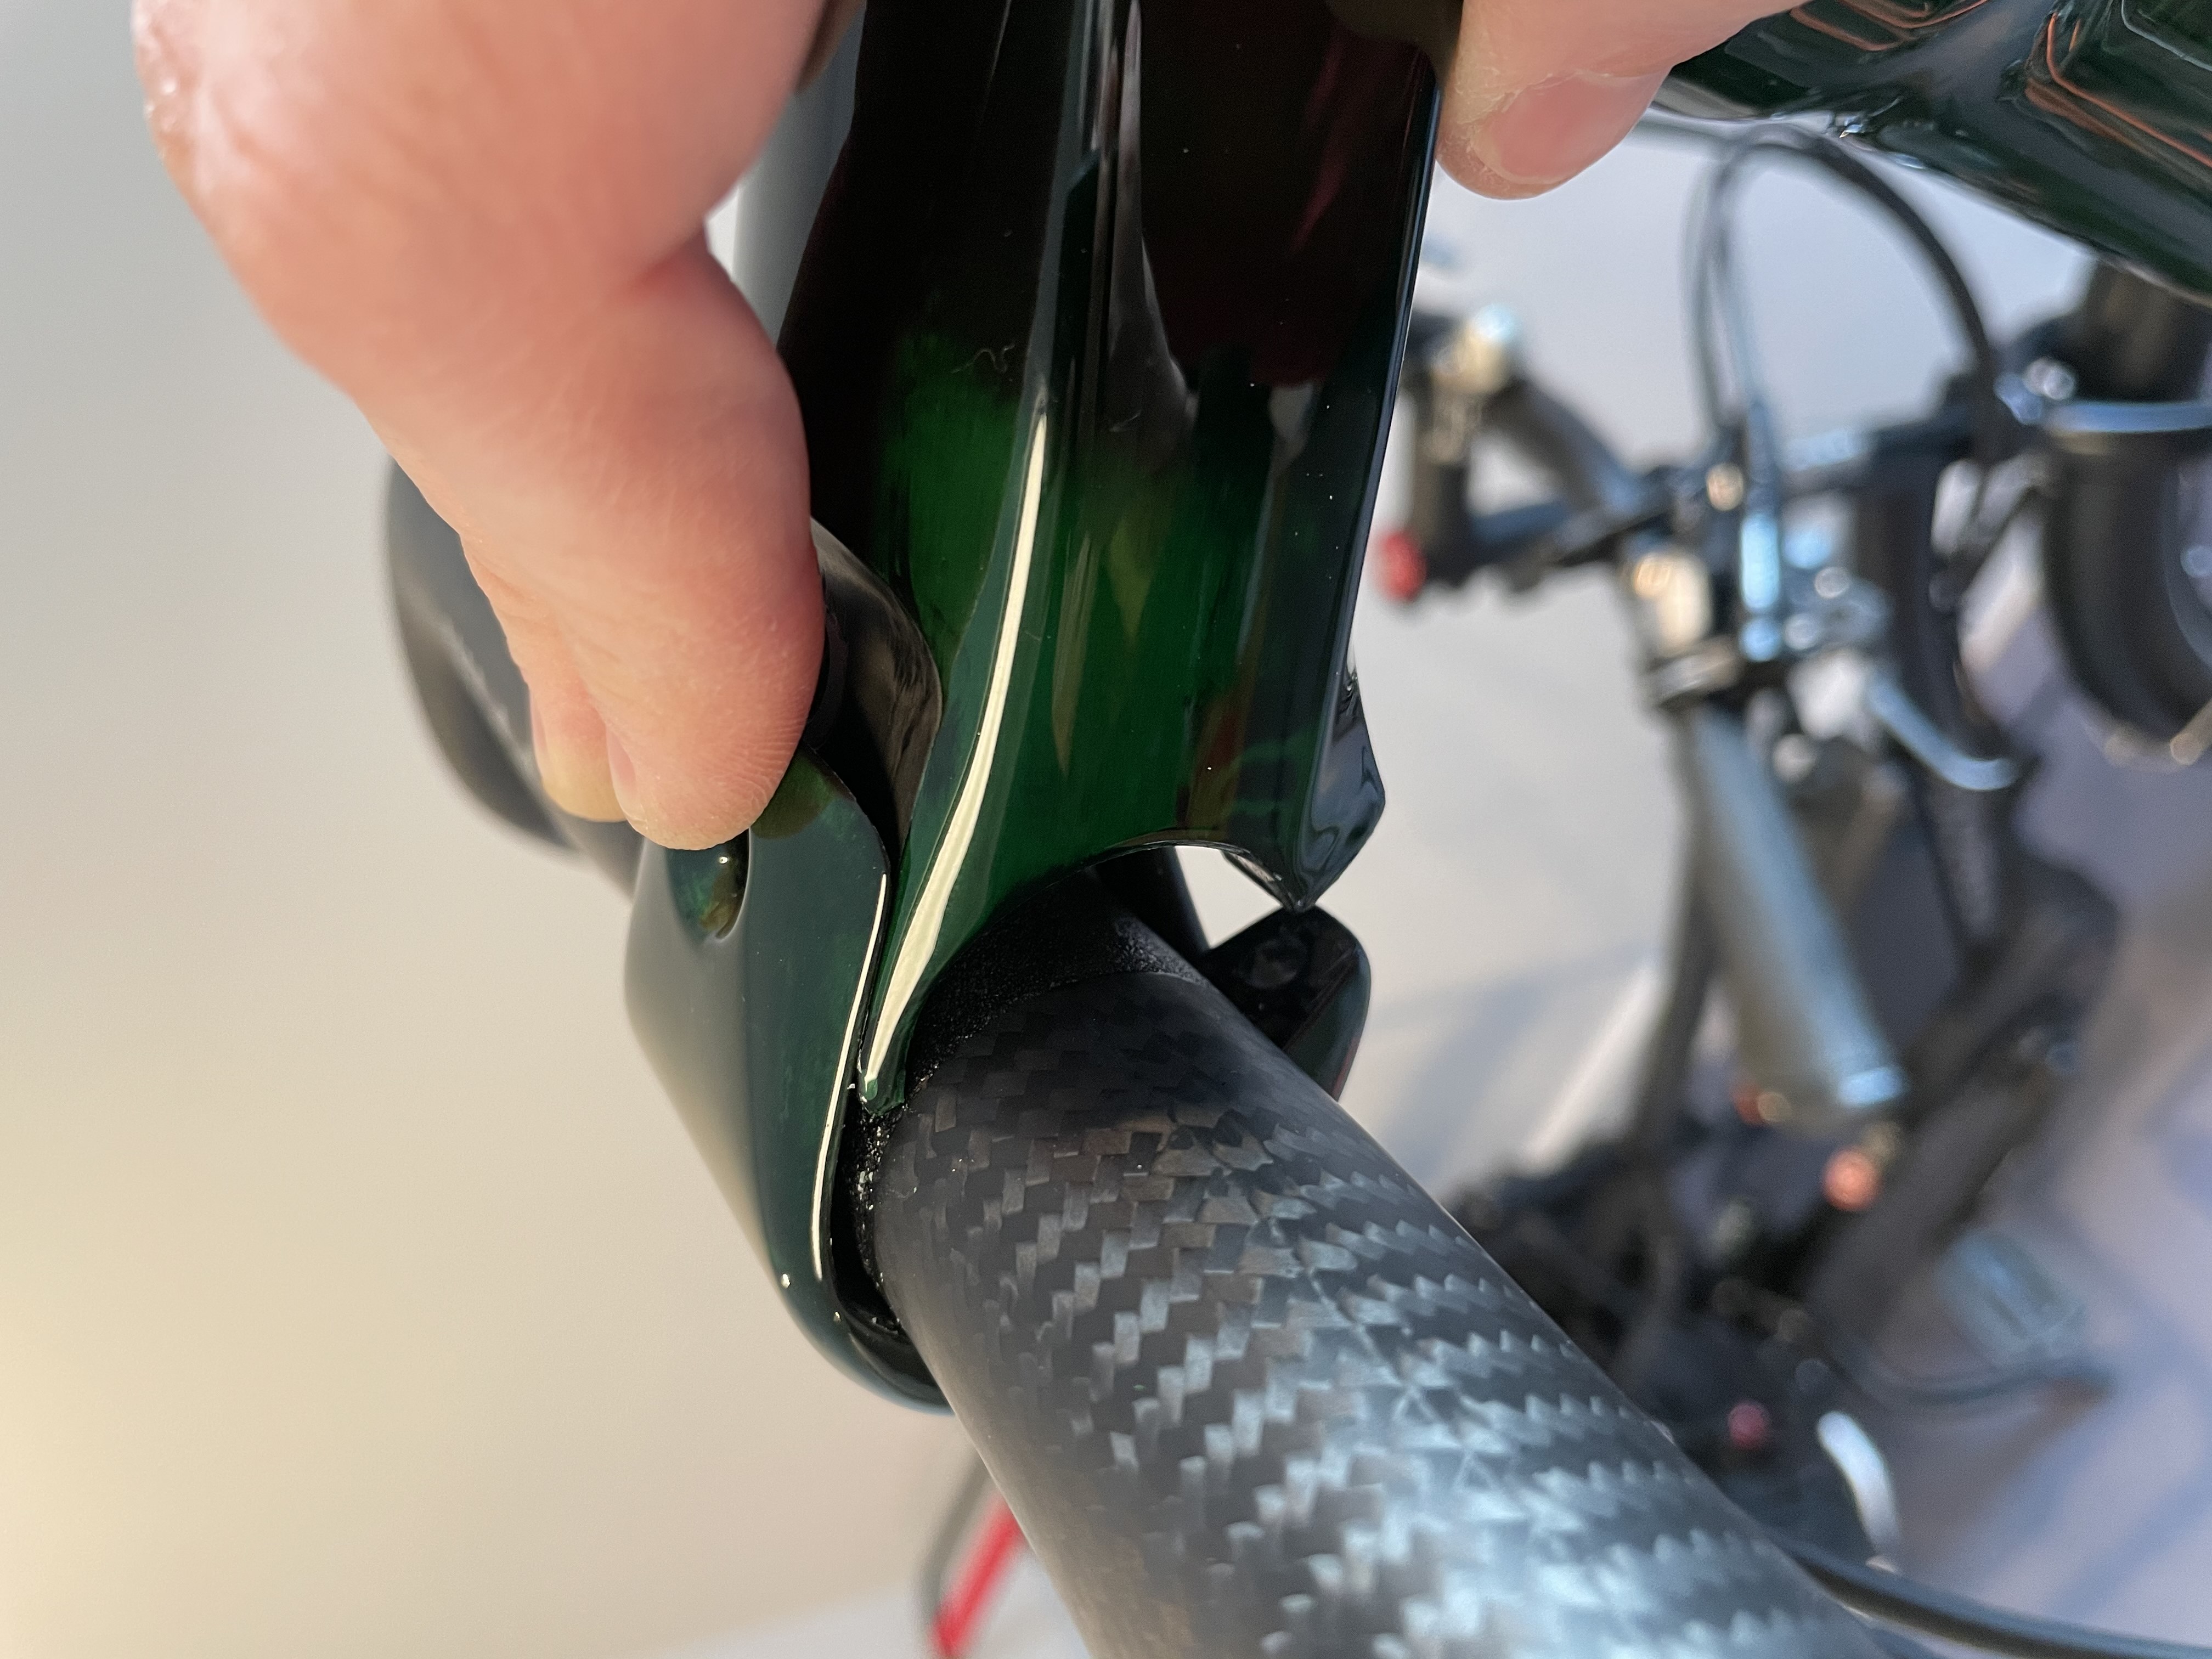
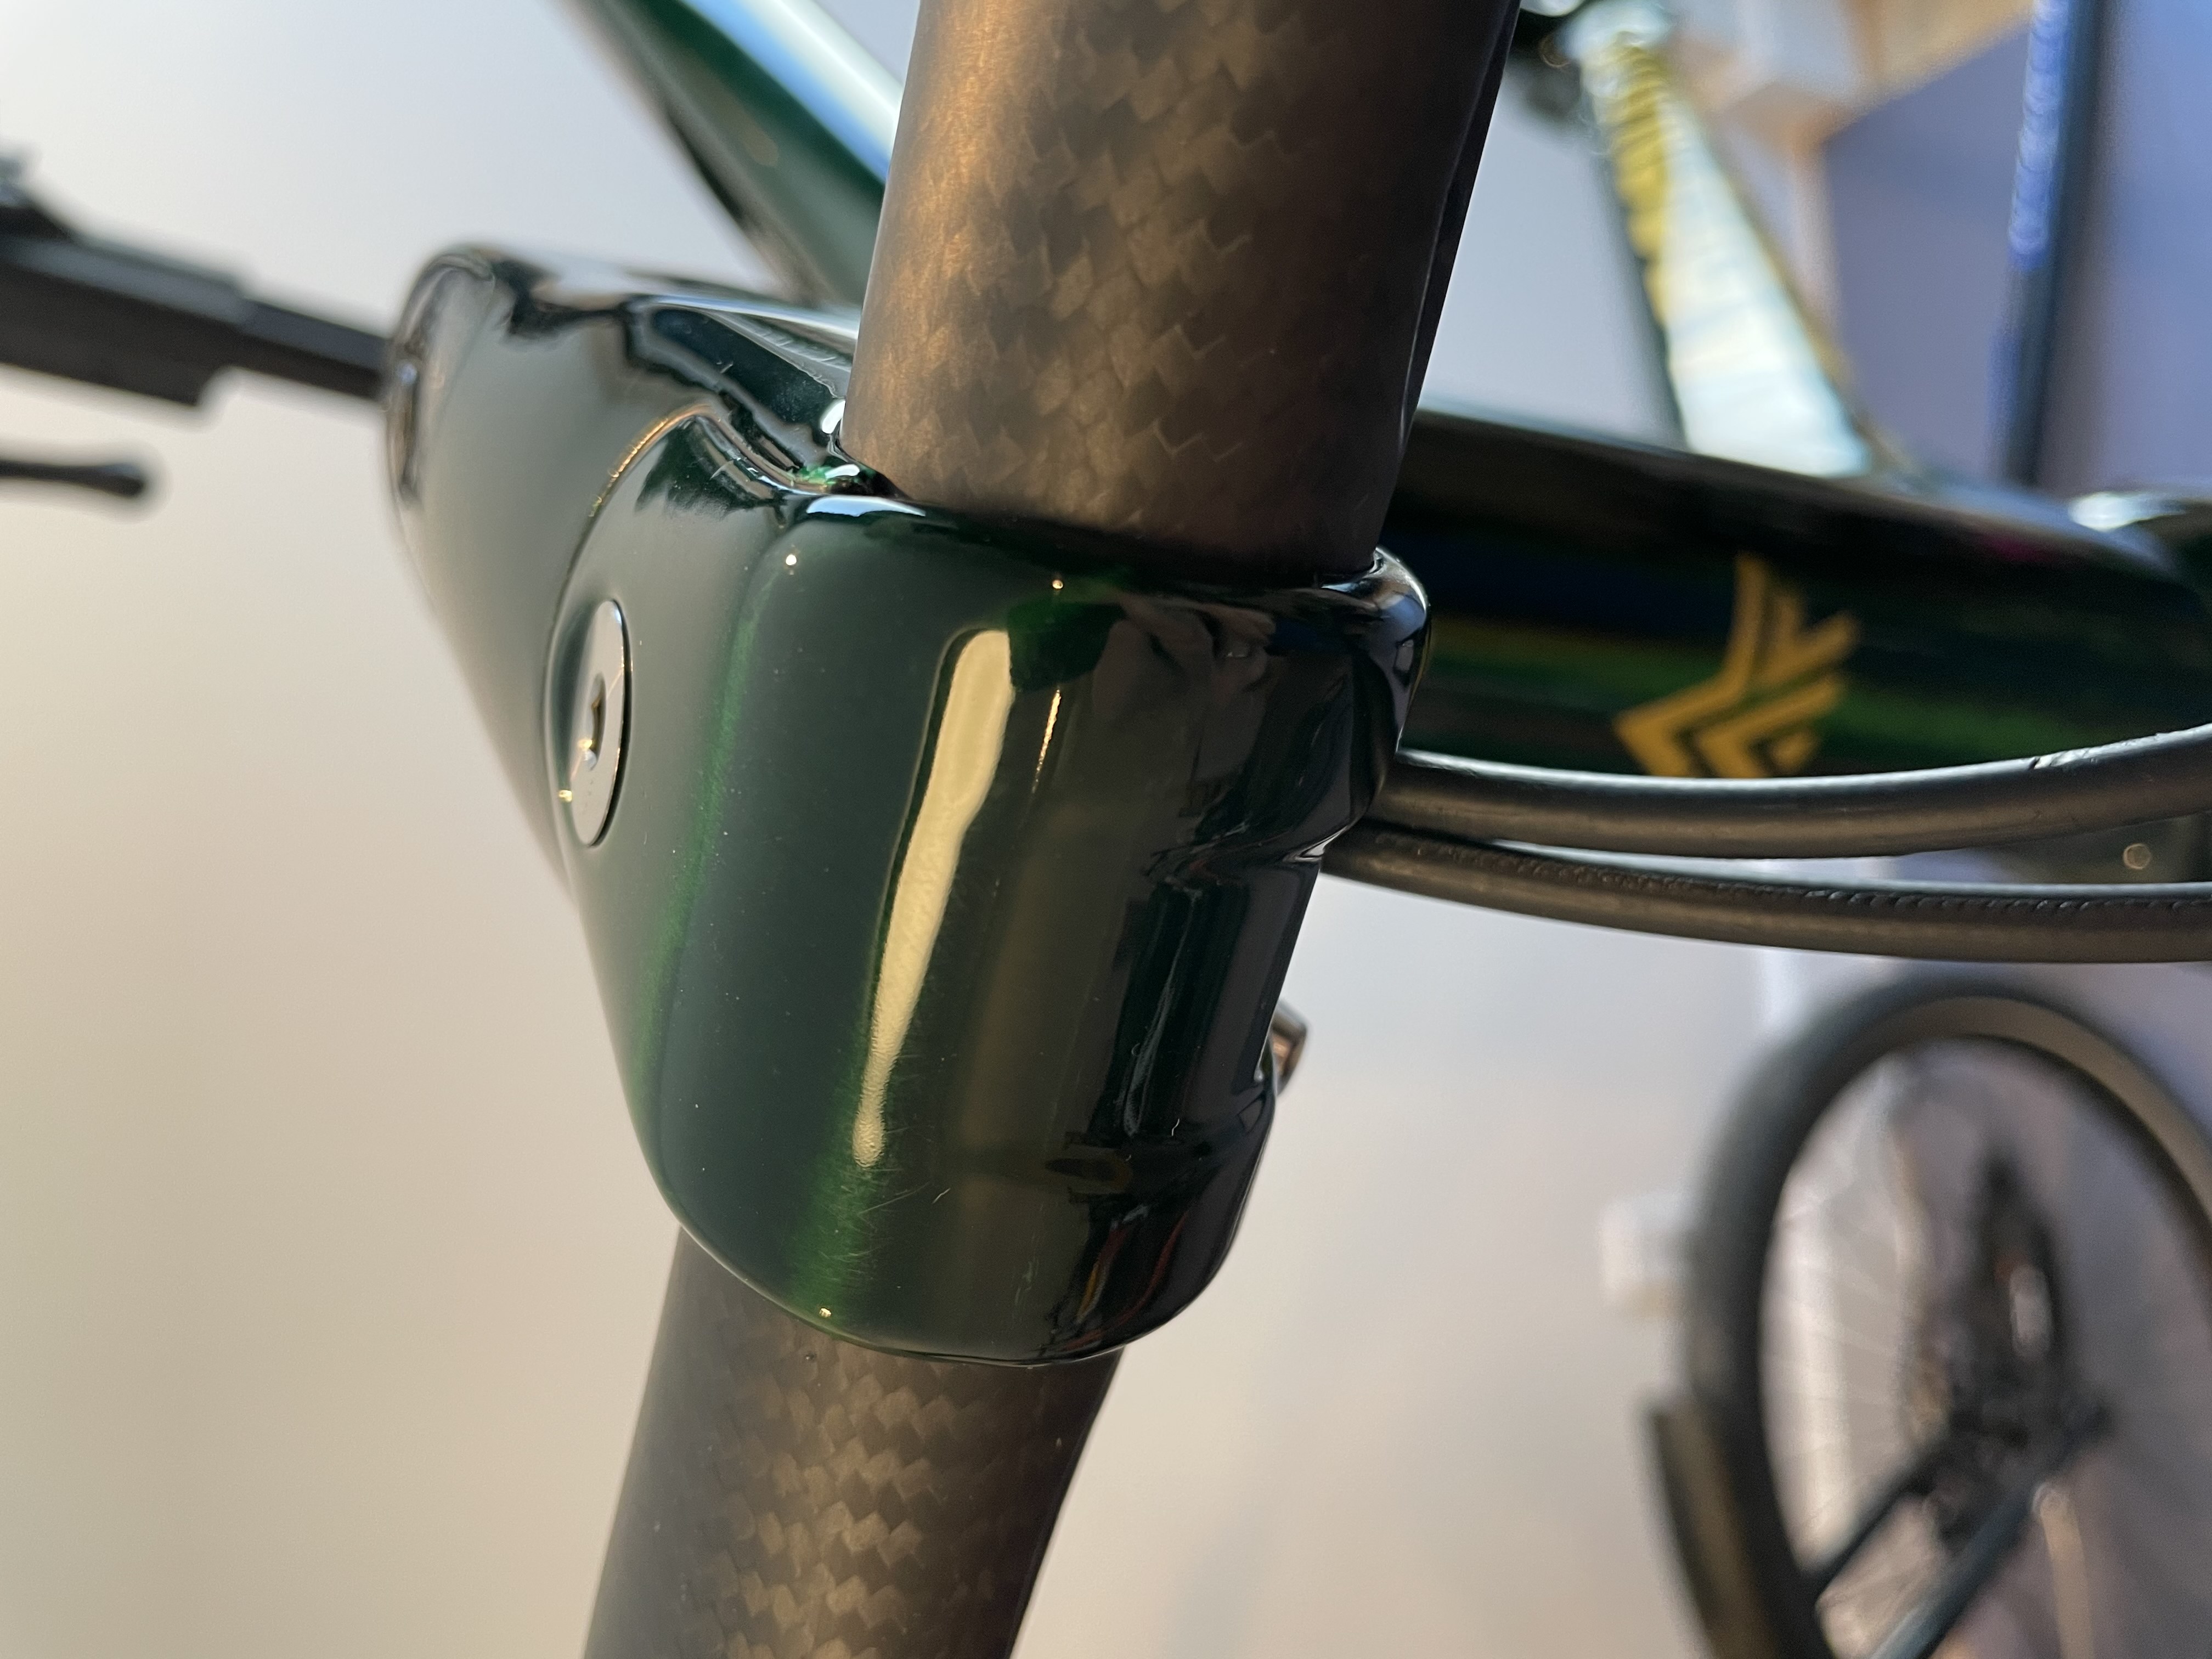
The 100mm stem came sans mounting hardware so I got a closer-than-average look at the aluminum insert that adapts the carbon fiber stem to round steerer tubes, offering an opportunity for different inserts to set the angle and still saves room for brake hoses. The stem is secured to the steerer tube by a nut with an oblong shape that fits snugly into one side of the clamp.
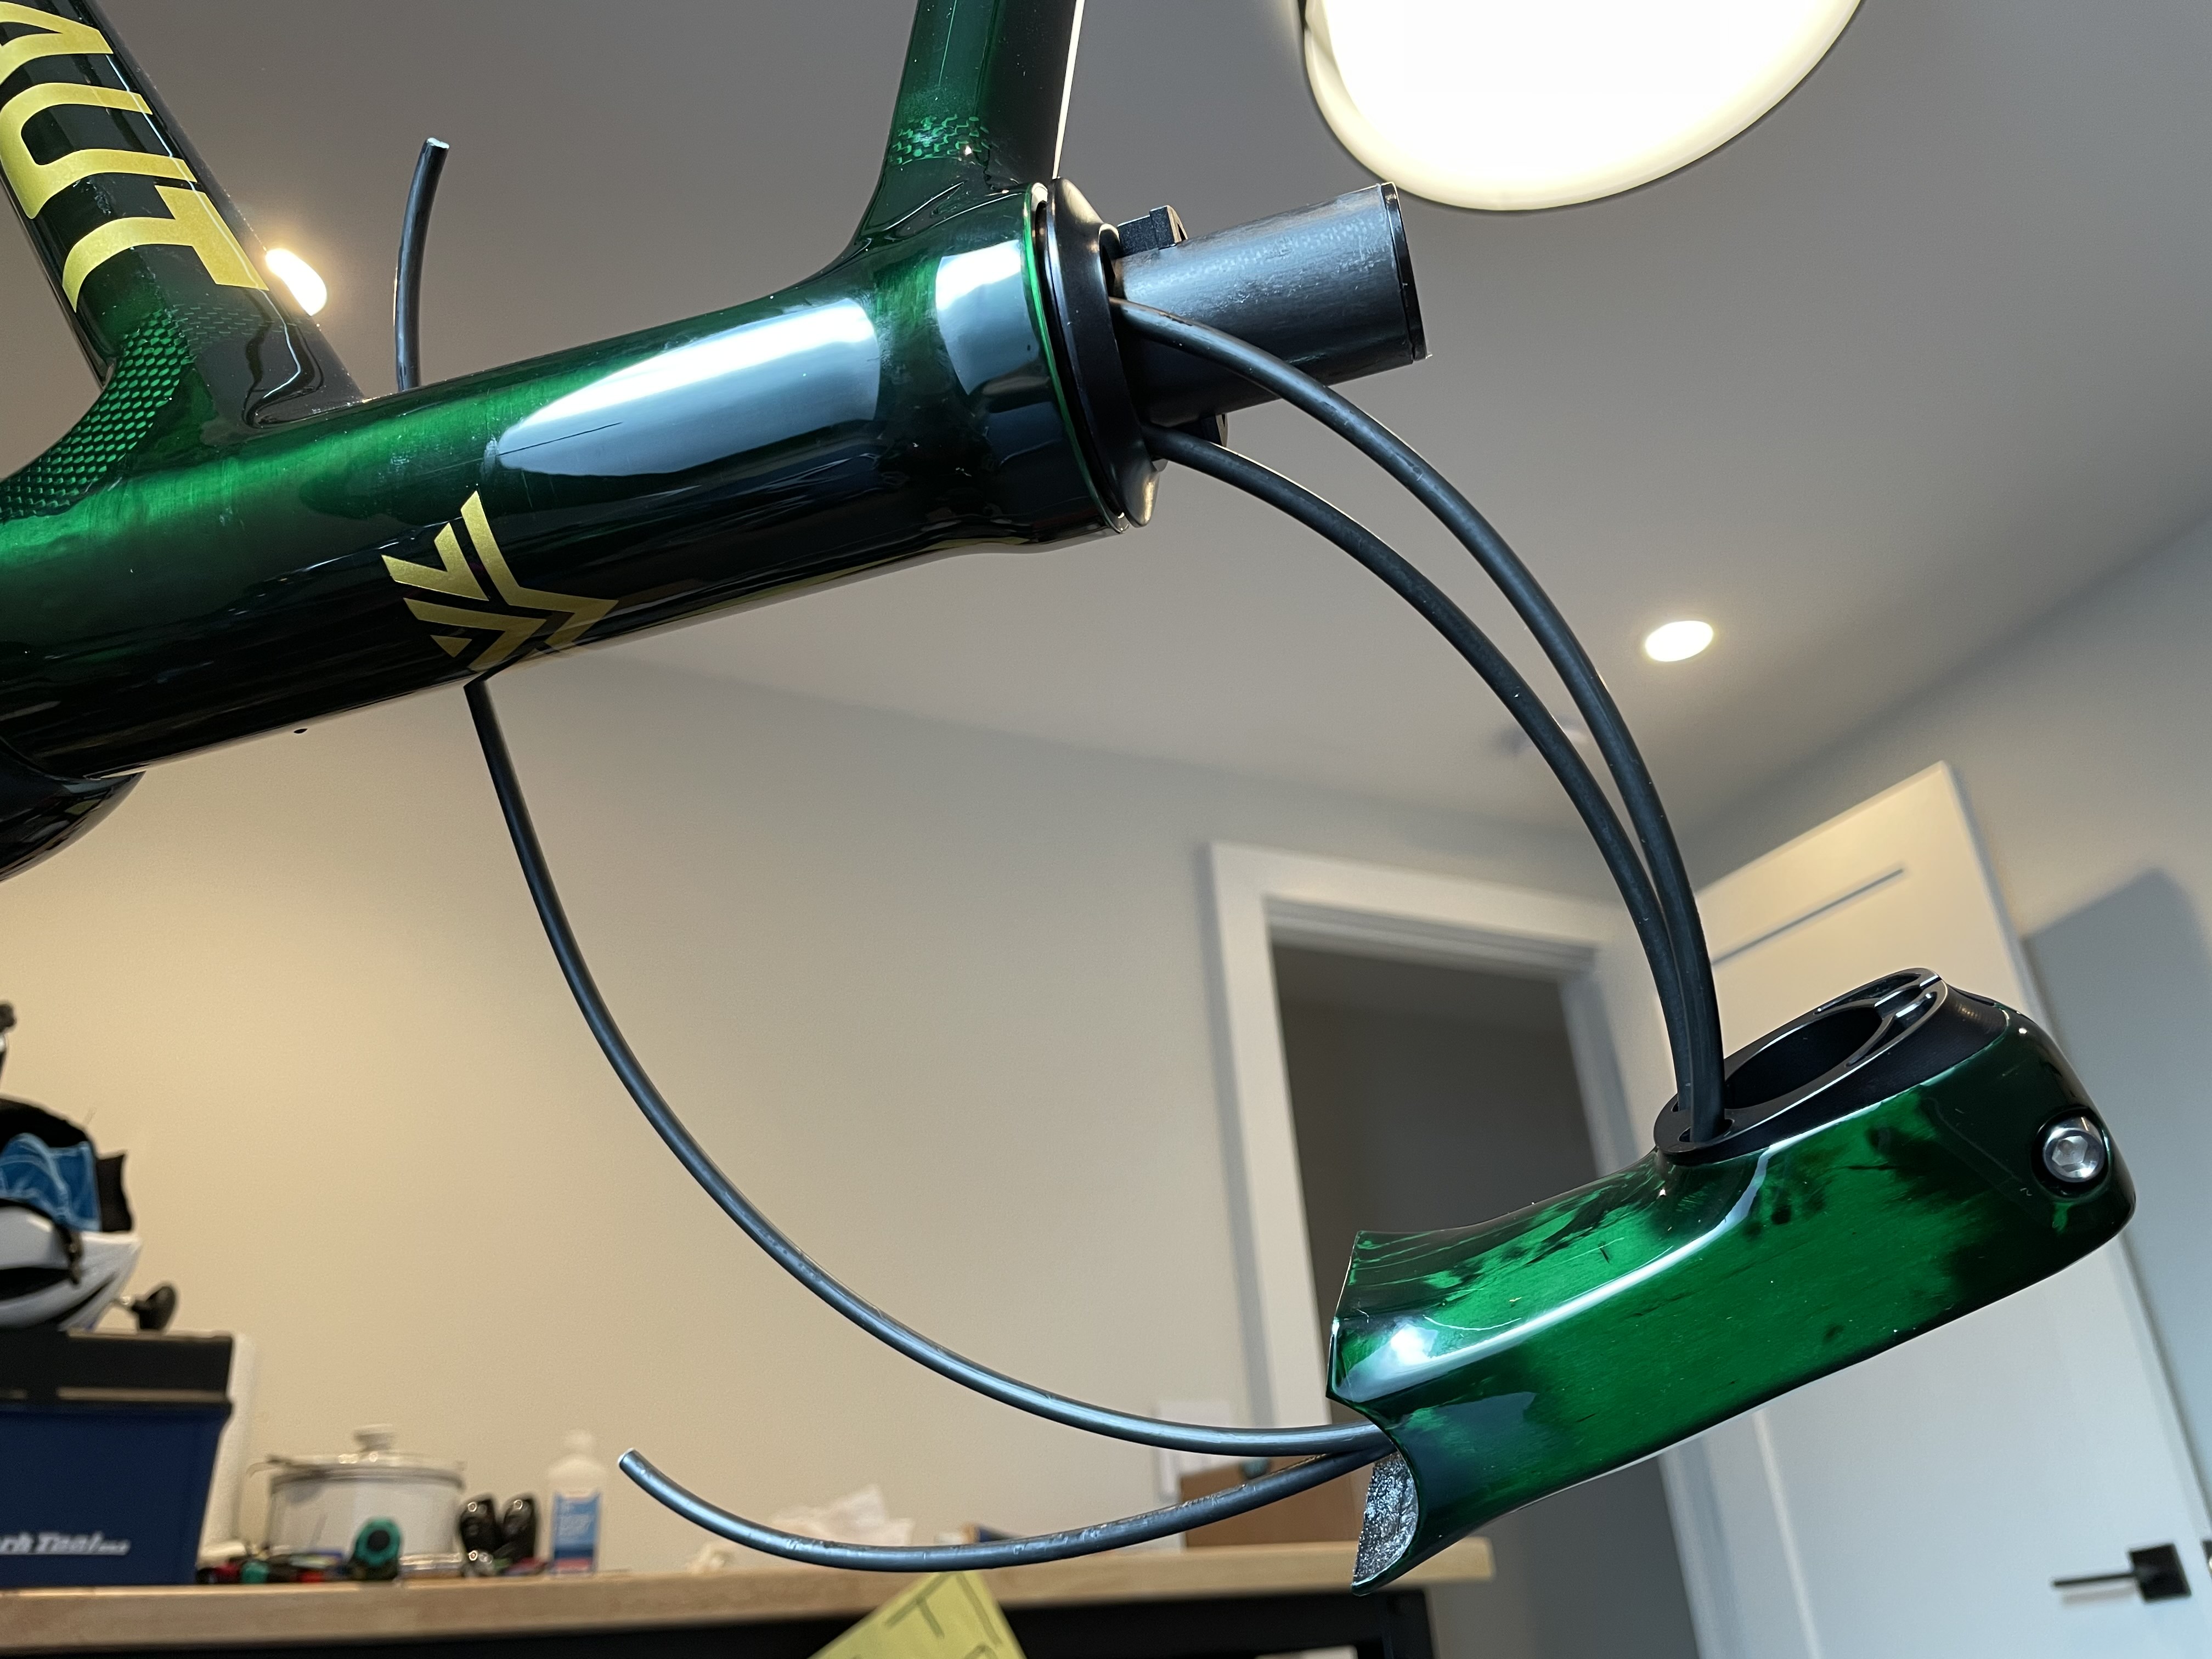
Thanks in no small part to the comically large headset bearings — 1½" top and bottom — routing the brake hoses into the stem and out the front was no trouble at all. The angles here are tighter than anywhere in the frame but I haven’t seen or heard any signs of constricted steering, tapping, or brake hoses being pulled back and forth. Very pro.
So the brake hoses are routed and yet here is where the trouble begins.
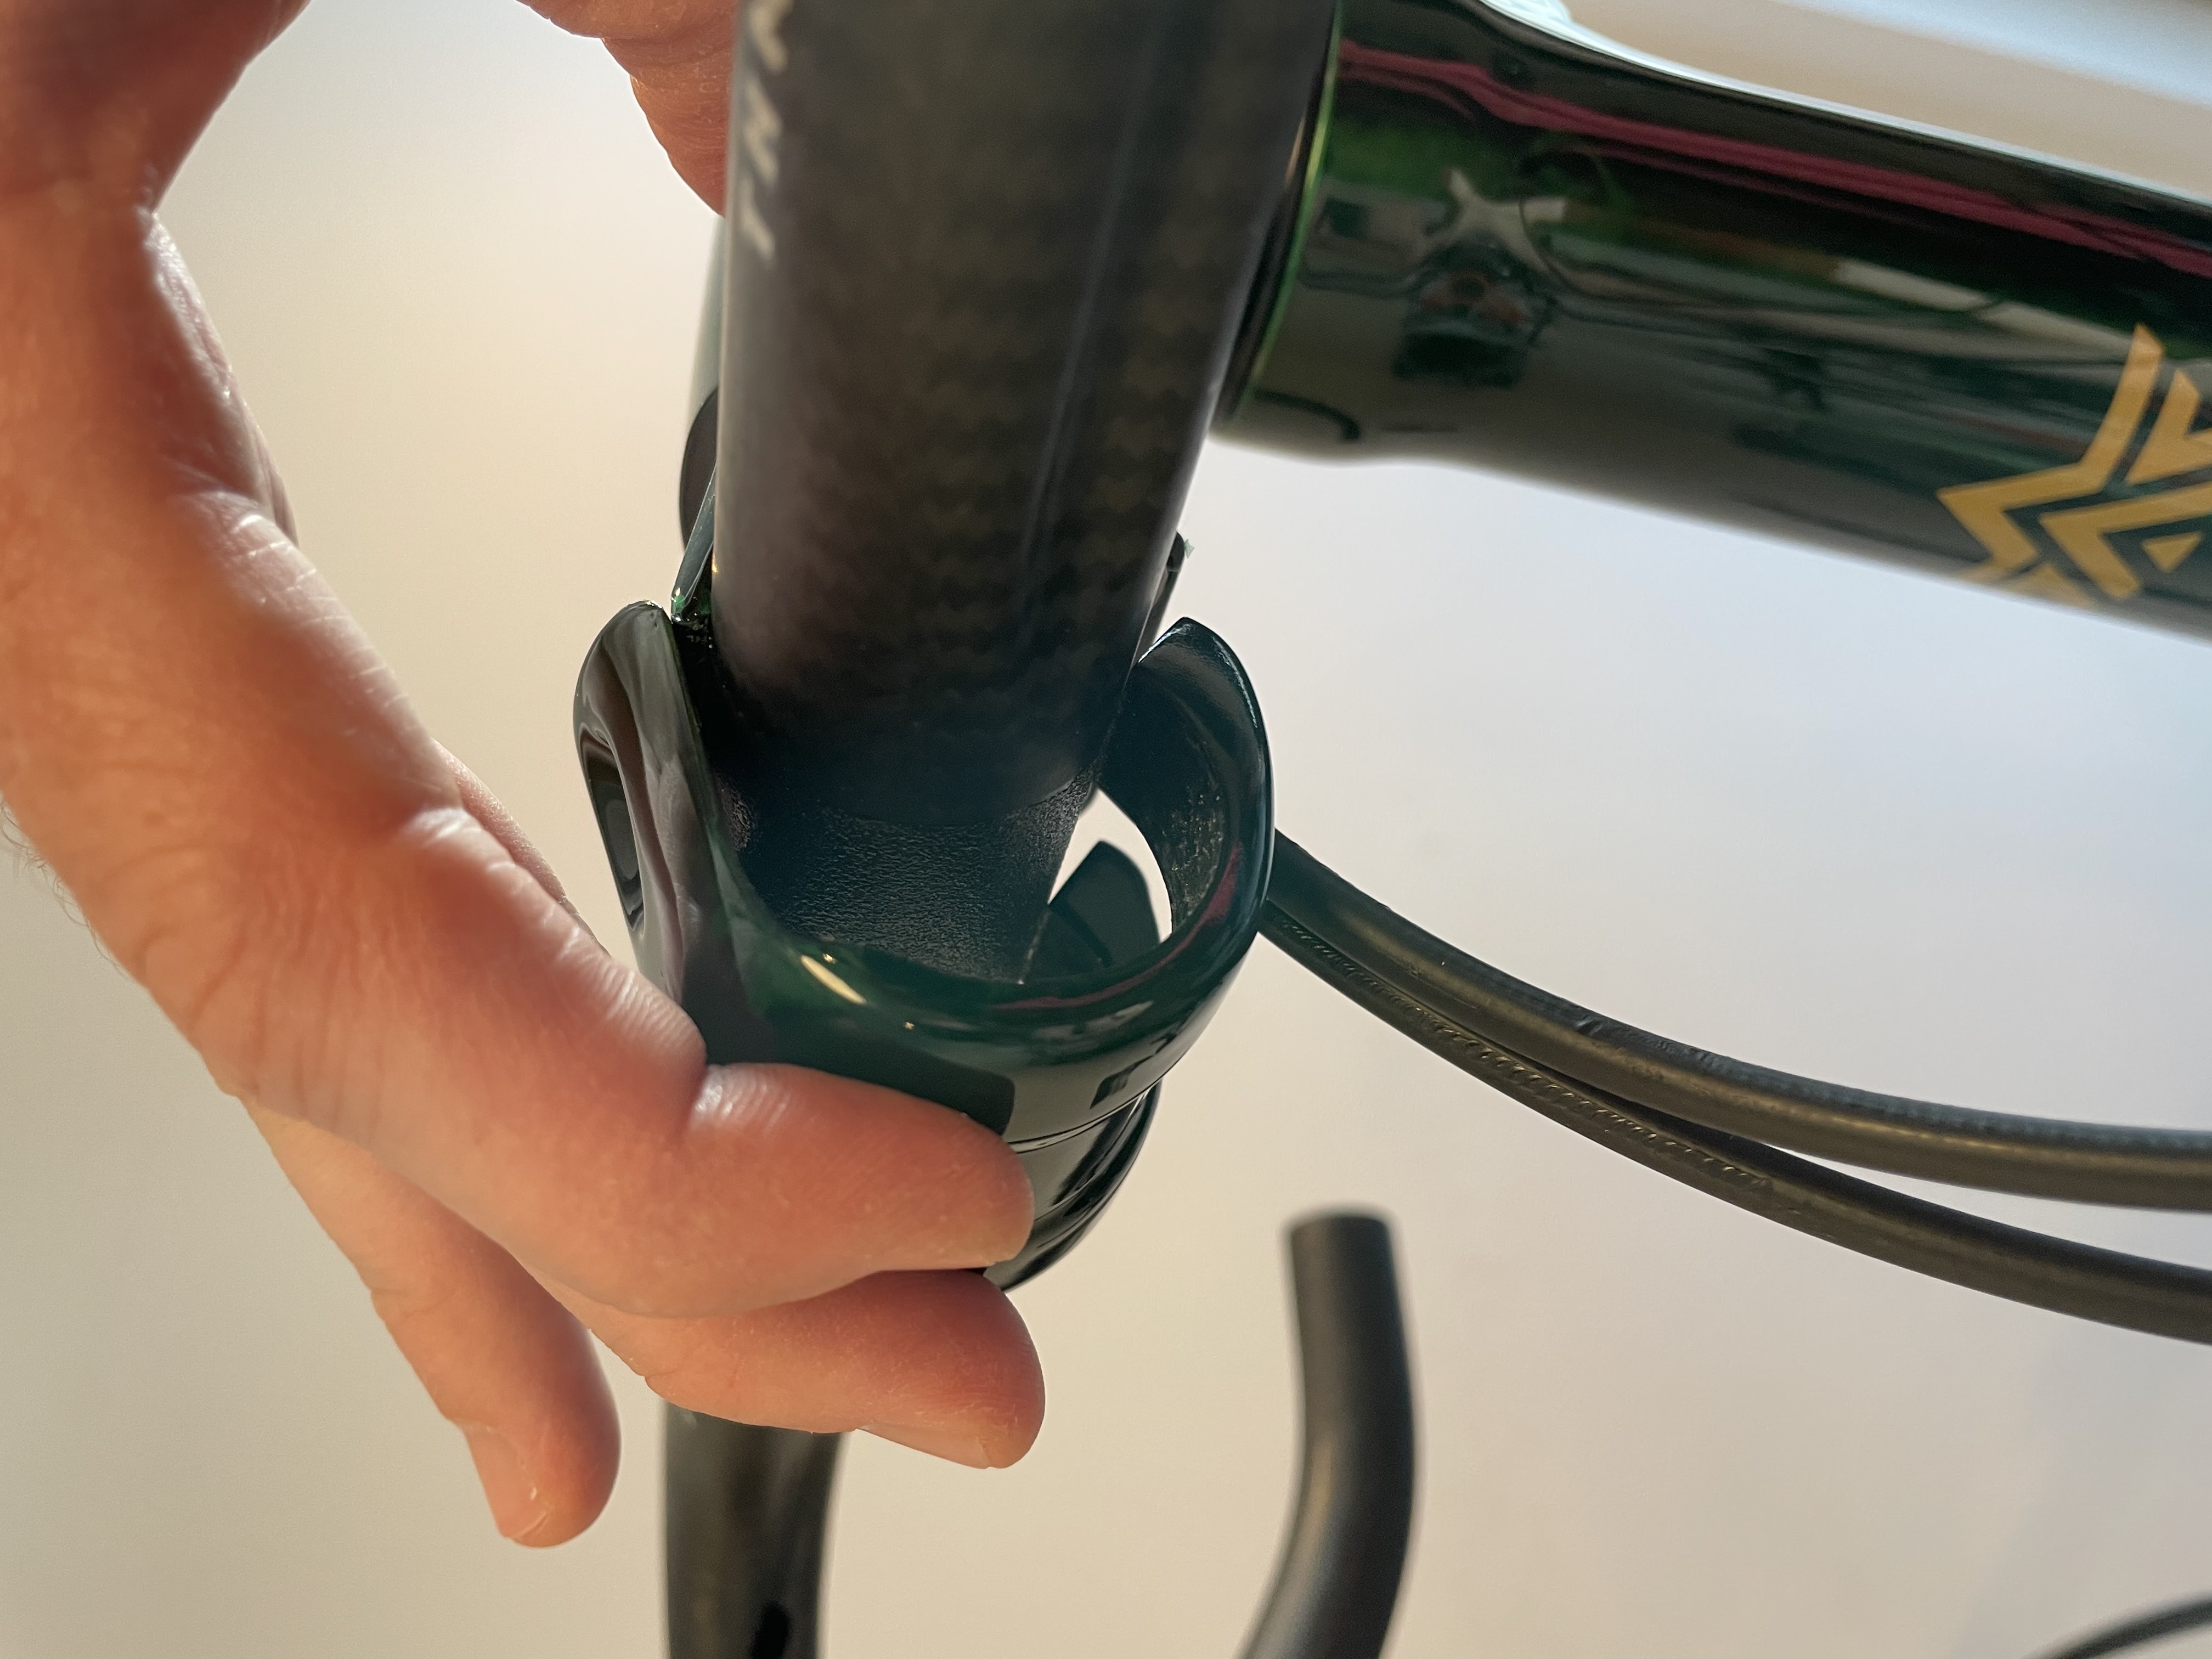
Fuck. I... How? I stared at this for half an hour, easy. I tried every order, every angle. Mounting the handlebar was beyond my skill with a wrench. I ended up emailing Ben to ask for help. He kindly wrote me an ad hoc service manual for the stem. It includes multiple admonitions that the “fit here is tight” and admits it is “difficult”. Here we go.
Even with a walkthrough and a warning in hand, this procedure is not for the faint of heart. First, one must slide the faceplate onto the handlebar clamping area from the narrower parts to either side because the clamp goes more than half way around. Then, one must roll it up and back to snap (yes) the top of the faceplate over the top of the stem. I’ve never been so sure I was about to break a bike part without actually breaking it. With the snap out of the way you’re still not out of the woods because the bolt hole isn’t even slightly lined up with the threads. You have to squeeze really, really hard and also use the handlebar and the bolt as levers to get the threads started and then crank it down to 12 Nm before even thinking about the bottom bolts. In theory, those clamp the handlebar. In practice, I could go for a ride without the bottom bolts and the handlebar wouldn’t move. That sucker is in there.
The handlebars, by the way, are THM Ulna. In a sea of competent 42cm handlebars, I chose to go very light and matchy matchy with the crankset.
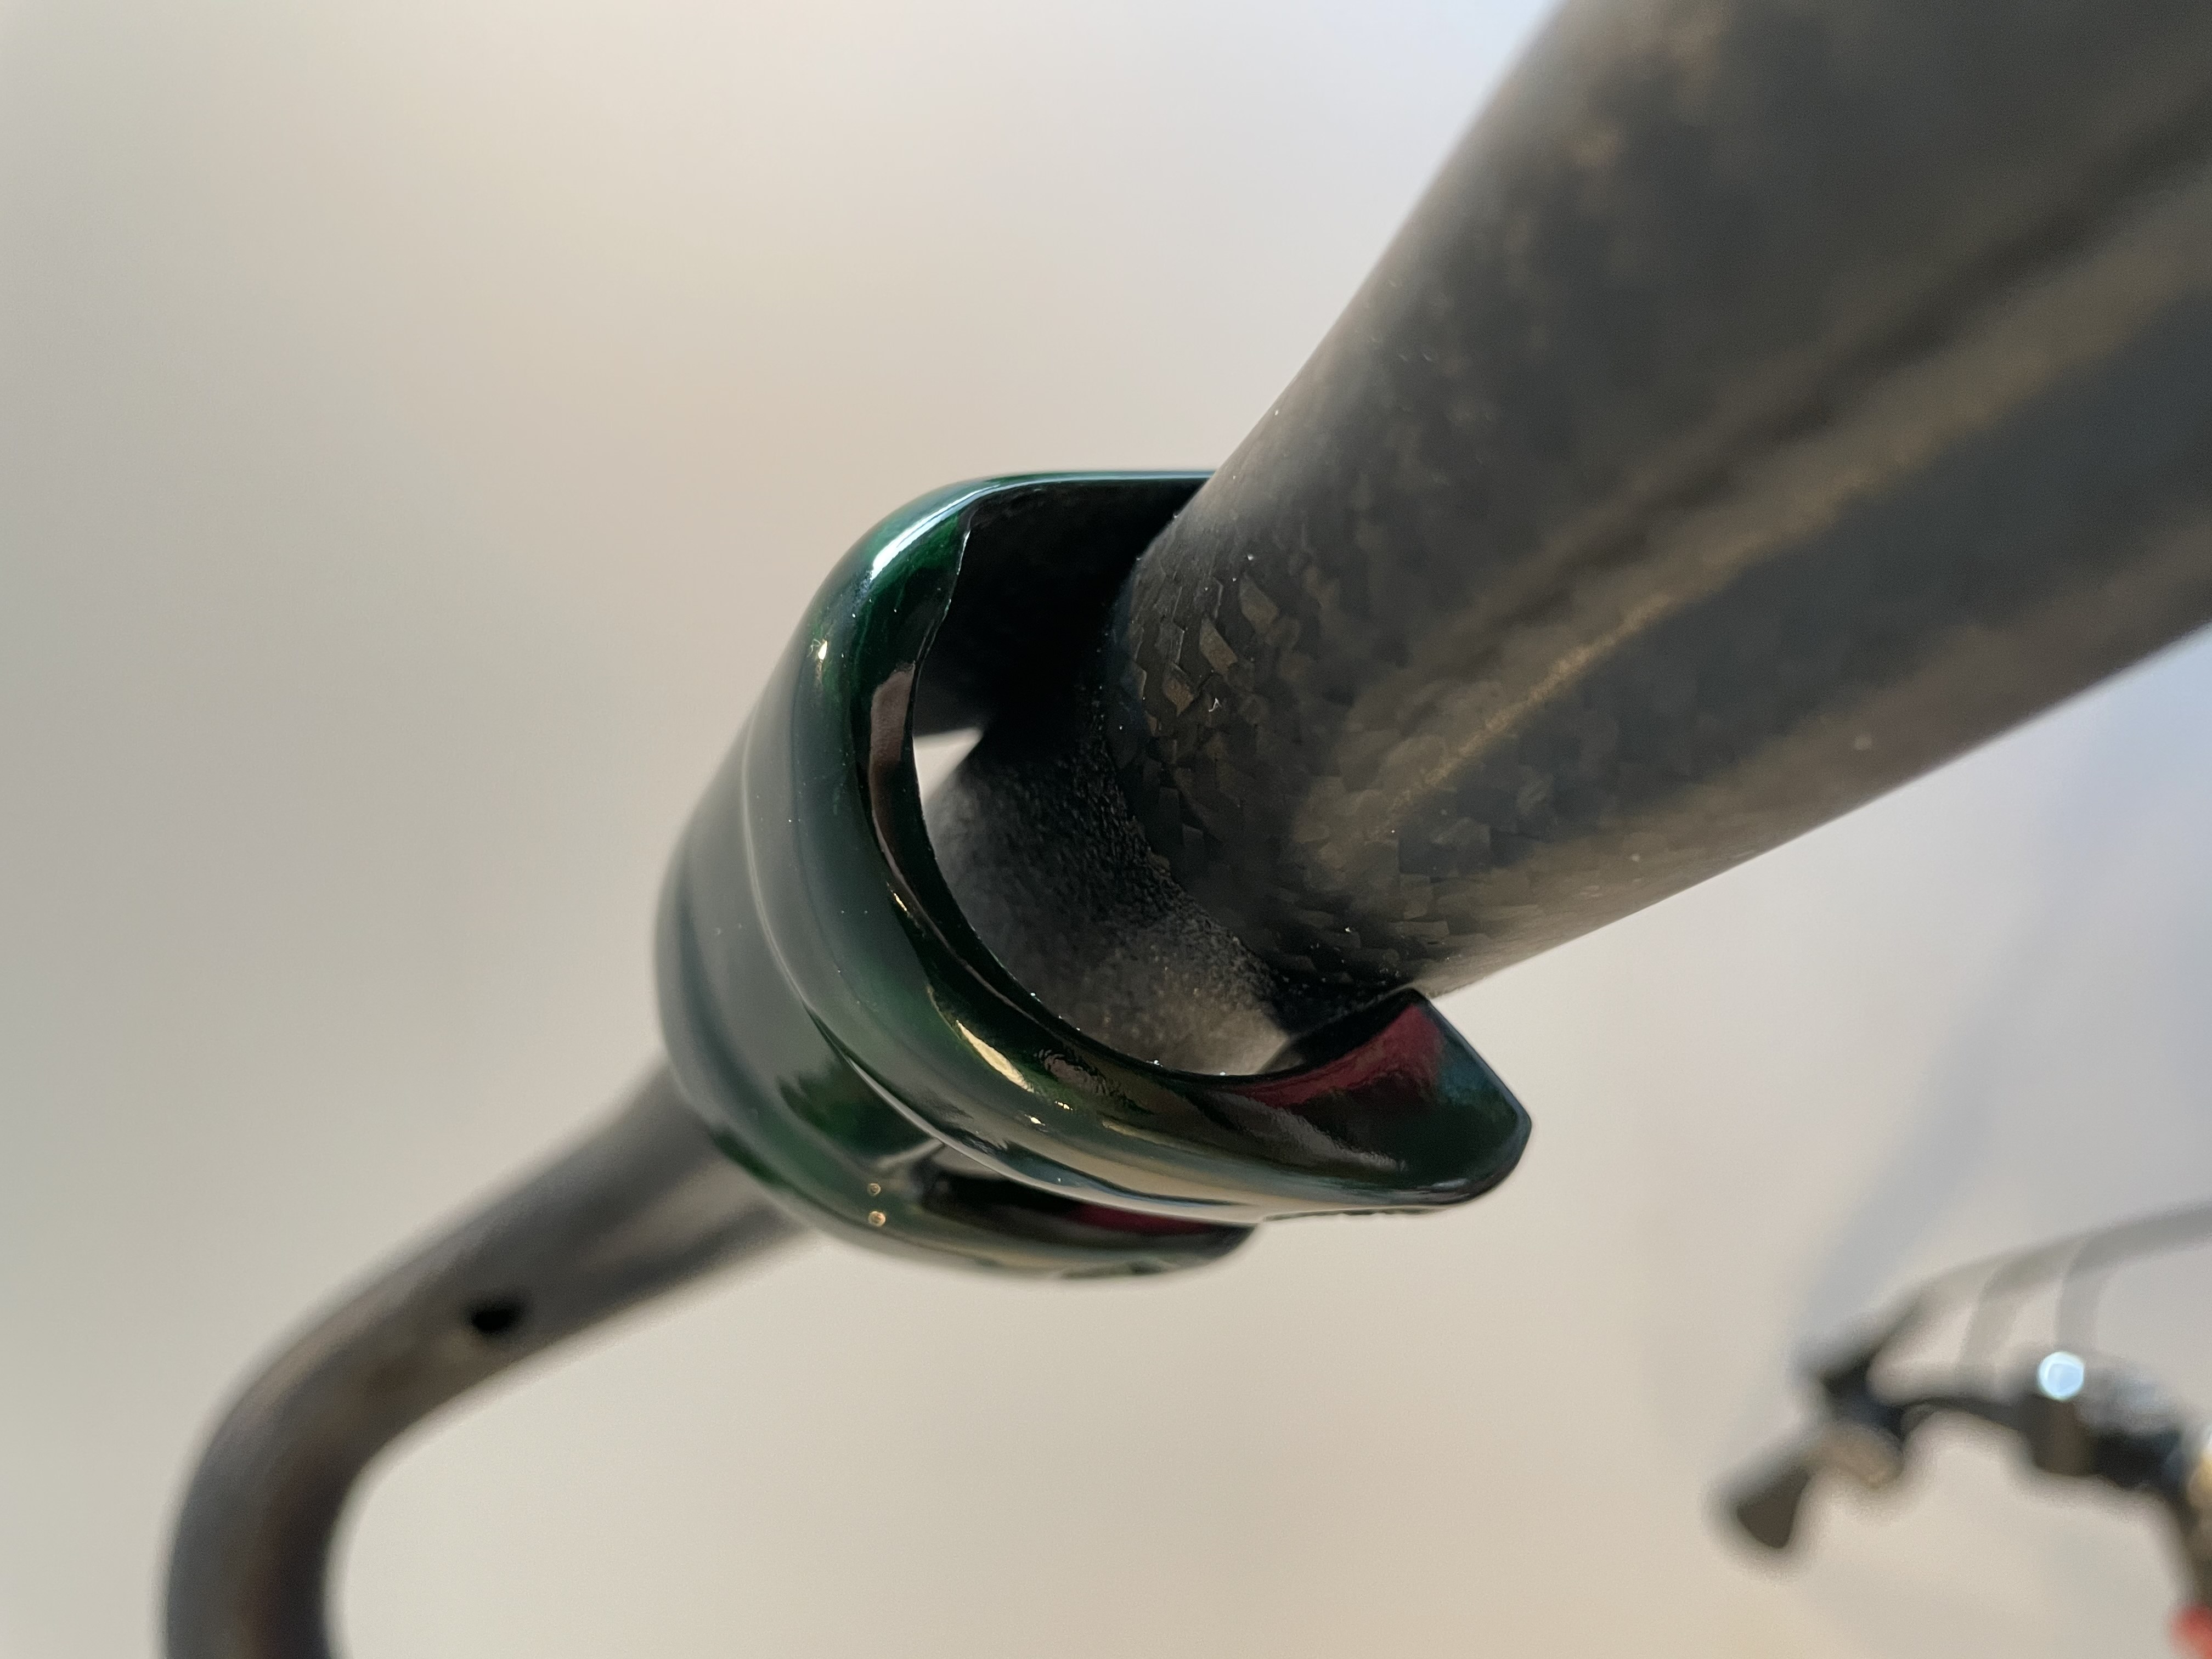
Hallelujah, it is done! I still can’t believe the internal brake hose routing was the easy part. I’ve asked Ben to satiate my curiosity on why the stem’s designed like this. (I bet it’s all about creating the most rock-solid steering platform possible. We’ll see.) If he bites, I’ll summarize his insights here.
— I hoped to get a long enough block of time to cut the brake hoses and bleed the brakes but I only ended up making it half way. The internal hose routing leaves very, very little room for imperfection in the length of the hose. Too short and you can’t turn. Too long and your bike clicks when you turn. So measure 17 times, cut once, still fret about getting it wrong. The DOT fluid will have to wait until tomorrow.
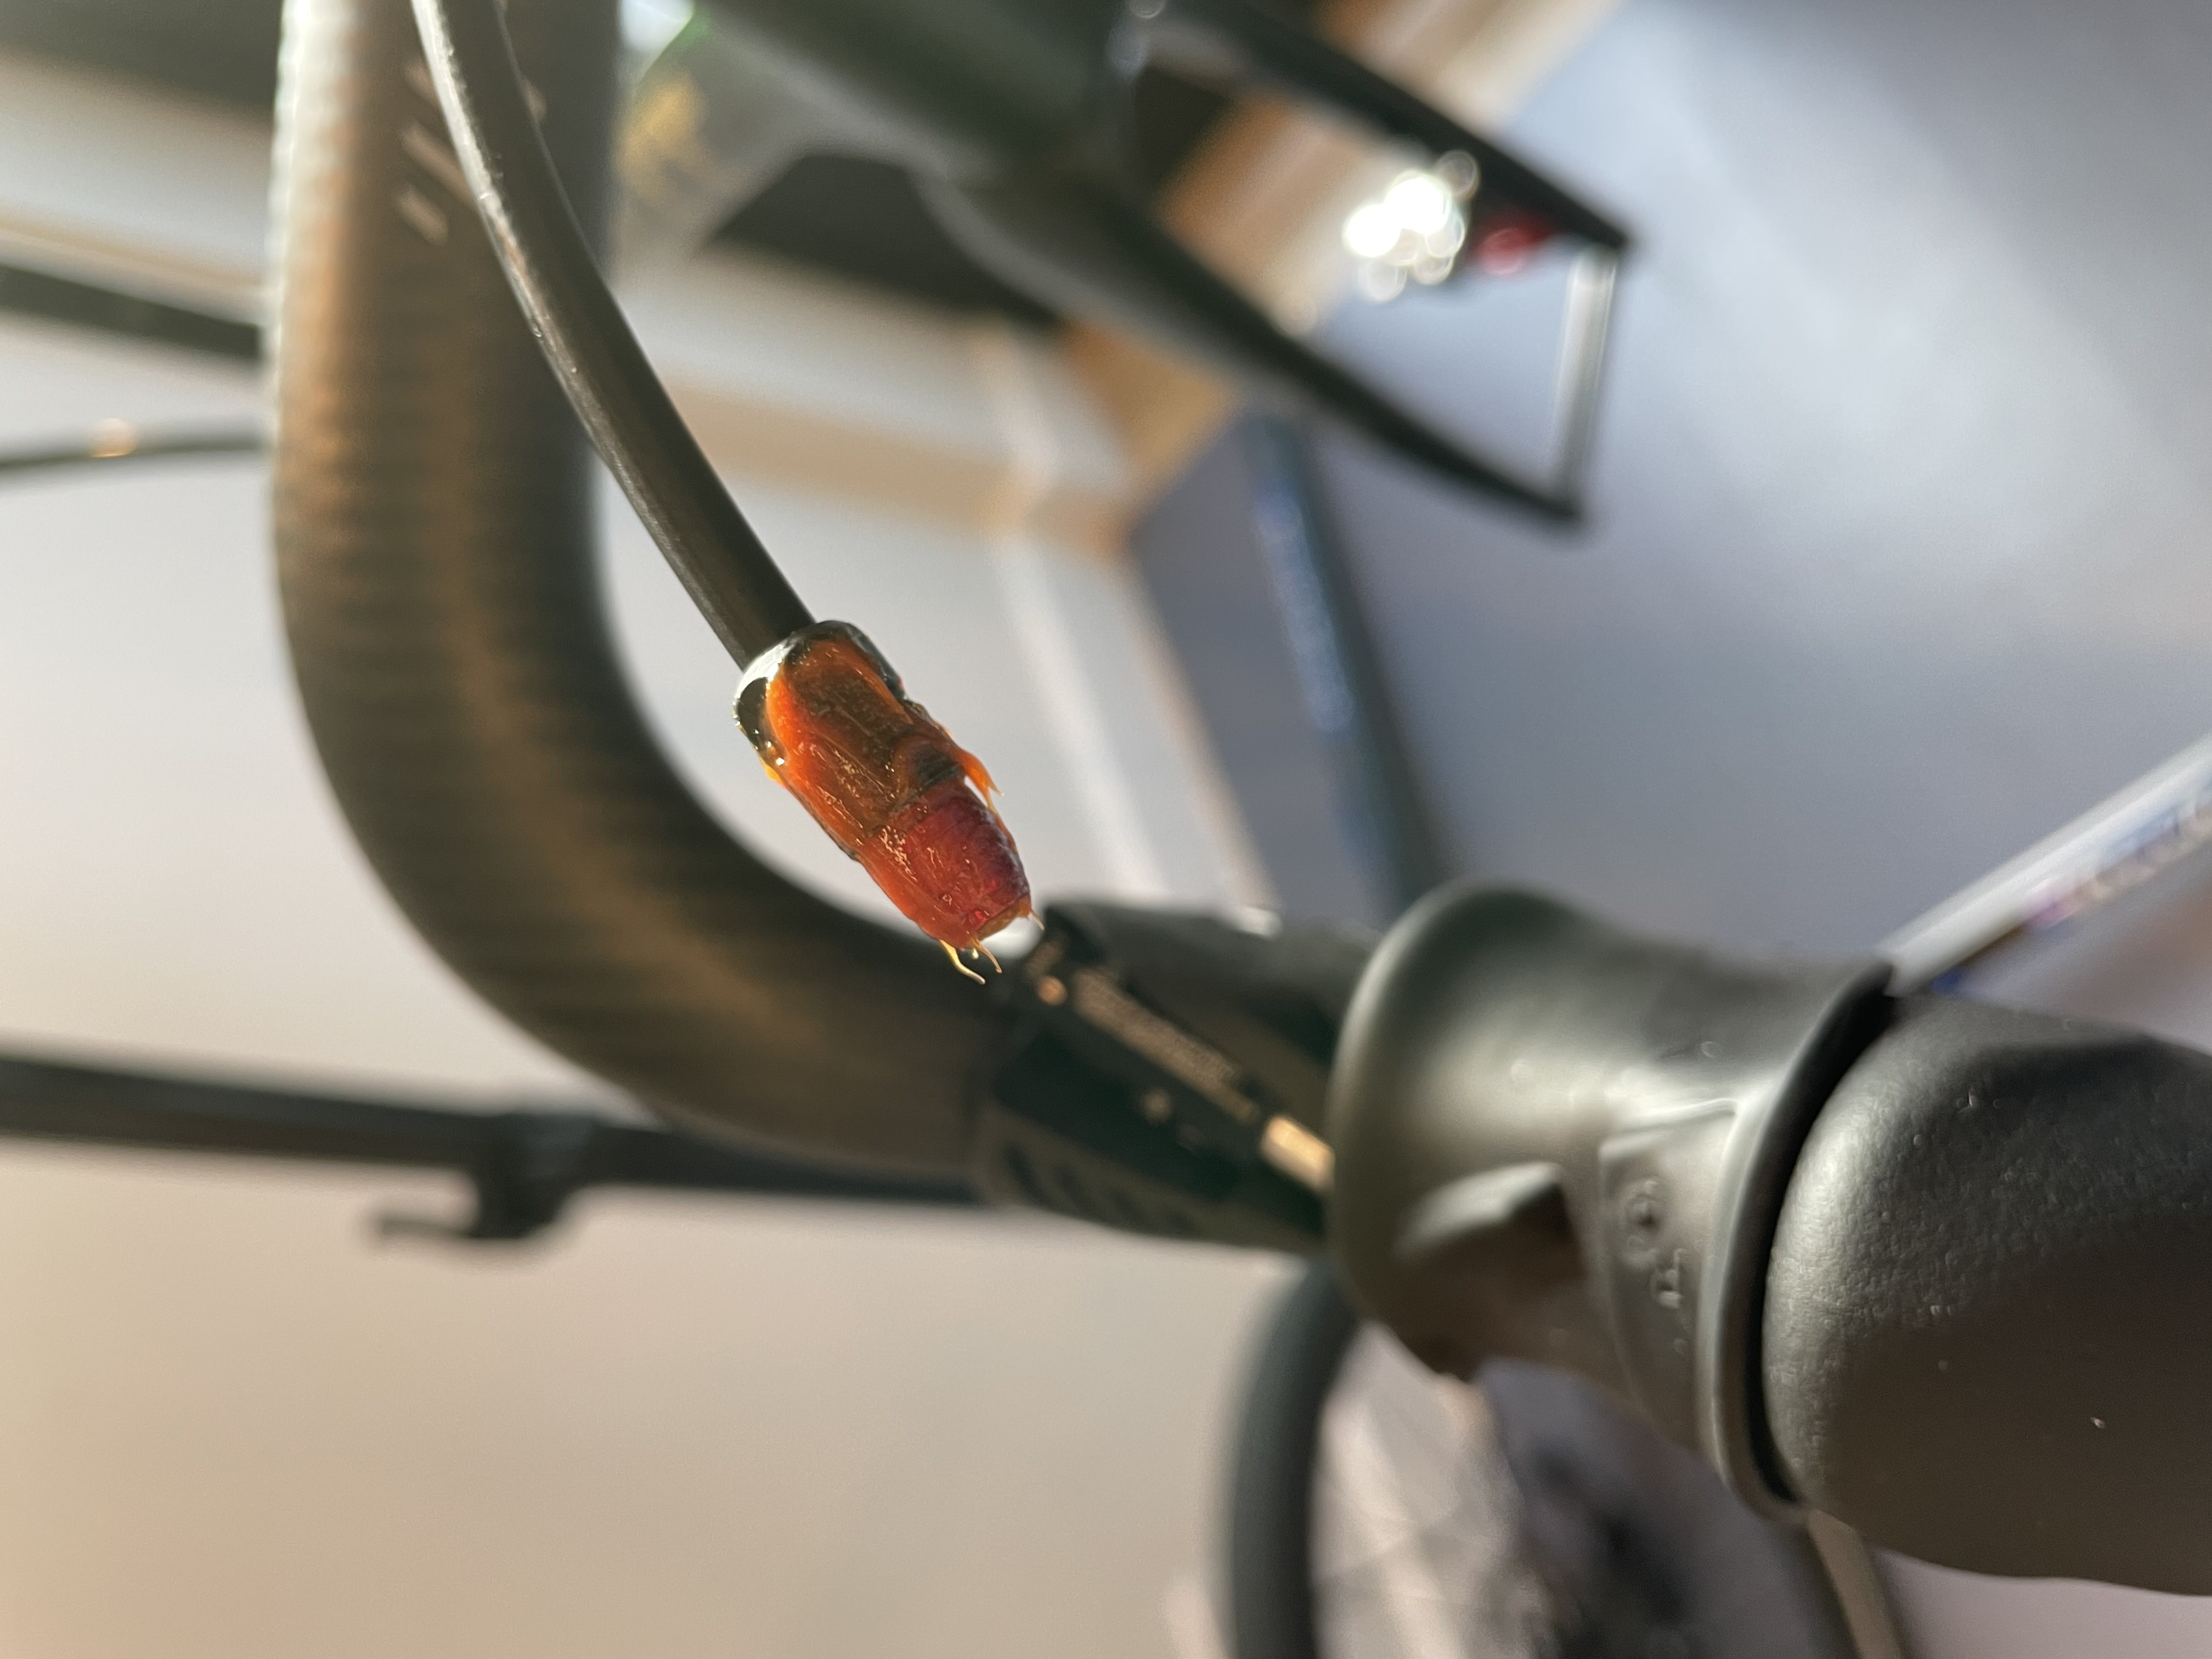
On the way to 8 Nm, I wondered to myself if there has ever been a box wrench that doesn’t immediately start to round off whatever it is you’re tightening. The hoses look a little long in these photos but, in addition to the can’t-turn/clicky-turns spectrum mentioned above, there’s the additional balance between keeping it super tidy and being able to fit computer and light mounts when I want ‘em. I believe I’ve got it; time will tell. Time to bleed tomorrow.
— No one spends much time thinking about their front derailleur hanger. For instance, before I began my spreadsheet for this build I wansn’t aware there were even options beyond those from the derailleur manufacturer and those that are part of the frame. Today, though, let’s give this little part some consideration. Typically they’re heavy, hinged metal bands with too much branding on them - SRAM’s and Shimano’s certainly fit that description, anyway - and then there’s Parlee’s model, which is light, simple, and understated. It’s the best front derailleur hanger and, as I discovered much later, is not compatible with the Argonaut RM3 frame.

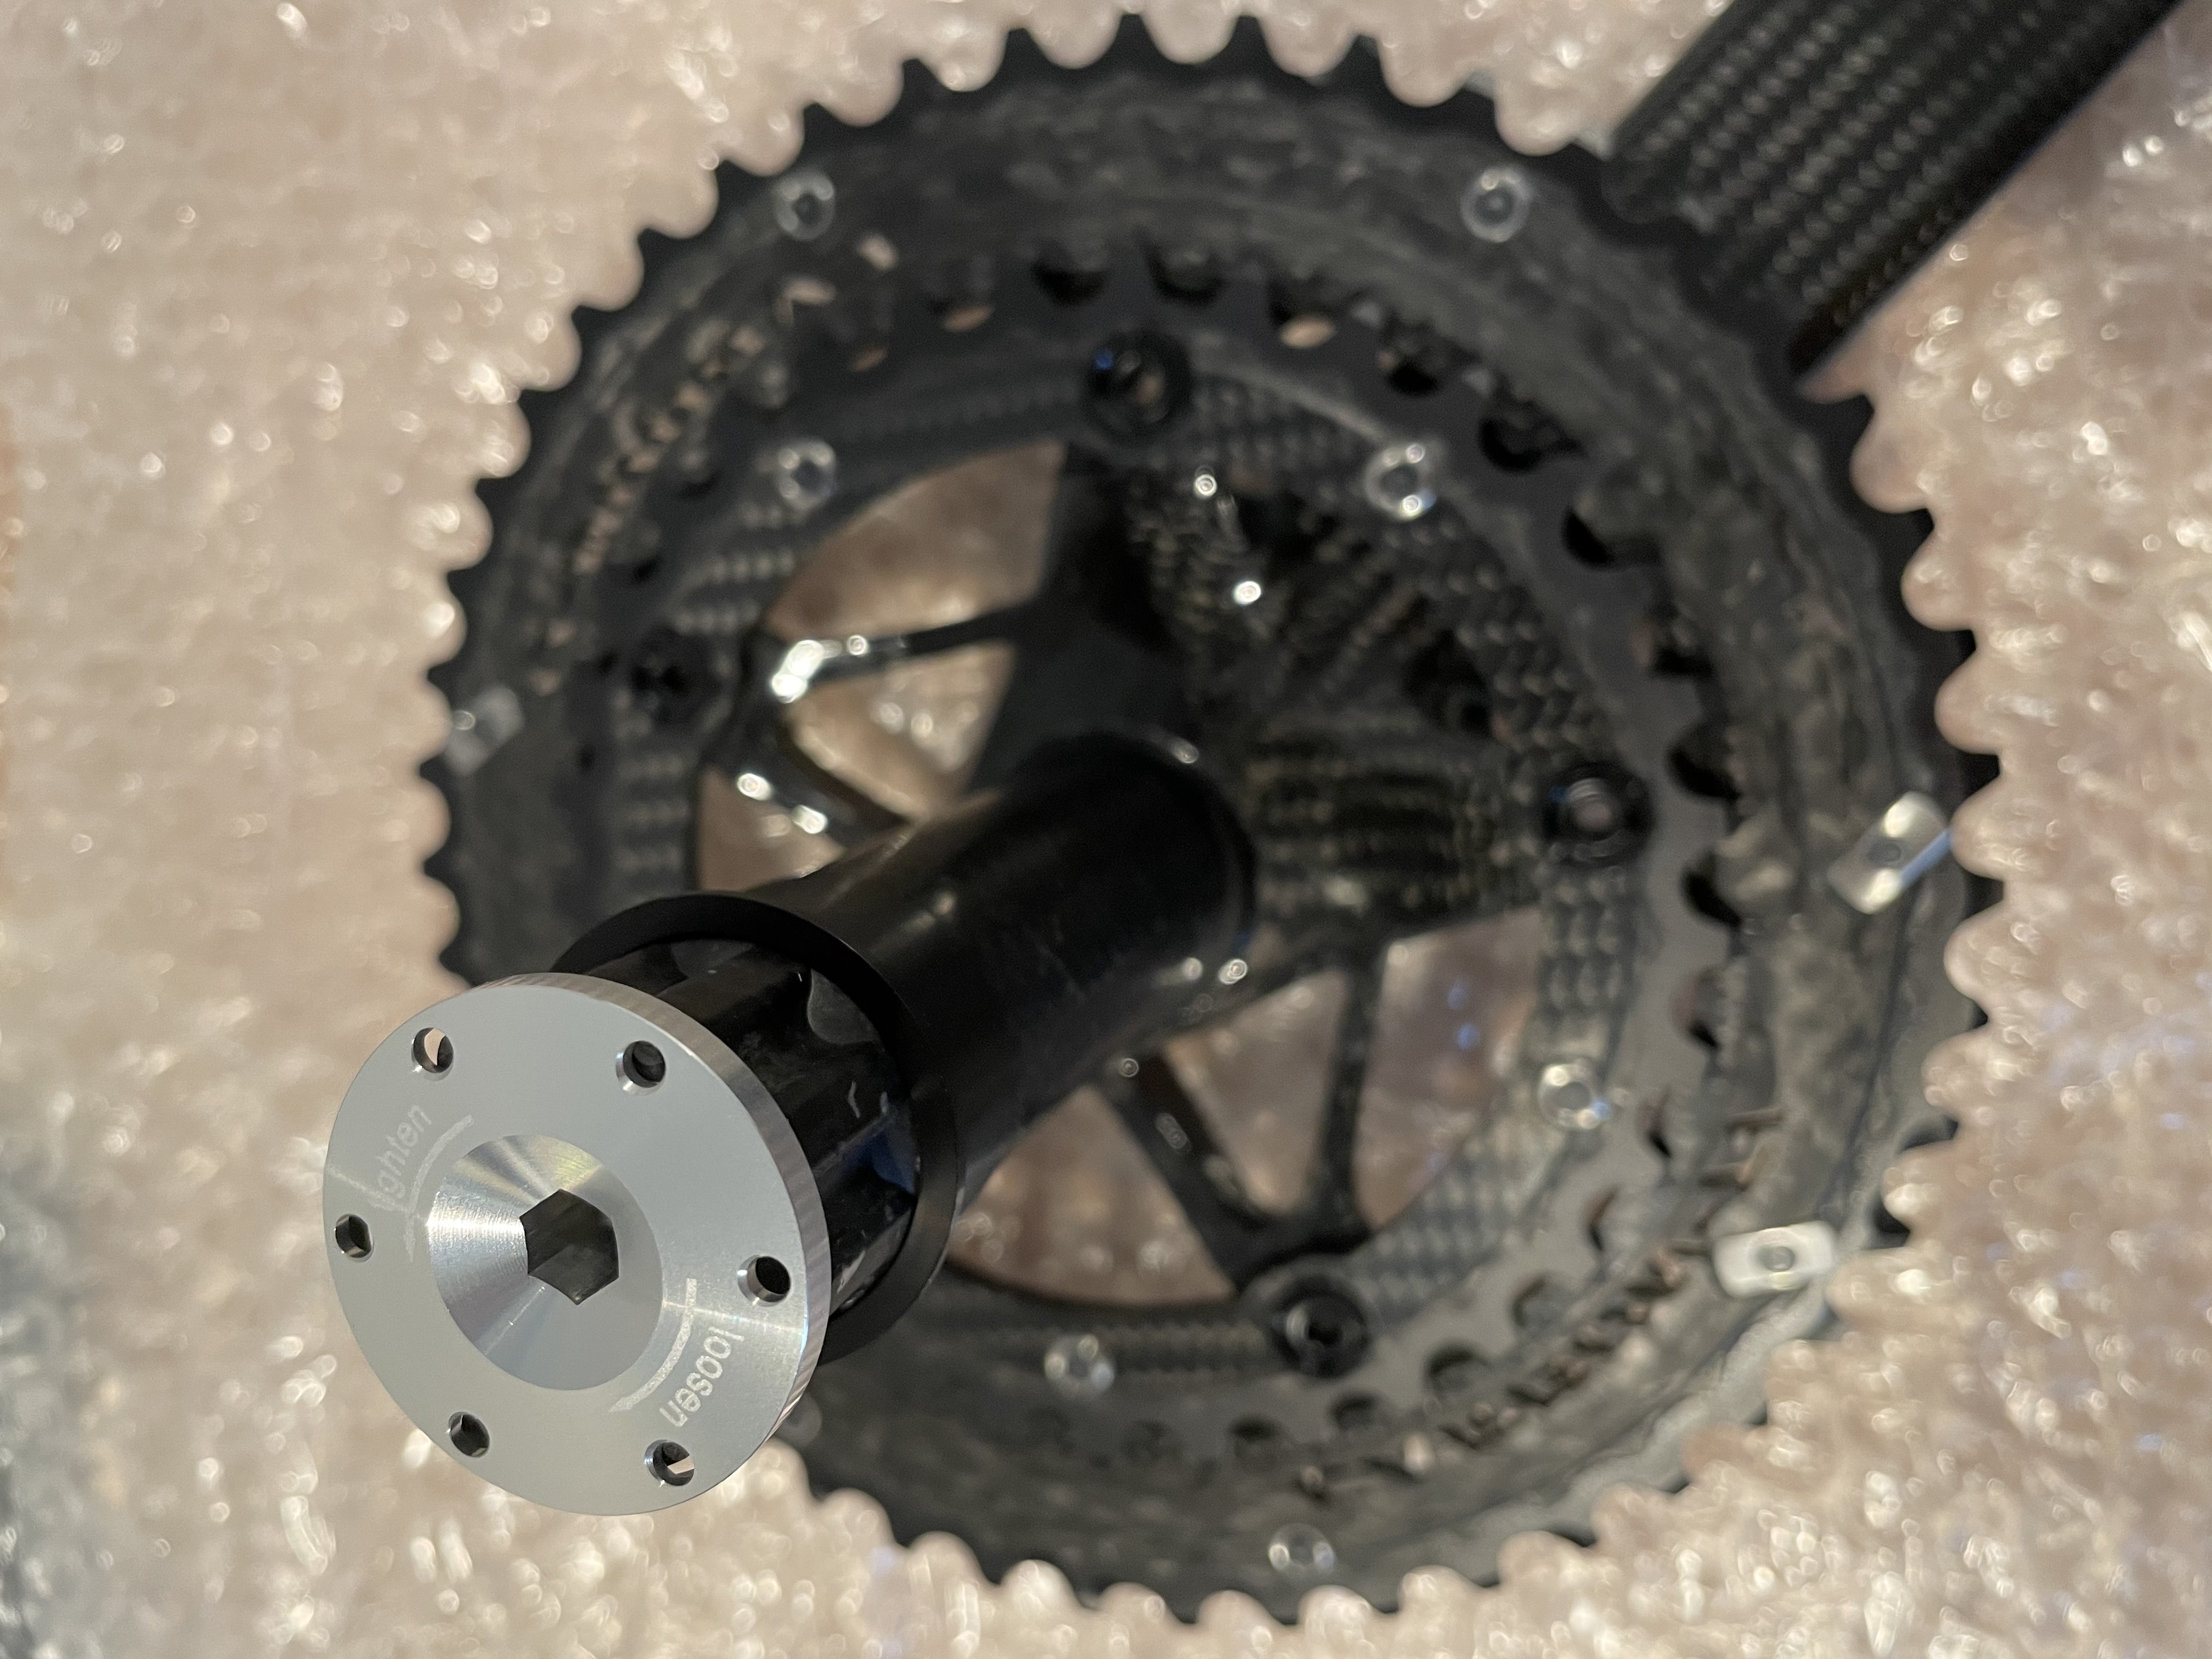
First things first, though. If you’re going to mount a front derailluer, you have to mount it relative to a chainring. So here’s that beautiful THM Clavicula with the ostentatious Carbon-Ti chainrings, now mounted happily. I was nervous about getting all the spacers just right but THM’s manual was fantastic and had all the measurements neatly arranged by bottom bracket type.
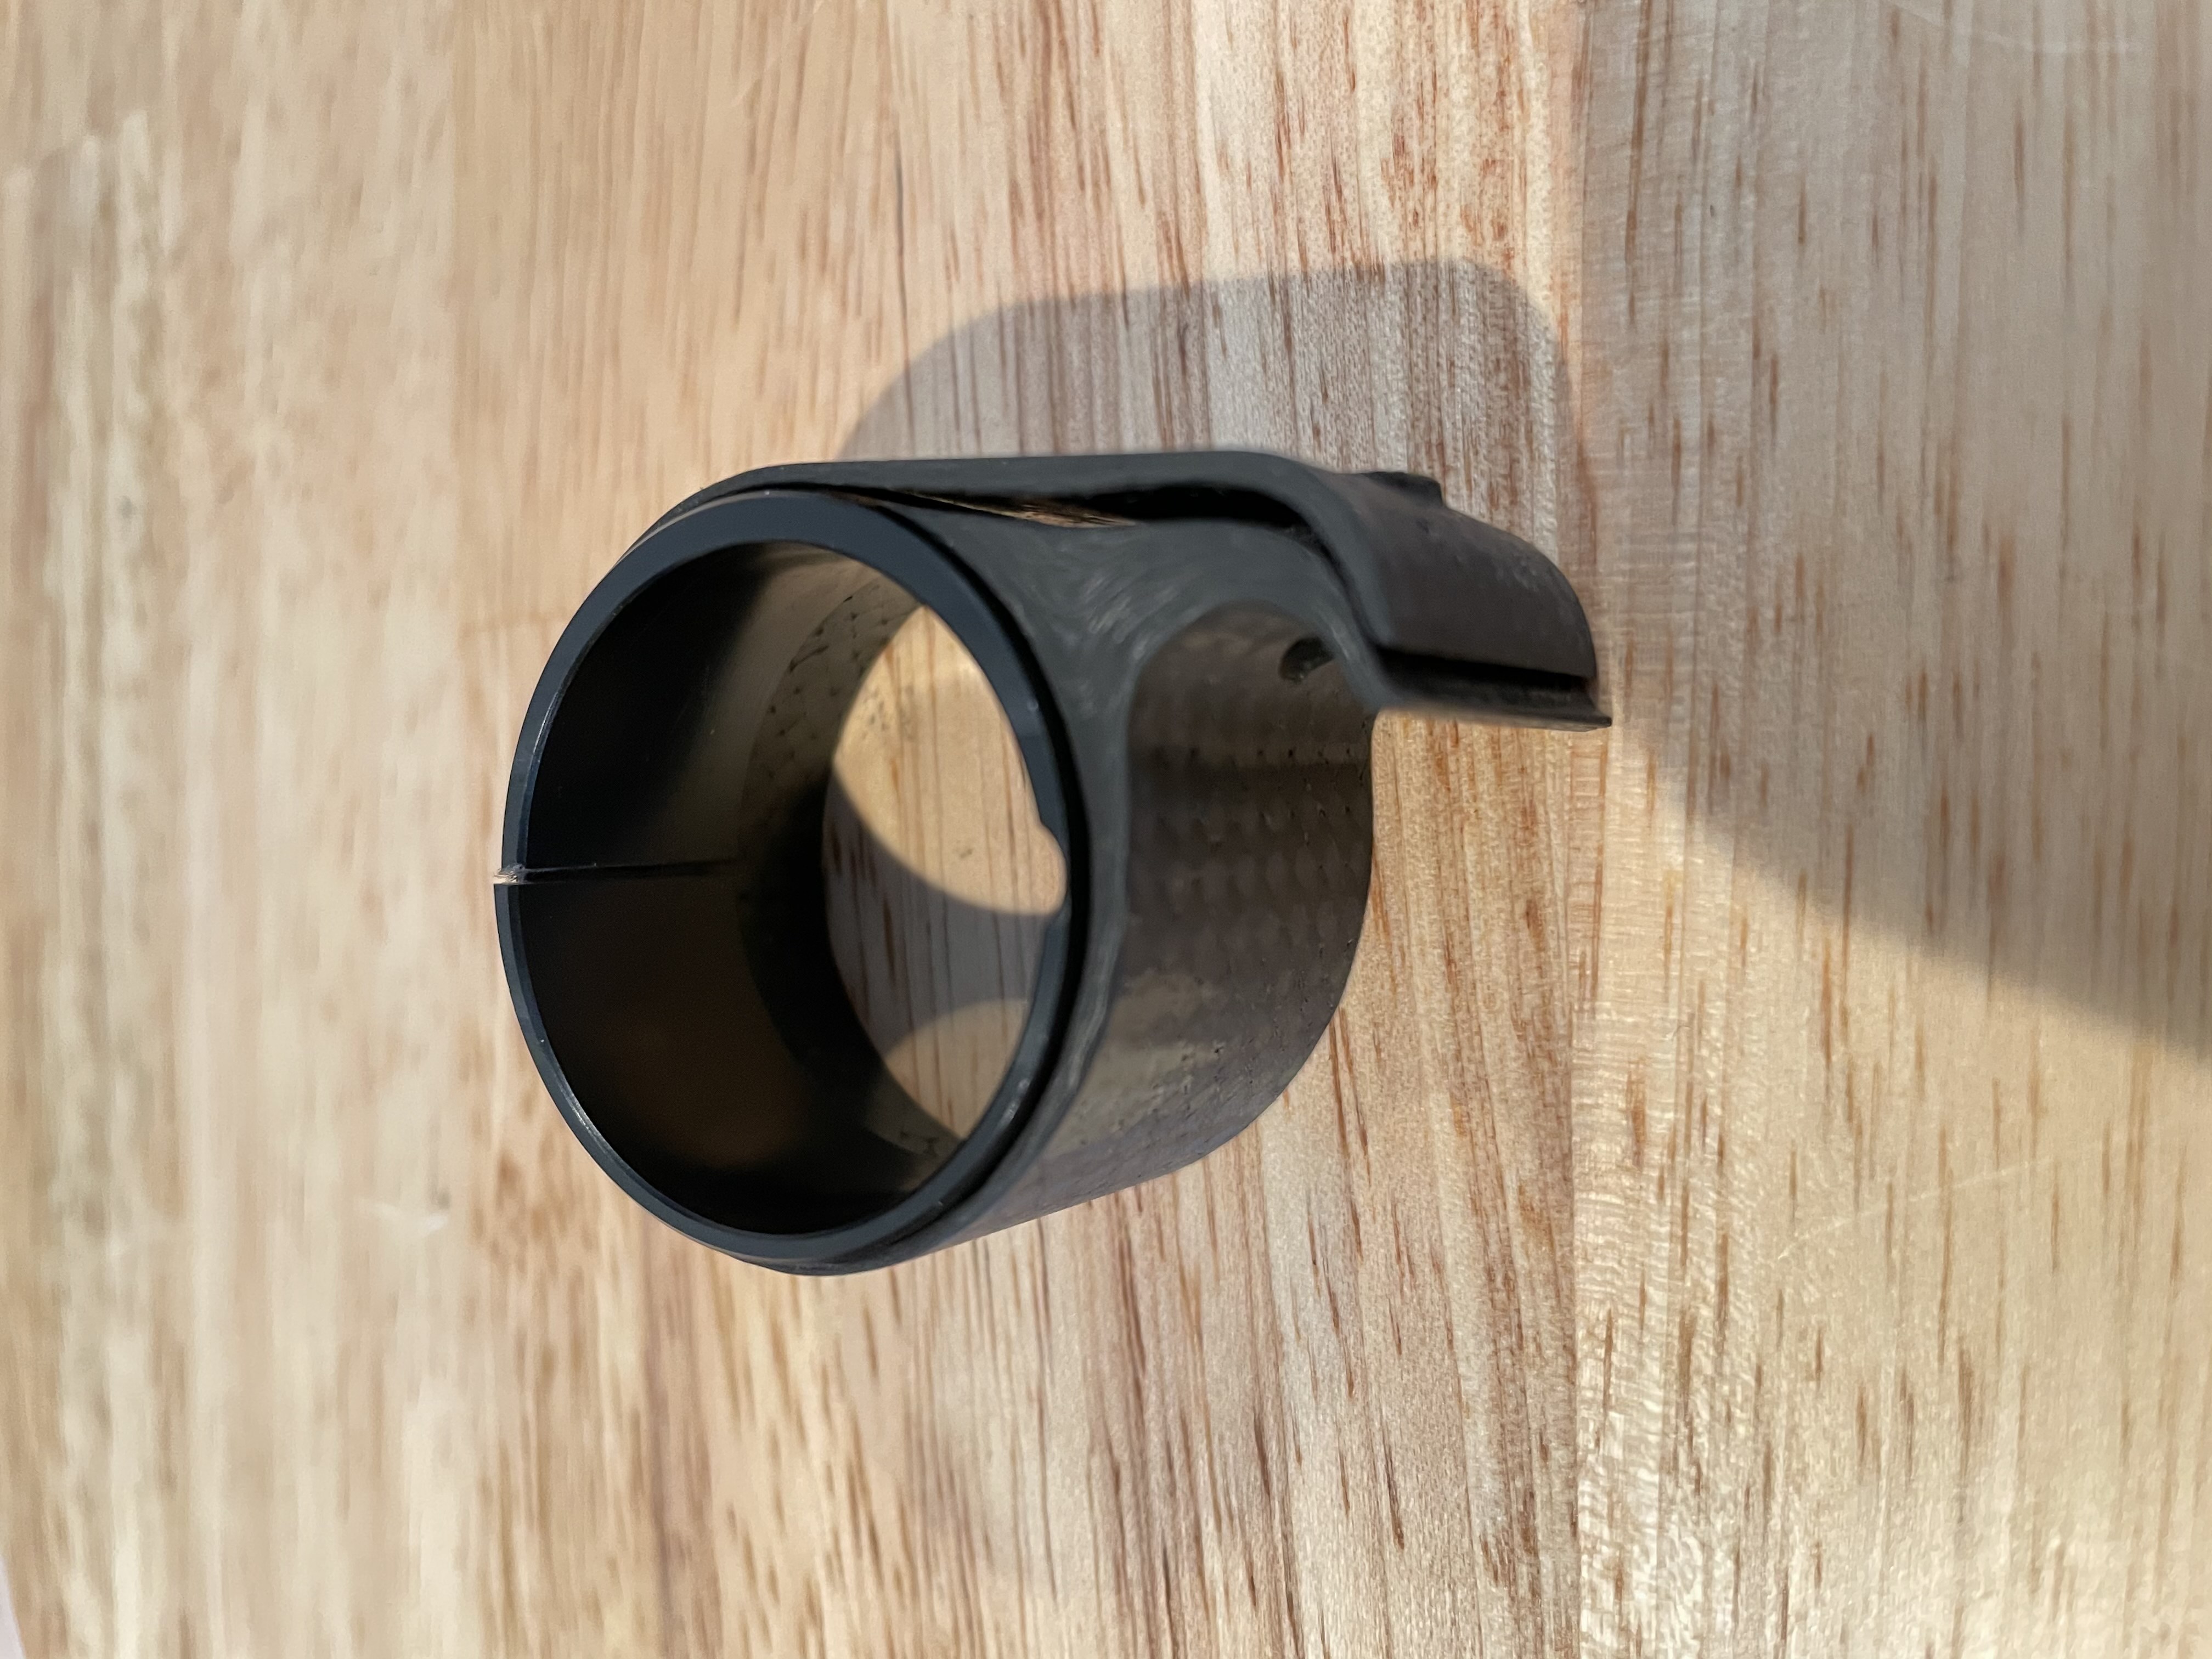
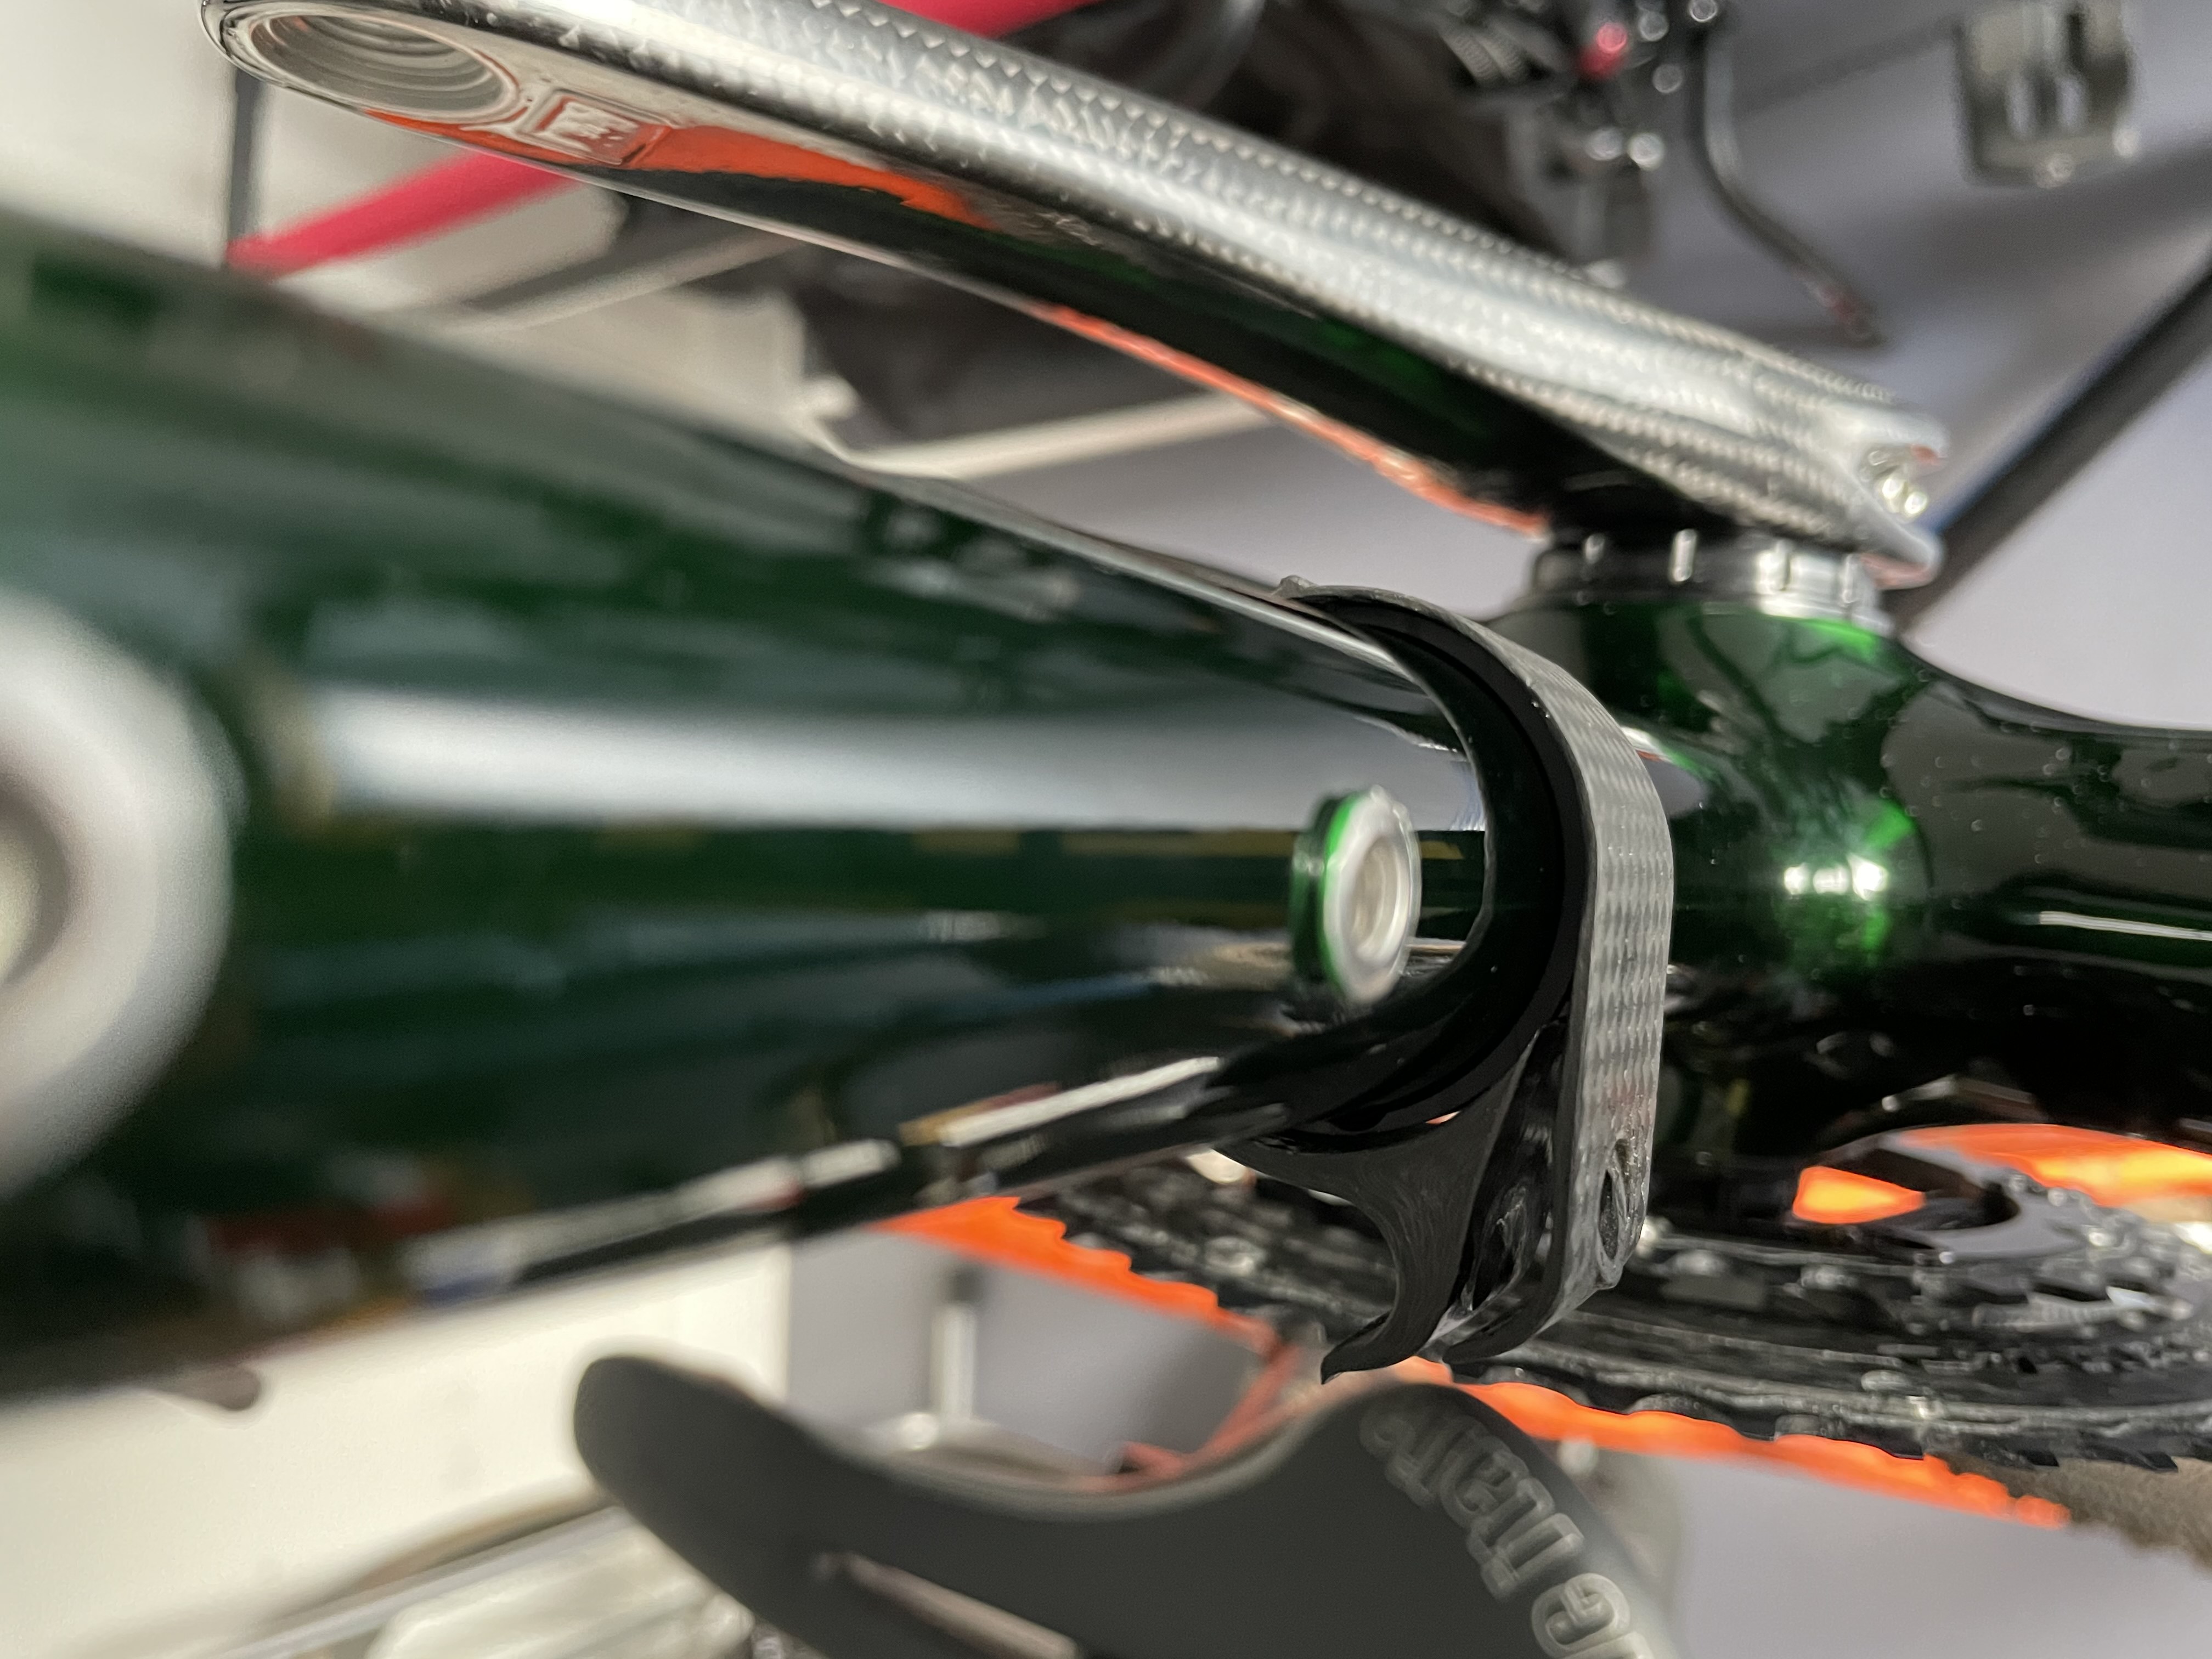
A front derailleur hanger is sold to match the diameter of the seat tube. Unfortunately, that’s too simple. They slacked the RM3 seat tube angle slightly and pushed it forward such that it doesn’t hit the center of the bottom bracket the way a seat tube usually does. This is what creates its 35mm tire clearance. Unfortunately, this also changes the angle of the front derailleur relative to the chainrings. Have no fear, though, they thought of this. They specify a 34.9mm front derailleur clamp but in truth the seat tube is closer to 32.9mm in diameter. The rest of that diameter is provided by a Delrin shim that corrects the angle of the front derailleur clamped to it. However, the total diameter of the seat tube plus the shim is a bit greater than 34.9mm. I think they expect the front derailleur clamp to be able to dig in slightly. The Parlee clamp, however, cannot, as it’s a single flat band of carbon fiber even wider than the shim itself. There’s simply no way it can compress or dig into the Delrin.
I had to let go of the beautiful Parlee front derailleur clamp and pick up the standard SRAM one. With that, the front derailleur mounted without further complication. The rear derailleur hanger was as devoid of drama as any I’ve ever used. It is thankfully secured in a way that doesn’t involve the thru-axle (glares at Open) so it can’t fall off when you remove your rear wheel.
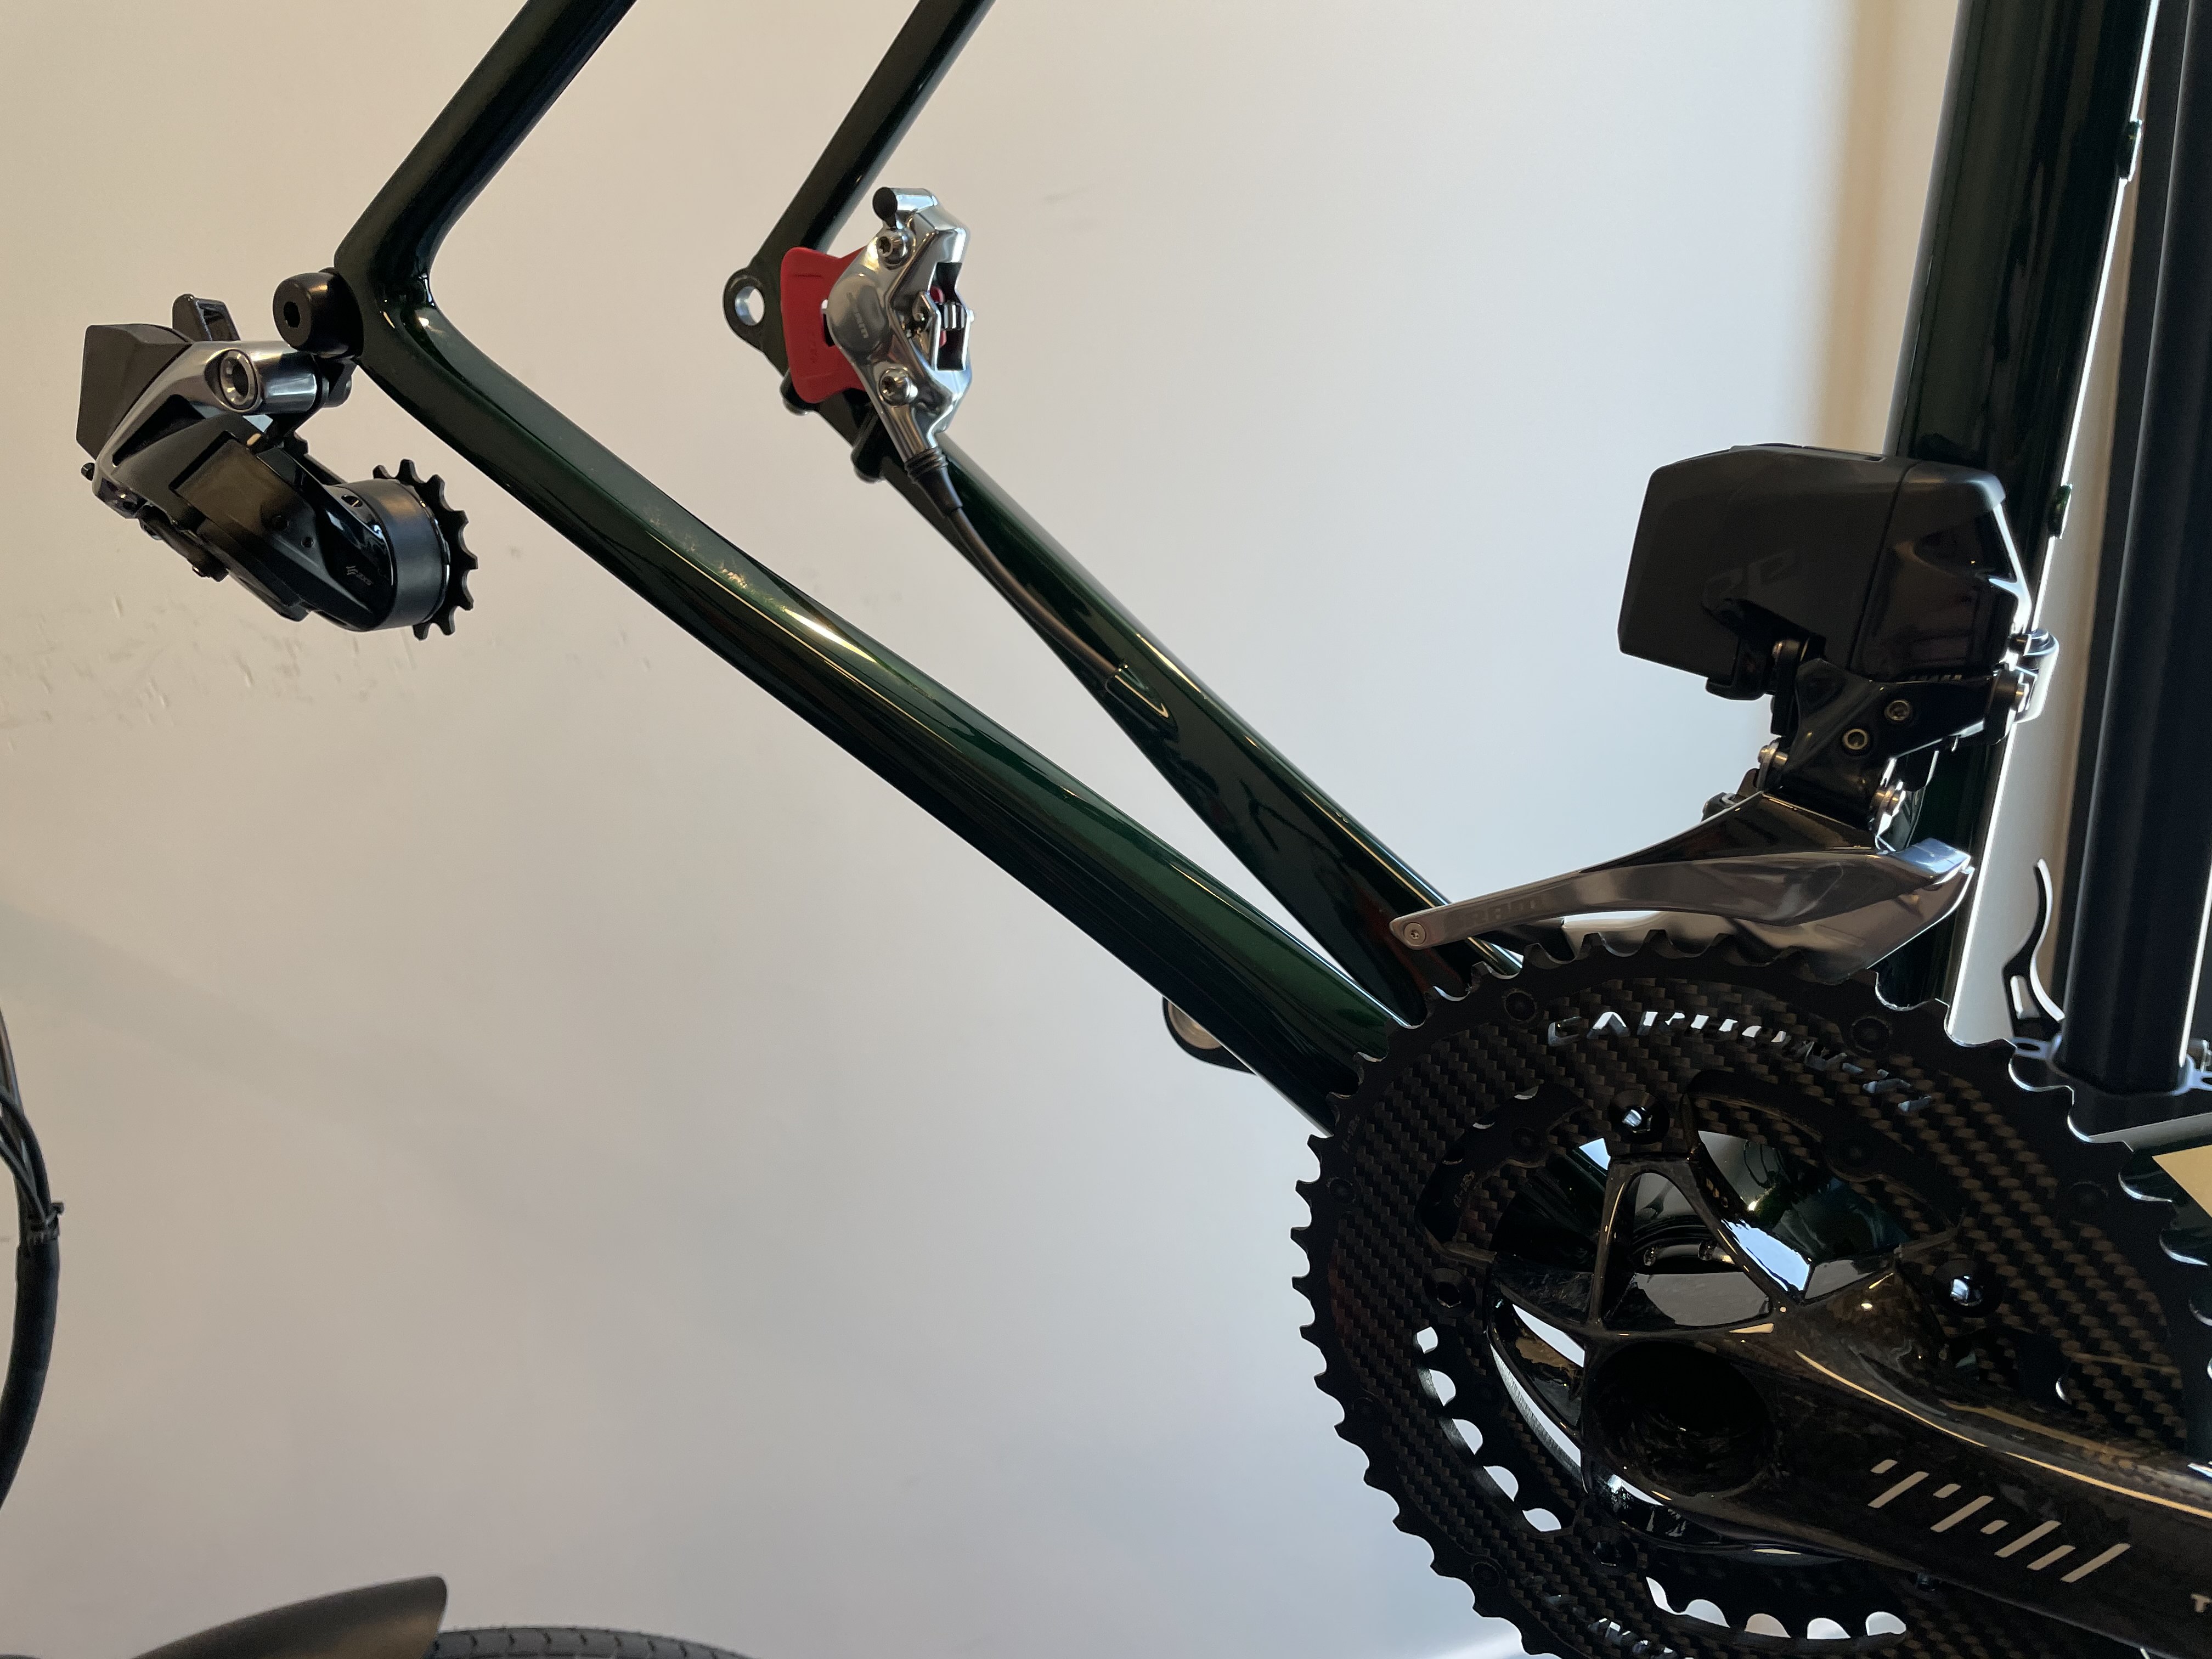
To that standard SRAM front derailleur hanger and Argonaut’s well-designed rear derailleur hanger I’ve (unsurprisingly) mounted SRAM Red AXS derailleurs. This is no surprise since I’ve already shown the brake calipers and the cassette and there’s no such thing as interoperability at the top of the drivetrain manufacturers’ lines anymore. I’ve had a phenomenal experience with SRAM Red eTap on one of my other bikes. For me, electronic shifting is a worthwhile tradeoff. I do so much of my riding in the dark early mornings that my bikes already effectively have batteries. Two more that last for months are no stress. And for the cost of managing those batteries, the shifting performance is outstanding - it genuinely makes me happy just to use it. It may be true that Di2 or EPS are marginally better still but all three compare favorably to mechanical and only SRAM makes installation and maintenance such a breeze.
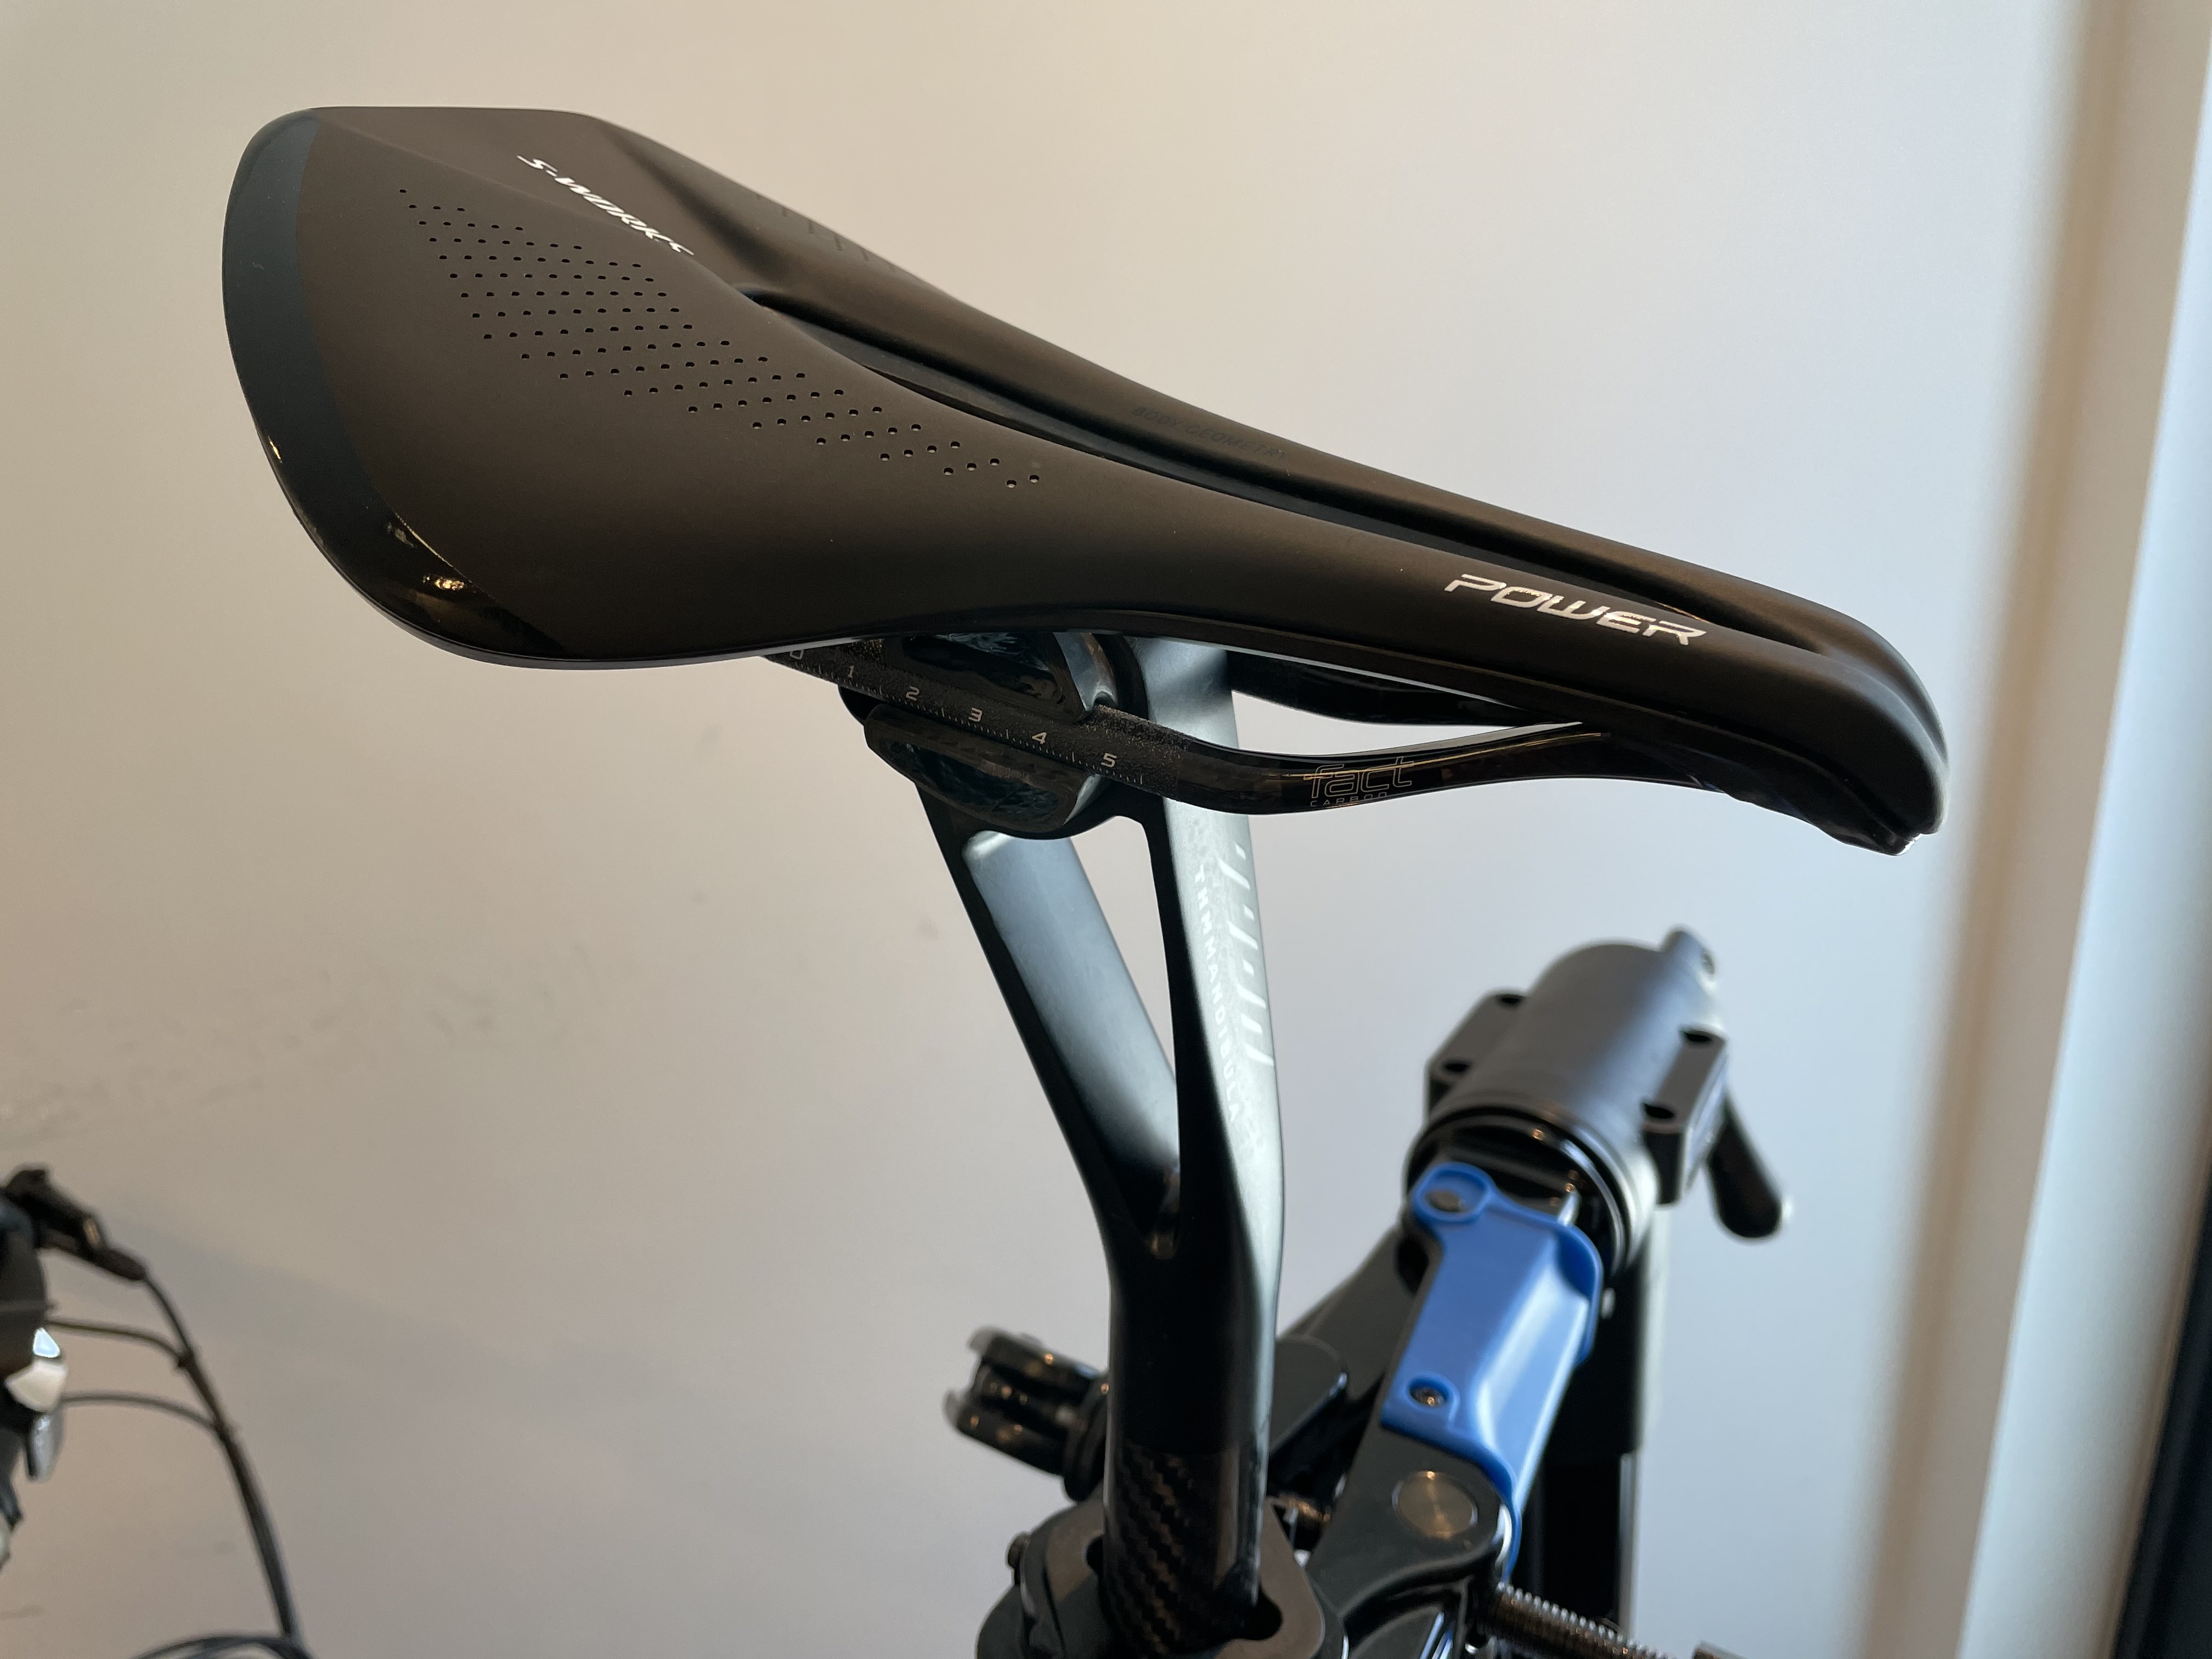
I had used some variation on the classic Selle Italia Flite saddle from basically high school until two years ago, when I tried (and liked) a Fizik saddle. Now, absent a standard, I feel free to try things out. Lots of folks rave about the S-Works Power saddle with its curious stubby nose. I’m giving this a try. In a few months I expect I’ll either be a convert or have a saddle to sell.
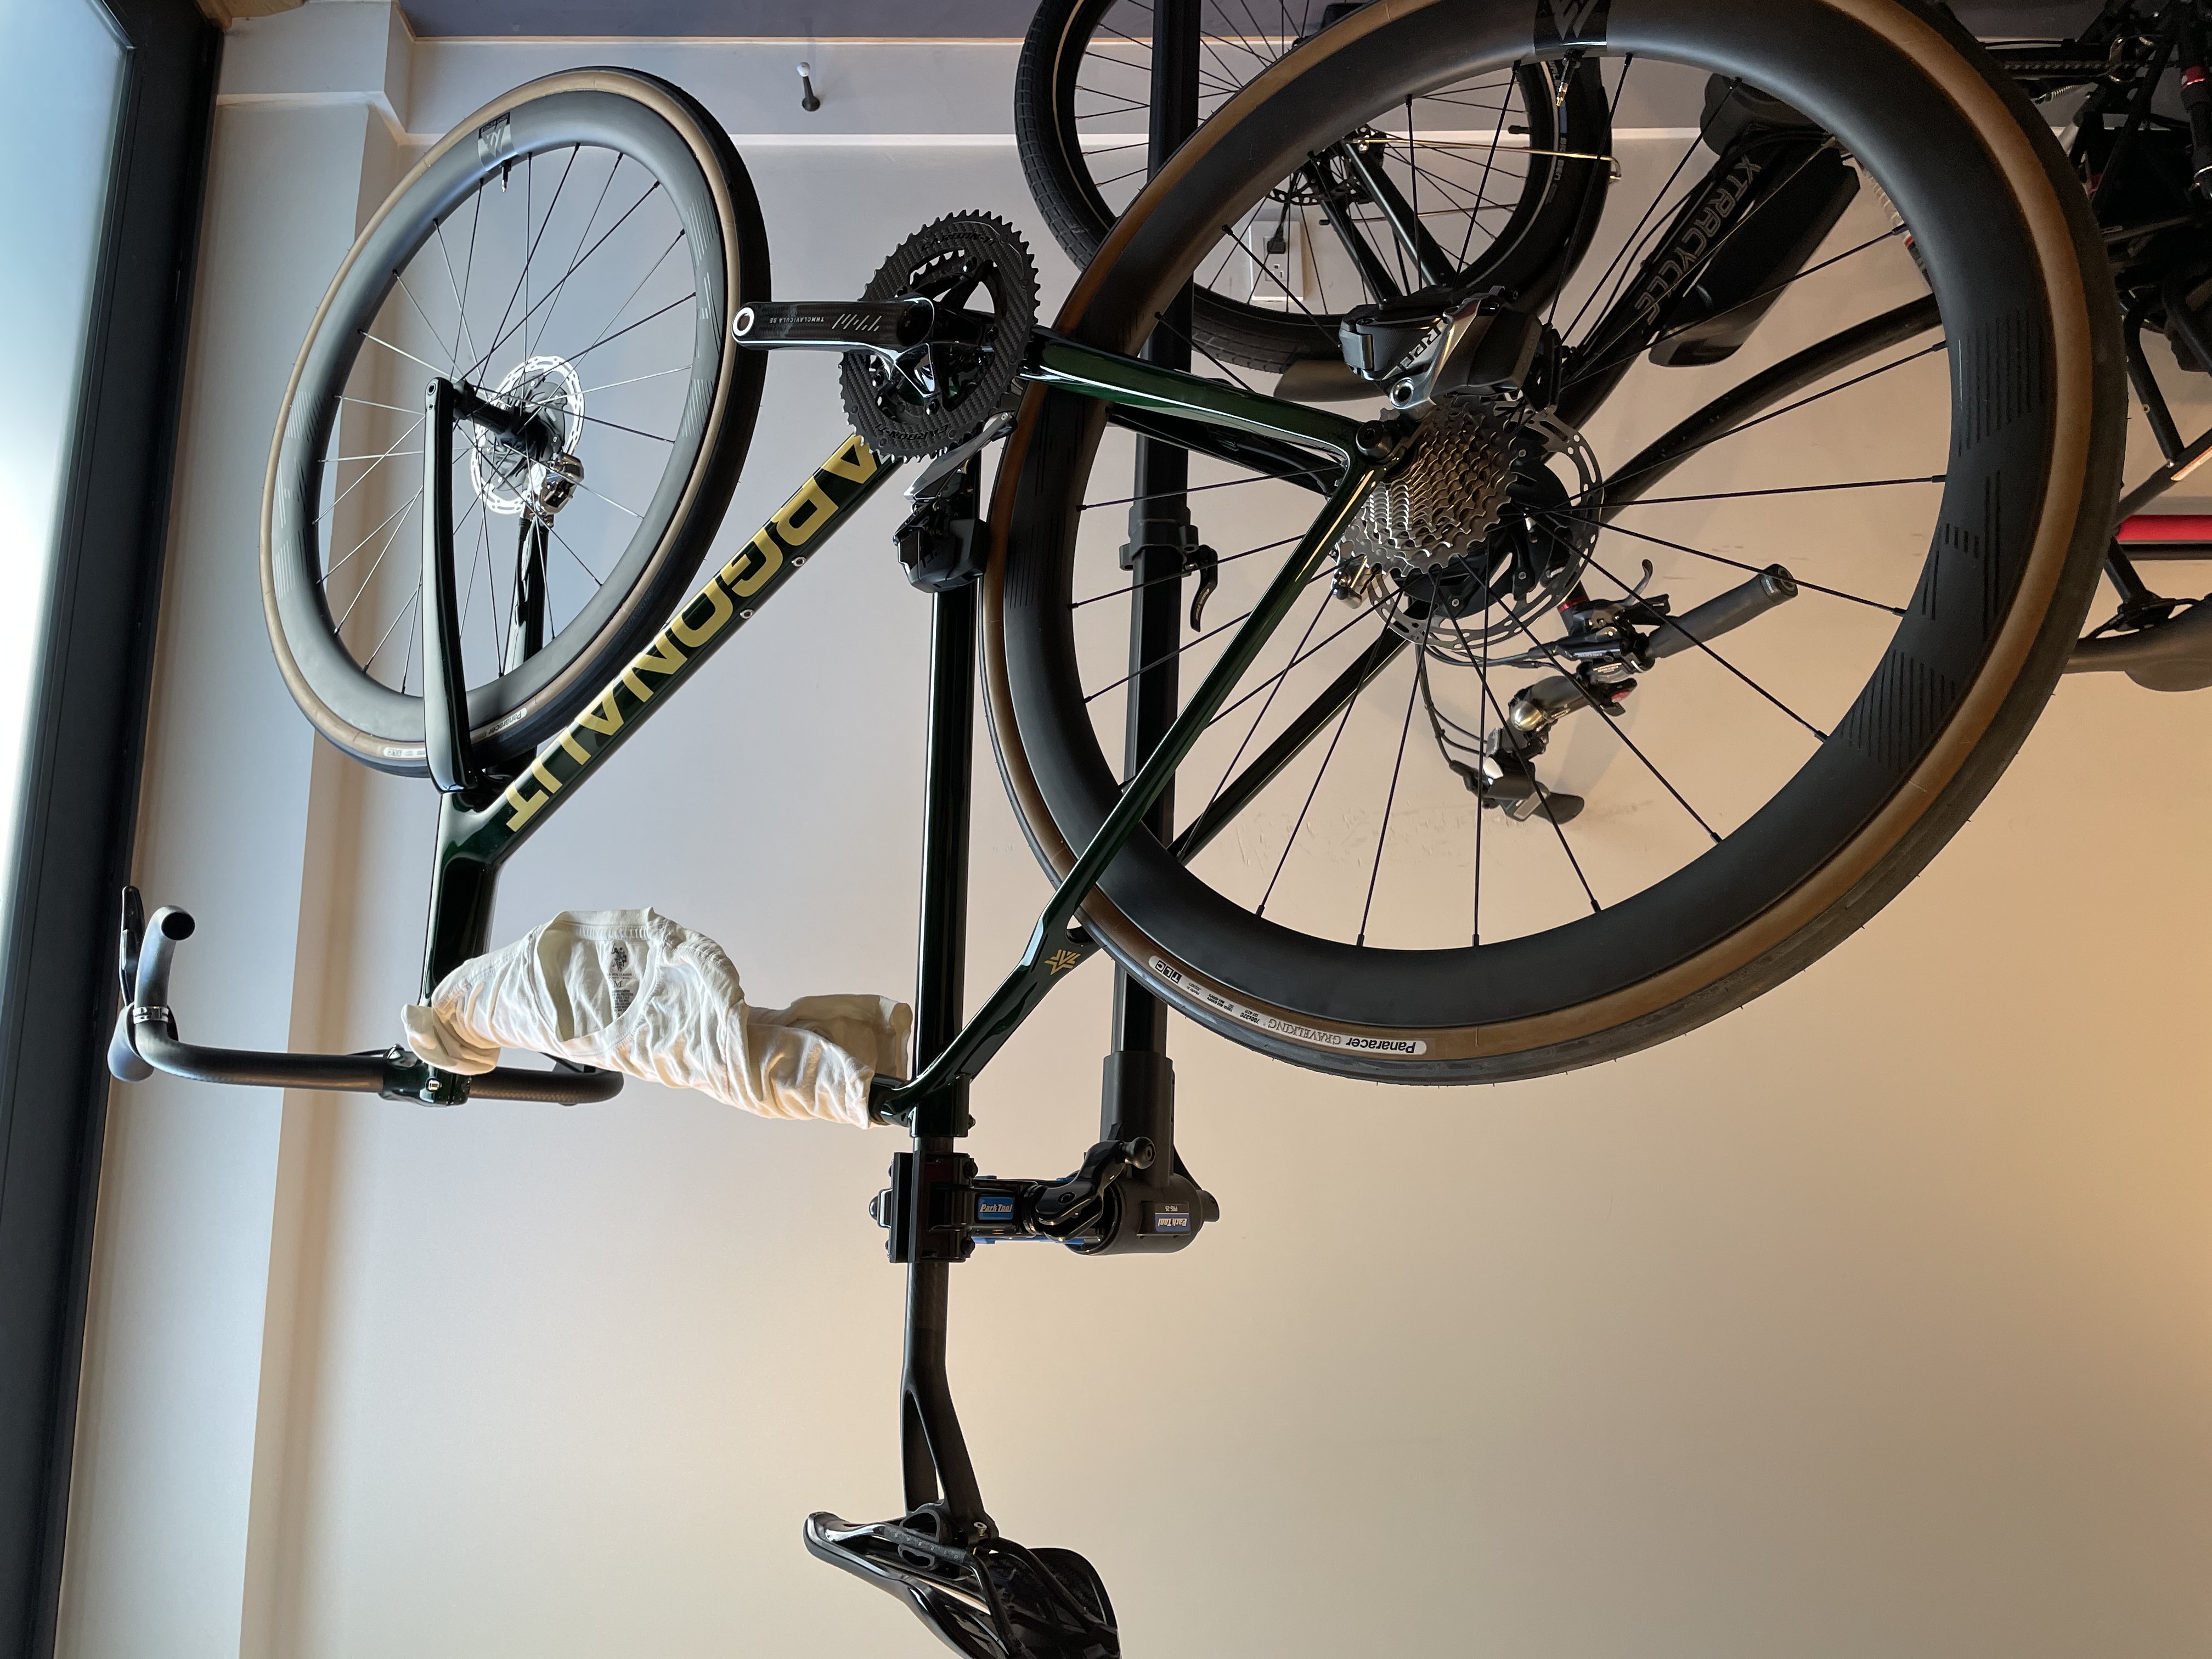
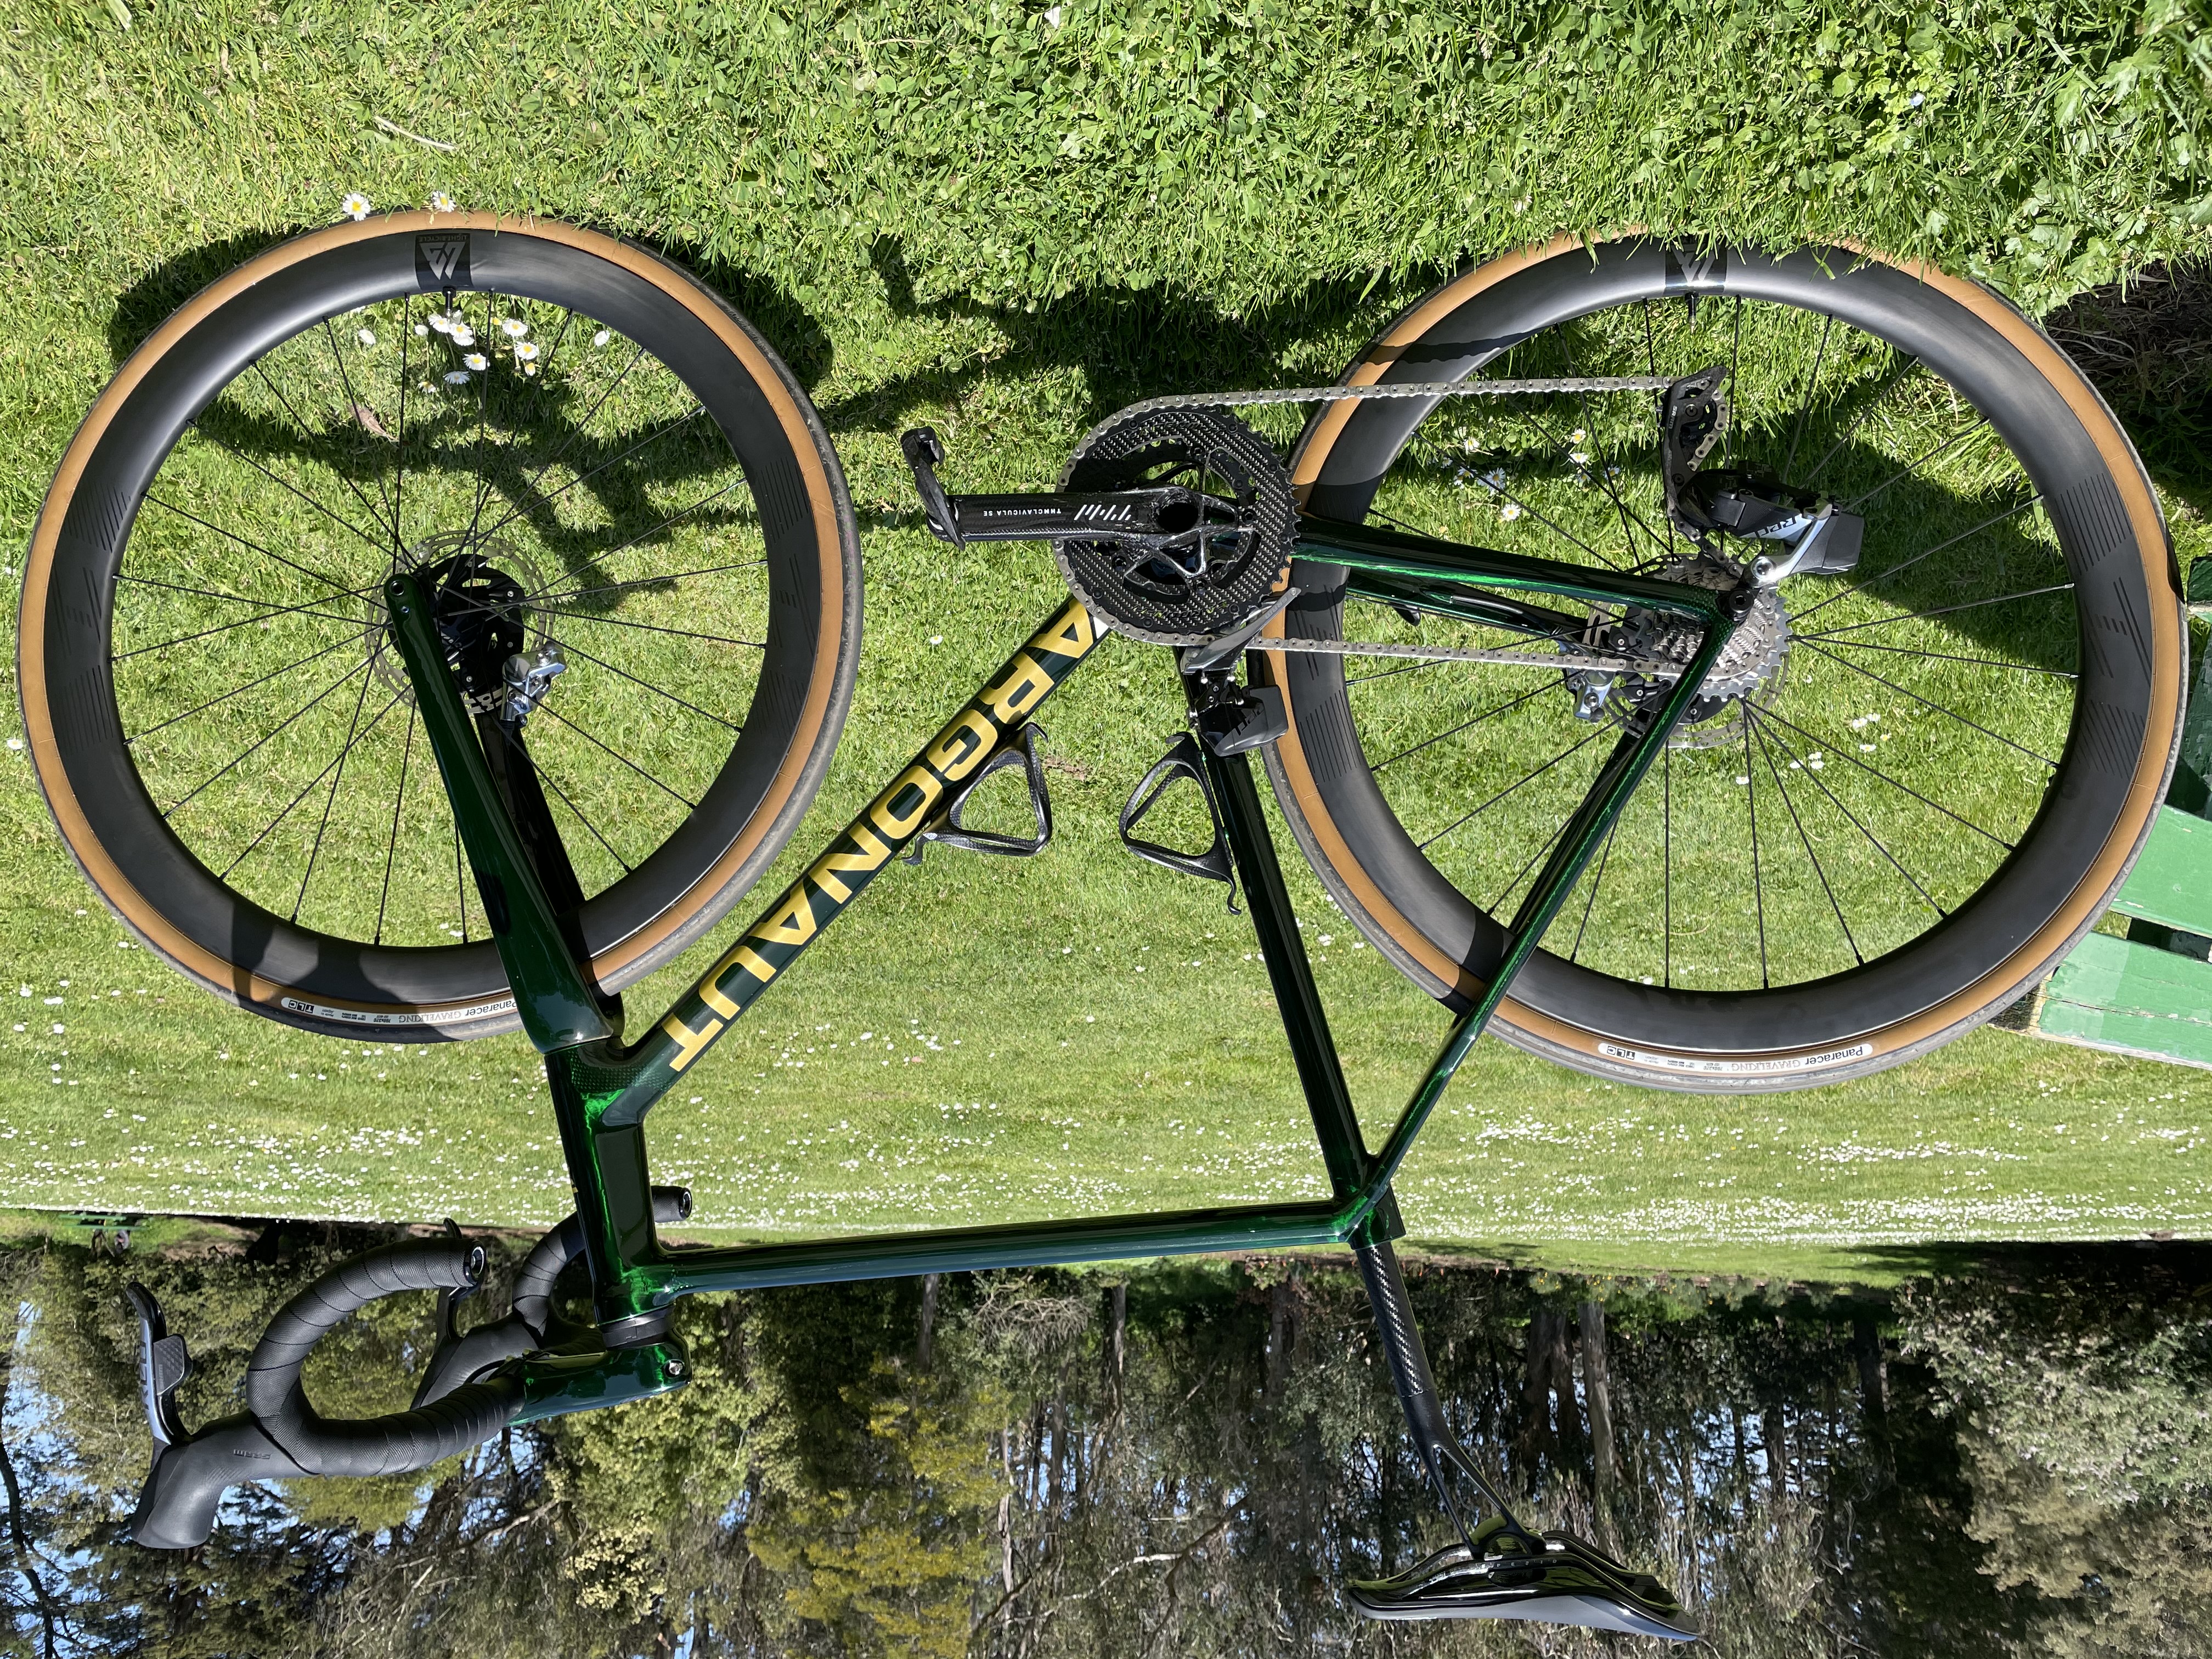
With the wheels on it’s finally starting to look like a bike. I expect to have it dialed for a maiden voyage on the SFCC Pescadero Classic.
— I chickened out and rode Pescadero on my Mosaic. I wasn’t willing to do miles 2 through 123 in one shot on a type of saddle I’ve never ridden. In the meantime, my daughter has named it Clover. Clover’s been penciled in for the next epic.

I did some science during one of my shakedown rides to discover how it handles. It was supposed to be lively and it is but it’s more stable and controlled than the few really racy bikes I’ve ridden before. The handling’s faster than my Mosaic. It feels fun without feeling dangerous.
I’m going to ride this bike wherever the hell I want and to simulate that enough to render a complete verdict on how it feels, I had to hit some dirt roads. Interestingly, magically, it feels stiffer than my Mosaic on smooth tarmac and more compliant than my Mosaic on broken pavement, gravel, and dirt. Some of the stiff, fast feel could be attributed to the low weight and/or the deep wheels. And I don’t know whether the compliance is due to well-engineered carbon flex or carbon’s general vibration damping characteristics but, either or both, I’ll take it because it’s glorious.
 Thanks for playing along. See you on the road.